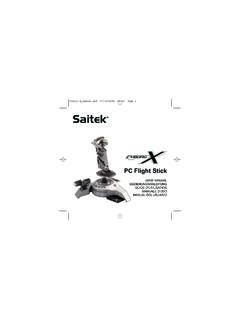
Transcription of SAITEK X52 FLIGHT CONTROL SYSTEM - PRODUCT …
1 3 ENGLISHCool-touchmetal pinkieswitch can beassigned shiftfunctionality todouble up onprogrammablecommands. 5-position adjustmentto suit all hand metal triggerDestroy the enemy with the aid of aprecise and durable, cool-touch can be programmed withseparate fire Rudder Twisthandle onjoystick forprecise ruddercontrol; includesintegrated rudderlock toggle switchesSpring loaded and convenientlypositioned on the base for anextra 6 programmable centering mechanismNon-contact technology on x andy axes and constant spring forcereduce free play, improve controland increase Fire ButtonsBacklit buttonsconvenientlypositioned onjoystick head forinstant access in theheat of the LauncherFlip up the spring-loadedsafety cover to activatemissile x 8-way hat switches-1 pre-defined as pointof view.
2 Select frommultiple viewperspectives andassign frequently FeaturesBacklightingIlluminated buttons and Multi-Function Display (MFD) - ideal forlow light environments, guaranteed to stand out from the brightness via Windows CONTROL partsPart metal construction for increased durability and maximumcomfort during extended selector switch3-position rotary switch with tri-state LED to indicate X52 FLIGHT CONTROL SYSTEM - PRODUCT TOURJ oystickX52 manual(ok)(24/11/04) 9:05 PM Page 35 ENGLISH4 GETTING STARTEDIn order for this PRODUCT to function correctly please install the drivers on theCD supplied with this FOR USERS OF WINDOWS XPA) Drivers Only For Typical Users1 With your computer switched on, close down any programs that are currently running and insert the SAITEK SmartTechnology CD into your CD-ROM the Introduction Screen appears, click Install Softwareto continue.
3 If the CD does not run automatically,select Startfrom the Windows Taskbar, then Runand type D:\ and click OK - where D:\ is the letter ofyour CD-ROM the Welcome screen appears, click Nextto reading the Disclaimer, select the I accept the terms of the Disclaimeroption and click Nextto the Driver Setup screen, if you haven t already done so, plug in your controller and click on Next. 6At the Driver Setup screen, click Nextto test your controller. 7 When the SAITEK Controller screen appears, try out all your controller s buttons and controls to show that it isworking properly. When you have finished, click OK. For more information on the use of the CONTROL panel, pleasesee the Maintaining your Controller Settingssection of this the Software Setupscreen, select Do not install the SST Programming Softwareand click Software can be installed at a later date by following instruction (B).
4 Below9At the Registration screen, select Check this box to register nowand follow the on-screen instructions, or youcan choose to select this option later. 10 Click on Finishto complete the installation. Multi-Function Display (MFD) screen indicates: Mode and shift stateMode state is determined by mode selector on the head of the defined Text area- indicates name of command assigned to button when supplies name of profile in use and enables on-the-fly profileselection. Profile can also be changed during gameplay by pressingclutch button and scrolling though available profiles moving the point-of-view hat switch up and down. Move the same button left to clearcurrent profile or right to activate Time DisplaysTime zone(set origin and destination local times in CONTROL panel)Formattable date/month/timeStopwatchfor FLIGHT timeThrottle2 Fire ButtonsConveniently positioned onthrottle head for instantaccess in the heat of the throttle controlSuper smooth action with metal tensionadjustment and detents for programming idle(0-20%) and afterburner (80-100%) controller,which can alsofunction as a hat switch.
5 Select from multiple viewperspectives and assignfrequently used rotaries provide axesfor pitch, trim and (I) ButtonInitiates 'safe mode' to allowon-the-fly profile selection,or to display buttonfunctionality on MFD withoutactivating sliderprovides axes forpitch, trim andyaw settings orzoom in/out wheel positioned on rearof throttle for index fingeractivation; includes mouse manual(ok)(24/11/04) 9:05 PM Page 47 ENGLISH67 When the Controller Propertiesscreen appears, click Nextto view the Testscreen. 8 Now try out all your controller s buttons and controls to show that it is working properly. When you have finished, clickOK. 9At the Programming Software screen, select Typical Userand click Next.
6 10 At the Registration screen, select Registerand follow the on-screen instructions or select Register Laterand clickNext. 11 Click on Finishto complete the installation. B) Drivers and Programming Software For Advanced Users1 Follow points 1 8 of the install procedure in A), then at the Programming Softwarescreen, select Advanced Userand click Next. 2At the Programmable Controller Driversscreen, click Updateand follow the on-screen instructions. 3 Then at the Installation of programming software successfulscreen, click Next. 4At the Registration screen, select Registerand follow the on-screen instructions or select Register Laterand clickNext. 5 Upon completion of the installation, you have the option to Run Profile Editor, which will give you a view of the 3 Dprogramming environment.
7 If you do not wish to see the Profile Editor at this point, just uncheck the box and click onFinishto complete the installation. INSTALLATION FOR USERS OF WINDOWS 98 AND MEA) Drivers Only For Typical Users1 With your computer switched on, close down any programs that are currently running and insert the SAITEK SmartTechnology CD into your CD-ROM the Introduction Screen appears, click Install Softwareto continue. If the CD does not run automatically, selectStartfrom the Windows Taskbar, then Runand type D:\ (where D: is your CD drive) and click the Welcomescreen appears, click Nextto reading and accepting the Disclaimer, click Nextto continue. Note: For your controller to work, you must have a minimum of Microsoft DirectX installed on your computer.
8 TheB) Drivers and Programming Software For Advanced Users1 Follow points 1 7 of the install procedure in A),then at the Software Setupscreen, select Install the SSTP rogramming Software and click the following Software Setupscreen, click Nextand follow the on-screen instructions. At this point you will beasked to install such features as the SAITEK Magic Mouse,HID-compliant mouse, SAITEK Magic Keyboard andHID Keyboard Device(these are what XP calls the various elements of your SAITEK controller). Continue to click onNextand Finishto accept the installation until the Registration screen appears. 3At the Registrationscreen, select Check this box to register now and follow the on-screen instructions, or do notselect this option and register completion of the installation, you have the option to Run Profile Editor, which will give you a view of the 3 Dprogramming environment.
9 If you do not wish to see the Profile Editor at this point, just uncheck the box and click onFinishto complete the installation. INSTALLATION FOR USERS OF WINDOWS 2000A) Drivers Only For Typical Users1 With your computer switched on, close down any programs that are currently running and insert the SAITEK SmartTechnology CD into your CD-ROM the Introduction Screen appears, click Install Softwareto continue. If the CD does not run automatically,select Startfrom the Windows Taskbar, then Run and type D:\ and click OK - where D:\is letter of yourCD-ROM drive. 3 When the Welcomescreen appears, click Nextto reading the Disclaimer, select the I accept the terms of the Disclaimeroption and click Nextto the Device Driver Installationscreen, click on Nextand follow the on-screen instructions.
10 6 When prompted, plug your controller s USB connector into your computer, then click on Configure. X52 manual(ok)(24/11/04) 9:05 PM Page 6 MAINTAINING YOUR CONTROLLER SETTINGSYour SAITEK X52 FLIGHT CONTROL SYSTEM (FCS) is supplied ready for use. However, we want you to use it in the way thatsuits you best. We've therefore included the facility for you to change various settings on your stick and throttle , for example, vary the brightness of the LED buttons, check your stick is working correctly or change the way thedate is displayed on your Multi-Functional Display (MFD).You change your controller settings in the SAITEK X52 FLIGHT Stick properties window. There are two ways you can openthis window.