Transcription of CYBORG GRAPHITE STICK - Saitek.com
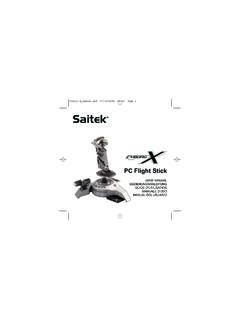
1 CYBORG GRAPHITE STICKUSER MANUALCYBORG GRAPHITE JOYSTICKC ongratulations on your purchase of the CYBORG GRAPHITE Joystick with state-of-the-art ergonomic andadjustable design for hours of fatigue-free gaming - in style! Perfect for left- and right-handers, youcan use the integral tool to customize the STICK to your suit your exact gaming needs. Just follow thecorrect installation procedure (below) for your computer s system, and you re ready to go!Main Features 3 Fire Buttons Finger Trigger Lever Throttle 8-way Hat Switch Plug n Play343 Fire ButtonsFinger TriggerLever Throttle8-way Hat Switch123421 Installing the CYBORG GRAPHITE on Windows XP1 With your computer switched on and all applications shut down, plug the CYBORG GraphiteJoystick into one of your computer s USB Found New Hardware callout will appear to inform you that the joystick has beensuccessfully test that CYBORG GRAPHITE is functioning correctly, click on Starton the Windows Taskbar andthen select Control the Control Panel list, select Printers and other Hardware, then double-click the GameControllersicon.
2 In the Game Controllerswindow select CYBORG for users who have changed their XP Desktop settings to Classic view: To test thatCyborg GRAPHITE is functioning correctly, click on Starton the Windows Taskbar and then selectSettingsand Control Panel. In Control Panel, double-click the Game Controllersicon, then inthe Game Controllerswindow select CYBORG , click on Propertiesto open the CYBORG GRAPHITE Propertieswindow. Click on the Testtaband try out the buttons and controls of your new joystick. The Hat Switch cursor should reach allfour corners of the square, the button and trigger indicators should light as you press thecorresponding control and the throttle indicator should move up and down when you move thethrottle through its full range of testing your joystick, click OKtwice to finish.
3 Now it s time to load your favorite game andenjoy the fun!Installing the CYBORG GRAPHITE on Windows 20001 With your computer switched on and all applications shut down, plug the CYBORG GraphiteJoystick into one of your computer s USB computer will automatically detect and load the drivers for your new test that your CYBORG GRAPHITE is functioning correctly, click on Starton the Windows Taskbarand then select Settingsand Control the Control Panel, double-click the Gaming Optionsicon, then in the Gaming Optionswindow select CYBORG , click on Propertiesto open the CYBORG GRAPHITE Propertieswindow. Click on the Testtaband try out the buttons and controls of your new joystick. The Hat Switch cursor should reach allfour corners of the square, the button and trigger indicators should light as you press thecorresponding control and the throttle indicator should move up and down when you move thethrottle through its full range of testing your joystick, click OKtwice to finish.
4 Now it s time to load your favorite game andenjoy the fun!Installing the CYBORG GRAPHITE on Windows Me1 With your computer switched on and all applications shut down, plug the CYBORG GraphiteJoystick into one of your computer s USB computer will automatically detect and load the drivers for your new test that your CYBORG GRAPHITE is functioning correctly, click on Starton the Windows Taskbarand then select Settingsand Control the Control Panel, double-click the Game Controllersicon, then in the Game Controllerswindow select CYBORG , click on Propertiesto open the Gaming OptionsPropertieswindow. Click on the Testtaband try out the buttons and controls of your new joystick. The Hat Switch cursor should reach allfour corners of the square, the button and trigger indicators should light as you press thecorresponding control and the throttle indicator should move up and down when you move thethrottle through its full range of testing your joystick, click OKtwice to finish.
5 Now it s time to load your favorite game andenjoy the fun!Installing the CYBORG GRAPHITE on Windows 98 (Second Edition)1 With your computer switched on and all applications shut down, plug the CYBORG GraphiteJoystick into one of your computer s USB the Add New Hardware Wizard appears, click Nextand follow the on-screen prompted, select Search for the best driver for your device (Recommended)and clickon the following screen, select the CD-ROM driveoption, insert your Windows 98 (SE) CD andclick on to follow the on-screen instructions until the installation is complete, then click on Finishand remove your test that your CYBORG GRAPHITE is functioning correctly, click on Starton the Windows Taskbarand then select Settingsand Control Control Panel, double-click the Game Controllersicon, then in the Game Controllerswindow, select CYBORG , click on Propertiesto open the Game Controller Propertieswindow.
6 Click on the Testtaband try out the buttons and controls of your new joystick. The Hat Switch cursor should reach allfour corners of the square, the button and trigger indicators should light as you press thecorresponding control and the throttle indicator should move up and down when you move thethrottle through its full range of testing your joystick, click OKtwice to finish. Now it s time to load your favorite game andenjoy the fun!TROUBLESHOOTINGQMy computer is not recognizing the CYBORG GRAPHITE what s wrong?ACheck the cable connections. Unplug your controller and plug it back in, making certain that issecurely SUPPORTCan t get started don t worry, we re here to help you!Did you know that nearly all the products that are returned to us as faulty are not faulty at all? Theyhave just not been installed , if you experience any difficulty with this product, please visit our website or contact one of ourfriendly technical support staff who will be pleased to help website designed to help you get the best performance from your Saitekproduct.
7 And if you still have problems, we also have teams of product specialists around the worldyou can call for advice and support. Contact details are provided on the Technical Support Center listprovided with this product. Saitek is dedicated to helping you enjoy your purchase please call us ifyou have any difficulties or Saitek WebsiteIf you have access to an Internet connection, many of your technical queries may be answered with asimple visit to the Saitek Website Technical Support area will provide you with all the information you need to get the most out ofyour controller and solve any problems you might site also contains regularly updated material, including information about: Current and forthcoming products Driver upgrades Links to useful sitesContacting SaitekIf you do not have access to the Internet, or if the website cannot answer your question, you will needto contact your local Saitek Technical Support Team.
8 However, before contacting Technical Support, here are a few tips to help us to help you: Make sure you have followed all the steps shown in this manual Check that the controller is correctly connected to your computer Confirm that your PC is functioning normallyAt Saitek, we aim to offer comprehensive and thorough technical support to all of our users. So,before you call, follow the guidelines below to ensure that you have all of the information necessaryfor us to help the problem- make sure that you are clear about the problem you are having and thatyou can describe the events that led up to the Troubleshooting Guide in the Troubleshooting section of this your hardware - if it is possible, have the following information to hand: The make and model of the computer you are using The name and version of the game you were using when you started having problems The make and model of your computer s motherboard The make and model of your computer s sound card 4Be ready- if possible, please try and ring whilst sitting at the computer with all the relevantinformation and hardware to hand.
9 If you are having a problem with a particular game orapplication, make sure that you have it patient- we try our best to deal with customer queries as quickly as possible. At times it maybe necessary to refer queries on to our specialist staff. Please be patient!To contact your local Saitek Technical Support Center, please look up the relevant contact details onthe separate Technical Support Center sheet that came packaged with this of Warranty1 Warranty period is 2 years from date of purchase with proof of purchase instructions must be must not have been damaged as a result of defacement, misuse, abuse, neglect,accident, destruction or alteration of the serial number, improper electrical voltages or currents,repair, alteration or maintenance by any person or party other than our own service facility or anauthorized service center, use or installation of non-Saitek replacement parts in the product or themodification of this product in any way, or the incorporation of this product into any otherproducts.
10 Or damage to the product caused by accident, fire, floods, lightning, or acts of God, orany use violative of instructions furnished by Saitek of Saitek shall be limited to repair or replacement with the same or similar unit, at ouroption. To obtain repairs under this warranty, present the product and proof of purchase ( billor invoice) to the authorized Saitek Technical Support Center (listed on the separate sheetpackaged with this product) transportation charges prepaid. Any requirements that conflict withany state or Federal laws, rules and/or obligations shall not be enforceable in that particularterritory and Saitek will adhere to those laws, rules, and/or returning the product for repair, please pack it very carefully, preferably using the originalpackaging materials. Please also include an explanatory : To save yourself unnecessary cost and inconvenience, please check carefully thatyou have read and followed the instructions in this warranty is in Lieu of all other expressed warranties, obligations or liabilities.
