Transcription of R440 FORCE WHEEL - Saitek.com
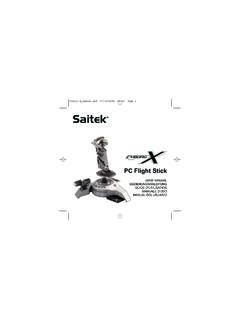
1 R440 FORCEWHEELUSER MANUALMANUEL D UTILISATIONBEDIENUNGSANLEITUNGMANUALE D USOMANUAL DEL USUARIOR440 Manual all 20/04/2004 16:40 Page 1 saitek R440 FORCE WHEELThe saitek R440 FORCE WHEEL is the new driving FORCE in wheels for the PC. With its streamlineddesign and Immersion s patented Touchsense technology inside, the R440 delivers the mostrealistic racing experience to your desktop. The FORCE feedback technology puts you right on theracetrack feeling every move you make in the game. Add to this a complete range of features -including pedals and gearshift paddles - and you have the perfect driving STARTEDS etting Up your Controller1 Before connecting the R440 FORCE Wheelto your PC, you need to connect it toyour mains supply using the AC/DCadapter (supplied). This connects via thefront of the unit next to the USB cable. 2 Attach the main WHEEL unit and the deskclamp as shown in the the steering WHEEL unit on theedge of your desktop, and turn the clampgrip clockwise until the unit is securelyattached to the desk.
2 Do not overtighten!4 Plug the cable from the pedal unit intothe socket in the steering WHEEL unit, making sure the connector clicks firmly into the main pedal unit to the pedal unit base, making sure it clicks firmly into place. Next,place the complete pedal unit floor for your optimum driving Smart Technology SoftwareSaitek Smart Technology software is the software that saitek supplies for our high-end gamecontrollers. The Smart Technology software comprises the product drivers for these Saitekcontrollers and the optional programming software. By keeping the two separate, the SmartTechnology software offers two types of installation to suit the individual gamer s needs, whichmeans even more gamers can enjoy these quality saitek products. The Quick Installloads the product drivers only (all that is needed to use the controller) and issuitable for the new or Typical User.
3 This install is fast and simple and will have the gamer upand running in no time at Full Installloads the product drivers and the saitek Smart Technology programming softwareand is suitable for the Advanced User. The programming software delivers a powerful set offeatures for the ultimate configuration in the game. Although it is recommended for the seasonedgamer, it can be installed at any time. This gives the typical user a chance to get to know thecontroller before taking gaming to the next Manual all 20/04/2004 16:40 Page 3 INSTALLATION FOR USERS OF WINDOWS XPQuick Install (Drivers Only)This installation will ONLY install the drivers for your saitek controller. TheFull Install(below) willinstall the drivers and the saitek Smart Technology programming software for your your computer switched on, close down any programs that are currently running andinsert the saitek Smart Technology CD into your CD-ROM the Introduction Screen appears, click Install Softwareto the Welcomescreen appears, click Nextto continue.
4 (If the CD does not runautomatically, select Startfrom the Windows Taskbar, then Runand type D:\ andclick OK- where D:\is letter of your CD-ROM drive).4 After reading the Disclaimer, select the I accept the terms of the Disclaimeroption andclick Nextto the Device Driver Installationscreen, click on Nextand follow the on-screen instructions. 6 When prompted, plug your controller s USB connector into your computer, then click onConfigureand then Continue Anyway. Follow the on-screen instructions until you reachthe Controller the Controller Propertiesscreen appears, click Nextto view the Testscreen. 8 Now try out all your controller s buttons and controls to show that it is working properly. Whenyou have finished, click OK. 9At the Programming Softwarescreen, select Typical Userand click Next. 10 At the Registrationscreen, select Register my saitek controller onlineand follow the on-screen instructions or select Register Laterand click Next.
5 11 Click on Finishto complete the installation. Your saitek controller is now ready for use withyour favorite Install (Drivers and Programming Software)This installation will install the drivers and the saitek Smart Technology programming software forthe saitek points 1 7 of the install procedure in Quick Install (Drivers Only), then at theProgramming Softwarescreen, select Advanced Userand click the Programmable Controller Driversscreen, click Updateand follow the on-screeninstructions. At this point you will be asked to install such features as the saitek Magic Mouseand saitek Magic Keyboard (these are what XP calls the various elements of your Saitekcontroller). Continue to click on Next, Continue Anywayand Finishto accept the installationuntil the Installation of programming software successful screen appears. 3At the Installation of programming softwaresuccessful screen, click Next.
6 4At the Registrationscreen, select Registerand follow the on-screen instructions or selectRegister Laterand click Next. 5 Upon completion of the installation, you have the option to Run Profile Editor, which will giveyou a view of the 3D programming environment. If you do not wish to see the Profile Editor atthis point, just uncheck the box and click on Finishto complete the installation. Your Saitekcontroller is now ready for use with your favorite a complete guide on how to program your saitek controller, visit the saitek website R440 Manual all 20/04/2004 16:40 Page 4 INSTALLATION FOR USERS OF WINDOWS 2000 Quick Install (Drivers Only) This installation will ONLY install the drivers for your saitek controller. The Full Install(below), willinstall the drivers and the saitek Smart Technology programming software for your your computer switched on, close down any programs that are currently running andinsert the saitek Smart Technology CD into your CD-ROM the Introduction Screen appears, click Install Softwareto the Welcomescreen appears, click Nextto continue.
7 (If the CD does not runautomatically, select Startfrom the Windows Taskbar, then Run and type D:\ andclick OK - where D:\is letter of your CD-ROM drive). 4 After reading the Disclaimer, select the I accept the terms of the Disclaimeroption andclick Next to the Device Driver Installationscreen, click on Nextand follow the on-screen instructions. 6 When prompted, plug your controller s USB connector into your computer, then click onConfigure. 7 When the Controller Propertiesscreen appears, click Nextto view the Testscreen. 8 Now try out all your controller s buttons and controls to show that it is working properly. Whenyou have finished, click OK. 9At the Programming Software screen, select Typical Userand click Next. 10 At the Registration screen, select Registerand follow the on-screen instructions or selectRegister Laterand click Next.
8 11 Click on Finishto complete the installation. Your saitek controller is now ready for use withyour favorite Install (Drivers and Programming Software)This installation will install the drivers and the saitek Smart Technology programming software forthe saitek points 1 7 of the install procedure in Quick Install (Drivers Only), then at theProgramming Softwarescreen, select Advanced Userand click Next. 2At the Programmable Controller Driversscreen, click Updateand follow the on-screeninstructions. 3 Then at the Installation of programming software successfulscreen, click Next. 4At the Registration screen, select Registerand follow the on-screen instructions or selectRegister Laterand click Next. 5 Upon completion of the installation, you have the option to Run Profile Editor, which will giveyou a view of the 3D programming environment.
9 If you do not wish to see the Profile Editor atthis point, just uncheck the box and click on Finishto complete the installation. Your Saitekcontroller is now ready for use with your favorite a complete guide on how to program your saitek controller, visit the saitek website Manual all 20/04/2004 16:40 Page 5 INSTALLATION FOR USERS OF WINDOWS 98 AND MEQuick Install (Drivers Only) This installation will install the drivers for the saitek controller only. 1 With your computer switched on, close down any programs that are currently running andinsert the saitek Smart Technology CD into your CD-ROM the Introduction Screen appears, click Install Softwareto the Welcomescreen appears, click Nextto continue. (If the CD does not runautomatically, select Startfrom the Windows Taskbar, then Runand type D:\ OK).4 After reading and accepting the Disclaimer, click Nextto continue.
10 Note: For your controller to work, you must have a minimum of Microsoft DirectX installedon your computer. The installer will automatically recognize if this software needs to be added,and will allow you to install it directly from the saitek Product Companion CD, if you are asked to install Microsoft DirectX , click Installand follow the on-screeninstructions, and then restart your computer when prompted. Make sure that you leave theSaitek CD in the drive when restarting. After this software has been installed, you willautomatically be taken to the installation to continue with the next the on-screen instructions and select Yes, I want to restart my computer now the restart, at the Device Driver Installationscreen, click on Nextand follow the on-screen instructions. 7 When prompted, plug your USB connector into your the Controller Propertiesscreen appears, click Nextto view the Test Screen.