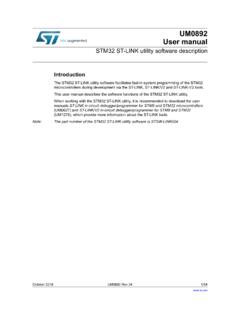
Transcription of STM32™ and STM8™ Flash loader demonstrator
1 UM0462. User manual STM32 and STM8 . Flash loader demonstrator Introduction The purpose of this document is to describe the STMicroelectronics STM32 and STM8 . Flash loader demonstrator application that was developed to illustrate the System memory boot loader capabilities. This document details the prerequested hardware and software environments, as well as the use cases of the demonstrator software. November 2009 Doc ID 13916 Rev 7 1/25. Contents UM0462. Contents 1 Getting started .. 5. Package contents .. 5. Software contents .. 5. Hardware contents .. 5. System requirements .. 5. Flash loader demonstrator installation .. 7. Software installation .. 7. Hardware installation .. 9. 2 User interface description .. 10. 3 Command-line usage .. 20. 4 Revision history .. 24. 2/25 Doc ID 13916 Rev 7. UM0462 List of tables List of tables Table 1. Document revision history .. 24. Doc ID 13916 Rev 7 3/25.
2 List of figures UM0462. List of figures Figure 1. System Properties dialog box .. 6. Figure 2. Device Manager window.. 7. Figure 3. InstallShield Wizard .. 8. Figure 4. InstallShield Wizard license agreement .. 8. Figure 5. Connection settings page .. 11. Figure 6. Flash status page .. 12. Figure 7. Device information page - STM32 example .. 13. Figure 8. Device information page - STM8 example .. 14. Figure 9. Operation choice page for STM32 .. 16. Figure 10. Operation choice page for STM8 .. 17. Figure 11. Option byte edition page .. 18. Figure 12. Operation progress page .. 19. Figure 13. Command-line version .. 20. 4/25 Doc ID 13916 Rev 7. UM0462 Getting started 1 Getting started Package contents The following items are supplied in the Flash loader demonstrator package: Software contents 1. : a dynamic-link library implementing the system memory boot loader protocol and the communication APIs as virtual functions to be loaded dynamically from the STUARTBLLib dll file.
3 2. : a dynamic-link library implementing the system memory boot loader protocol and the RS232 COM communication APIs. 3. : a dynamic-link library implementing the needed file manipulation APIs to load and store binary, hexadecimal and motorola S19 files. 4. STMicroelectronics Flash : a wizard application that provides the high-level operations that can be performed by the user. 5. : a command-line version of the STMicroelectronics Flash that provides the same features over several options. 6. The Map directory is located in the installation directory. It contains the mapping description files of the supported devices. 7. The Src directory is located in the installation directory. It contains the header and Lib files of the two DLLs and the complete source of the command-line version. 8. The Doc directory is located in the installation directory, it contains the UM0462 and UM0516 (Windows API for STMicroelectronics microcontroller boot loaders ) user manuals.
4 Hardware contents The Flash loader demonstrator is designed to work with all STMicroelectronics devices that support the system memory boot mode UART protocol. For more details, please visit the STMicroelectronics website ( ). System requirements In order to use the Flash loader demonstrator with the Windows operating system, a recent version of Windows, such as Windows 98, Millennium, 2000, XP, Vista or Windows7 must be installed on the PC. The version of the Windows OS installed on your computer may be determined by right- clicking on the My Computer icon on the desktop, then clicking on the Properties item in the displayed pop-up menu. The OS type is displayed in the System Properties dialog box under the System label as shown in Figure 1. Doc ID 13916 Rev 7 5/25. Getting started UM0462. Figure 1. System Properties dialog box For communication purposes, you need to verify that you have an available COM port (RS232) if the application implements the UART interface.
5 To check that you have an available interface (COM), right-click on the My Computer icon on the desktop and select Properties from the pop-up menu. The System Properties . dialog box appears. Click on the Hardware tab, and then on the Device manager button to display the system hardware configuration. Available COM ports are grouped under the Ports (COM & LPT) node in the hardware tree as shown in Figure 2. 6/25 Doc ID 13916 Rev 7. UM0462 Getting started Figure 2. Device Manager window It is interesting to know the capabilities of the COM port. To find out, right click on the Communication Port (COMx) item then click on Properties to display the Properties window. Select the Port Settings tab, then click on the arrow next to the Bits per second . combo box to know the baud rates supported by the port. Flash loader demonstrator installation Software installation If an older version is installed on you computer, remove it by using the Add or Remove Programs service in the Control Panel.
6 Run the provided file: the InstallShield Wizard will guide you through the installation of the Flash loader demonstrator application on your computer as shown in Figure 3 and Figure 4 (You must accept the license agreement to install the software). Doc ID 13916 Rev 7 7/25. Getting started UM0462. Figure 3. InstallShield Wizard Figure 4. InstallShield Wizard license agreement Once the software has been successfully installed, click on the Finish button. The file containing the new release notes will automatically open in the Microsoft - native Notepad application. Closing Notepad will launch the Flash loader demonstrator if the check boxes are kept as default in the InstallShield Wizard. 8/25 Doc ID 13916 Rev 7. UM0462 Getting started Hardware installation As the Flash loader demonstrator is able to communicate over the UART interface, the device should be connected to a spare PC COM port in the event of a UART.
7 Communication. Doc ID 13916 Rev 7 9/25. User interface description UM0462. 2 User interface description The Flash loader demonstrator is designed as a wizard application. It is structured into six steps, the: 1. Connection settings page 2. Flash status page 3. Device information page 4. Operation choice page 5. Option byte edition page 6. Operation progress page Step 1. Run the Flash loader demonstrator application from the Programs menu (connection to the device has not been made yet) then, make sure that the device is connected to your PC and reset it to restart the system memory boot loader code. This step consists in selecting the UART connection interface and its related settings. Set the connection settings (port name, baud rate and timeout, etc.) as shown in Figure 5. For an optimum configuration for the UART interface, set Baud Rate to 115200 bits per second and Timeout(s) to 5 seconds.
8 Ensure that the boot configuration pins are set correctly, then click Next to continue. If a connection has been established, the wizard moves to the next step, otherwise a message box is displayed that indicates the error that occurred. Possible errors messages: Cannot open the COM port : this message is shown if the selected COM port is not found or if it is already being used by another process. Unrecognized device : this message is shown if the received value is different from 0x79. Resetting the device may solve the problem. No response from the target : this message is shown when there is no response from the target. It indicates that the System memory boot loader is not functional. Verify the boot configuration and check that the used microcontroller contains the boot loader code. Note: The Timeout argument is the period of time after which a read request from the serial port is aborted if no data is received.
9 The recommended value is 5 seconds, but it depends on the used environment, like the hardware performance. 10/25 Doc ID 13916 Rev 7. UM0462 User interface description Figure 5. Connection settings page Note: Echo combo-box is present in version of the Flash loader demonstrator for the support of some STM8 devices that use LIN echo back emulation through the UART. protocol. If these devices are not used, this option should be kept disabled. Doc ID 13916 Rev 7 11/25. User interface description UM0462. Step 2. In the second step the connection has been established and communication has started. It consists in displaying the Flash memory status. This status can be read-protected, in which case the Next button is disabled until the read protection is removed by clicking on the Remove protection button. Note: Clicking on the Remove protection button will not only read-unprotect the Flash memory, it will also erase all its pages.
10 Figure 6. Flash status page 12/25 Doc ID 13916 Rev 7. UM0462 User interface description Step 3. In this step the Wizard displays the available device information such as the target ID, the firmware version, the supported device, the memory map and the memory protection status. Select the target name in the target combobox as shown in Figure 7 and Figure 8, then click on Next to continue. Figure 7. Device information page - STM32 example Doc ID 13916 Rev 7 13/25. User interface description UM0462. Figure 8. Device information page - STM8 example 14/25 Doc ID 13916 Rev 7. UM0462 User interface description Step 4. At this step, select the requested operation Erase, Download, Upload or Disable/Enable Flash protection or Edit option bytes and set the related parameters: 1. Erase a) Choose All to erase the whole memory b) Choose Selection to customize the Erase operation. Click the .. button to display the memory mapping dialog window.