Transcription of STS Spectrometer Getting Started - Ocean Optics
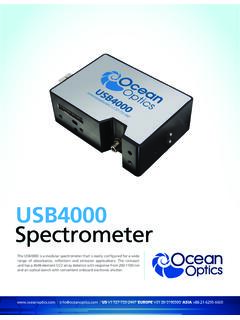
1 030-00000-003-01-201512 1 STS Spectrometer Getting Started STS is a family of compact, low-cost spectrometers ideal for embedding into OEM devices. STS provides remarkable performance for a Spectrometer of its size (just 40 mm x 42 mm 24 mm), including full spectral analysis with low stray light, a high signal-to-noise ratio and optical resolution of ~ nm (FWHM). This document provides you with the information that you need to get your STS Spectrometer up and running using OceanView or SpectraSuite Spectrometer Operating software (software available for an additional cost). Package Checklist Verify that your package contains the following: Micro USB cable: Connects your Spectrometer to a computer s USB port. Packing List: Attached to the outside of the shipment box (the invoice arrives separately). Wavelength Calibration Data Sheet: Your Spectrometer operating software reads this calibration data from your Spectrometer when it interfaces to a computer via the USB port.
2 Additional Equipment Available STS-CBL-PS cable: Connects the STS Spectrometer to Bluetooth or WiFi adapters and provides power when not connected to your computer s USB port. STS Status LED The STS has a status LED that provides the following information about the state of the device: State Display Hard Fault Off (STS is not operational) Error Slow flash (1 Hz) Start-up Fast flash (5 Hz). Occurs for 1 second after power-up during self-test. If it persists longer while no other activity occurs, then there may be a fault that will prevent taking measurements correctly. Transmitting Data 50% duty cycle flash (half-intensity continuous) Taking Measurement Off Standby On (full power) Note: In STS units with firmware 0034 and above, if the LED flashes in a pattern of two short blinks followed by a pause immediately after being powered up, this indicates that bad firmware is being detected on startup and the STS is waiting for new firmware to be loaded.
3 Contact Ocean Optics for instructions to reprogram the STS and restore it to normal operation. Installation Caution! : Install the software BEFORE connecting the Spectrometer to your PC. The Spectrometer operating software installs the drivers required for Spectrometer installation. If you do not install the software first, the system will not properly recognize the Spectrometer . Installing OceanView Software OceanView is the latest Spectrometer operating software available from Ocean Optics . It is available to be downloaded from the link provided when you purchased the software or from a CD at an additional cost. To install STS Getting Started Instructions 2 030-00000-003-01-201512 OceanView, see the instructions in the OceanView Spectrometer Operating Software Installation and Operation Manual: Installing SpectraSuite Software To install SpectraSuite, see the instructions in the SpectraSuite Spectrometer Operating Software Installation and Operation Manual: Installing Your Spectrometer Caution!
4 : If mounting your STS in another structure, remove two (2) of the screws from the electronics side lid (closest to the USB/mHDMI connectors). Do not use the Optics side lid (closest to the fiber) as a mounting surface. The STS Optics are precision-aligned in a cleanroom environment to prevent dust and dirt contamination; never remove screws from the Optics lid. To connect the USB cable that came with the Spectrometer to your computer via the USB port as shown in the example below. Procedure 1. Locate the micro USB cable provided with the Spectrometer . 2. Insert one end of the cable into the side of the Spectrometer (USB port). 3. Insert the rectangular end of the cable into the USB port of the computer (the USB port can be on either the front or the rear of the computer). The computer installs the Spectrometer s drivers. 4. Attach a fiber to the SMA connector. WARNING! : Use only precision connectors that meet IES specification standard 60874 when connecting a fiber to the STS.
5 Ferrule lengths that are out of specification can destroy the STS. Note: RS-232 operation requires separate power, either through the GPIO port or the USB port (using the standard micro USB cable), or through the STS-CBL-PS (available for additional cost). Start-up In OceanView To display a Quick View spectrum for all the attached devices, do one of the following: Select the Quick View option from the Welcome Screen and click OK. Click the x in the upper right hand corner of the Welcome Screen. Tip: Remove the checkmark from the Show on startup option in the Welcome Screen and the software will also start in Quick View. STS Getting Started Instructions 030-00000-003-01-201512 3 The Welcome screen also provides a button to display a list of wizards to choose the type of spectral analysis to perform. In SpectraSuite Procedure 1. Run the SpectraSuite software by selecting double-clicking on the SpectraSuite icon () or navigating to the folder where you stored SpectraSuite when you installed it.
6 The SpectraSuite screen appears (in Scope mode) with your spectrometers shown in the Data Sources pane on the left: STS Getting Started Instructions 4 030-00000-003-01-201512 2. If you expand the node for each Spectrometer shown on your screen, the following information appears: Acquisition parameters that you set via the (integration time, scans-to-average, boxcar smoothing), Whether dark and/or reference spectra have been stored, the graph (A, B, C, etc.) associated with this Spectrometer that appears in the right pane (important if you have installed more than one Spectrometer ), Spectrometer s properties (serial number, firmware level, number of pixels, and wavelengths). 3. You must first take a reference and dark spectrum before the experiment mode icon (, , , etc.) on the toolbar becomes active. After you take a reference and a dark spectrum, you can take as many measurement scans as needed.
7 However, if you change any sampling variable (integration time, averaging, smoothing, fiber size, etc.), you must store a new dark and reference spectrum. Performing Experiments Note: When running the STS in Quick View (OceanView) or Scope (SpectraSuite) mode, the signal may show significant etaloning. Once you run an experiment (such as Absorbance, Transmission, etc.), this disappears. Relative or absolute irradiance also removes the etaloning. Note: Unlike other Ocean Optics spectrometers, you do not need to perform an electric dark correction; the STS does this automatically. You should see a constant 1500 count baseline. Perform reference and dark scans if needed, then select the desired experiment. Follow the experiment wizard that appears. Note: The STS allows you to load an irradiance calibration file from the Spectrometer . To do so, follow the instructions in your SpectraSuite manual for performing an Absolute Irradiance experiment in Appendix A: Experiment Tutorials, selecting Get Irradiance Calibration from Spectrometer in the wizard.
8 STS Getting Started Instructions 030-00000-003-01-201512 5 With OceanView OceanView s feature-rich functionality allows you to run a spectroscopy wizard, load a previous project, restore a previous session, or view spectra in Quick View. The Graph view shows the spectrum graph as well as offering Graph Layer Options, Strip Charts, Spectral Splicing, and Peak finding. The Schematic View presents data from your device(s) in a diagram format. With SpectraSuite Most experiments follow a similar path using SpectraSuite. SpectraSuite recognizes the attached device and displays it in the Data Sources pane (select Spectrometer | Rescan Devices if you don t see your device there). The device s signal is displayed in Scope mode in the Graph pane. For More Information You can access documentation for Ocean Optics products by visiting our website at Select Support Technical Documents, then choose the appropriate document from the available drop-down lists.
9 Or, use the Search by Model Number field at the bottom of the web page. Please feel free to call Ocean Optics Technical Support at (727) 733-2447 for help or more information. Warranty Our 1-Year Warranty covers Ocean Optics OEM equipment from manufacturing defects: This comprehensive warranty ensures you of the highest level of craftsmanship and reliability. The warranty covers parts and labor needed to repair manufacturing defects that occur during the warranty period. We also will cover the costs of shipping warranty-related repairs from our customers to Ocean Optics and from us to our customers. Compliance FCC Part 15 Compliance This equipment has been tested and found to comply with the limits for a Class A digital device, pursuant to Part 15 of the FCC Rules. These limits are designed to provide reasonable protection against harmful interference when the equipment is operated in a commercial environment. This equipment generates, uses, and can radiate radio frequency energy and, if not installed and used in accordance with the instruction manual, may cause harmful interference to radio communications.
10 Operation of this equipment in a residential area is likely to cause harmful interference in which the user will be required to correct the interference at his own expense. Cautions The authority to operate this equipment is conditioned by the requirement that no modifications will be made to the equipment unless the changes or modifications are expressly approved by the manufacturer. This is a Class A product. In a domestic environment this product may cause radio interference, in which case the user may be required to take adequate measures. STS Getting Started Instructions 6 030-00000-003-01-201512