Transcription of Wireless-G Access Point
1 USER GUIDEW ireless-G Access PointModel: WAP54G About This GuideiWireless-G Access PointAbout This GuideIcon DescriptionsWhile reading through the User Guide you may see various icons that call attention to specific items. Below is a description of these icons:NOTE: This check mark indicates that there is a note of interest and is something that you should pay special attention to while using the product. WARNING: This exclamation Point indicates that there is a caution or warning and it is something that could damage your property or : This globe icon indicates a noteworthy website address or e-mail ResourcesWebsite addresses in this document are listed without http:// in front of the address because most current web browsers do not require it.
2 If you use an older web browser, you may have to add http:// in front of the web International and TrademarksLinksys, Cisco and the Cisco Logo are registered trademarks or trademarks of Cisco Systems, Inc. and/or its affiliates in the and certain other countries. Copyright 2008 Cisco Systems, Inc. All rights reserved. Other brands and product names are trademarks or registered trademarks of their respective holders. Table of ContentsiiWireless-G Access PointChapter 1: Product Overview 4 Front Panel.. 4 Back Panel .. 4 Chapter 2: wireless Security Checklist 5 General Network Security Guidelines.
3 5 Additional Security Tips .. 5 Chapter 2: Using the Linksys wireless Guard Service 6 Client Software Installation .. 6 Network Access .. 8 Your Account .. 8 Chapter 3: Configuring the Wireless-G Access Point 12 How to Access the Web-Based Utility ..12 How to Navigate within the Utility.. 12 The Setup Tab > Network Setup ..12 The Setup Tab > AP Mode ..13 The wireless Tab > Basic wireless Settings ..14 The wireless Tab > wireless Security ..16 The wireless Tab > wireless MAC Filter ..18 The wireless Tab > Advanced wireless Settings.. 18 The Administration Tab > Management.
4 19 The Administration Tab > SNMP ..20 The Administration Tab > Log.. 20 The Administration Tab > Factory Defaults ..21 The Administration Tab > Firmware Upgrade ..21 The Status Tab > Local Network ..21 The Status Tab > wireless Network.. 22 Appendix A: Troubleshooting 23 Appendix B: Specifications 24 Appendix C: Warranty Information 25 Limited Warranty.. 25 Appendix D: Regulatory Information 27 FCC Statement ..27 FCC Radiation Exposure Statement ..27 Safety Notices.. 27 Industry Canada Statement ..27 Avis d Industrie Canada.. 28 wireless Disclaimer ..28 Avis de non-responsabilit concernant les appareils sans fil.
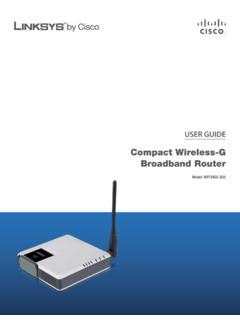
5 28 User Information for Consumer Products Covered by EU Directive 2002/96/EC on Waste Table of ContentsiiiWireless-G Access PointElectric and Electronic Equipment (WEEE).. 29 Appendix E: Software License Agreement 33 Software in Linksys Products ..33 Software Licenses ..33 Chapter 1 Product Overview4 Wireless-G Access PointChapter 1: Product OverviewThank you for choosing the Wireless-G Access Point . Use the instructions in this User Guide to help you connect the Access Point , set it up, and configure it to bridge your different networks. These instructions should be all you need to get the most out of the Access PanelCisco logo (Orange/White) The Cisco logo is the Access Point s SecureEasySetup button.
6 It lights up when the Access Point is powered on. The Cisco logo is orange when the SecureEasySetup feature is not used, while the color white indicates that the SecureEasySetup feature is being used. When the Access Point enters SecureEasySetup mode, the Cisco logo will turn white and start flashing. Then the Access Point will generate its SSID (network name) and WPA-Personal (also called WPA-PSK) key. If the Access Point successfully associates with a client using SecureEasySetup, the Cisco logo will stop flashing and stay white.
7 If the association is unsuccessful, then the Cisco logo will stop flashing and stay orange. To clear the SSID and WPA-Personal key, press and hold down the Cisco logo for ten seconds. The Cisco logo will turn orange to indicate a successful : SecureEasySetup is a feature that makes it easy to set up your wireless network. If you have SecureEasySetup devices, run the Setup Wizard on the Access Point s Setup Wizard CD-ROM. Then follow the on-screen (Red) The Power LED lights up when the Access Point is powered (Green) The Activity LED lights up when the Access Point is ready for wireless use.
8 It flashes when the Access Point is transmitting or receiving data (Orange) The Link LED lights up when the Access Point is successfully connected to a device through the Ethernet network port. The LED flashes when the Access Point is transmitting or receiving data through the Ethernet network PanelLAN The Ethernet network port connects to an Ethernet network device, such as a switch or There are two ways to reset the Access Point s factory defaults. Either press the Reset button for approximately ten seconds, or use the Administration > Factory Defaults screen of the Access Point s Web-based : Resetting the Access Point will erase all of your settings (including wireless security, IP address, and power output) and replace them with the factory defaults.
9 Do not reset the Access Point if you want to retain these The Power port connects to the Access Point s power 2 wireless Security Checklist5 Wireless-G Access PointChapter 2: wireless Security ChecklistWireless networks are convenient and easy to install, so homes with high-speed Internet Access are adopting them at a rapid pace. Because wireless networking operates by sending information over radio waves, it can be more vulnerable to intruders than a traditional wired network. Like signals from your cellular or cordless phones, signals from your wireless network can also be intercepted.
10 Since you cannot physically prevent someone from connecting to your wireless network, you need to take some additional steps to keep your network secure. 1. Change the default wireless network name or SSIDW ireless devices have a default wireless network name or Service Set Identifier (SSID) set by the factory. This is the name of your wireless network, and can be up to 32 characters in length. Linksys wireless products use linksys as the default wireless network name. You should change the wireless network name to something unique to distinguish your wireless network from other wireless networks that may exist around you, but do not use personal information (such as your Social Security number) because this information may be available for anyone to see when browsing for wireless networks.