Transcription of Xerox® Wireless Print Solutions adapter
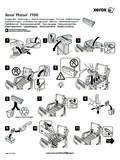
1 50/60 and install one of the AC plug adapters on the 5 VDC Power Supply. Ensure that the adapter snaps securely and fully into the base. Plug the Ethernet cable into your printer and the Wireless Print Solutions adapter . Plug in the power adapter to a wall outlet (110 V/220 V AC) or a power strip. Wait until the Status LED flashes amber. Apply the included rubber feet or hook-and-loop strips to the base of the unit. If you are attaching the device to the printer, ensure that you do not block vents or access the HardwareXerox Wireless Print Solutions AdapterInstallation and Connection Setup 18/11/15 7:53 access the web interface of the Wireless Print Solutions adapter , open a browser. In the URL field, enter the default IP address of , then press Enter or Go. Log in to the Web : The default User Name is admin and the default Password is PASS. Both values are case-sensitive. PC/Laptop Display: There are five main tabs across the top of the screen.
2 Mobile Device Display: The main tabs are arranged vertically. To expose the tabs, touch the icon at the top of the screen. There are 2 Web Interface formats:Setting up the Connection Using the Web InterfaceOn your computer or mobile device, navigate to your list of available Wireless networks. Select the available network that appears as wpsa-xxxx where xxxx is the last four characters of the MAC address of your adapter (not the Wireless MAC address). You can find the MAC address on the label that is located on the bottom of your 28/11/15 7:53 aisItalianoDeutschEspa olPortugu sРусский3457863At the top of the Quick Setup screen, if needed, click the menu, then select a language. In a few seconds, the screen refreshes and displays the selected language. You may need to log in : if the Quick Setup page does not appear, click the Administration tab, then in the navigation pane, select Quick Setup. 4 For Bridge 1 (br0) Configuration, select Enabled.
3 Leave the Bridging MAC Address field blank. 5 Optionally, if your Wireless router supports WPS and it is enabled, you can use WPS. If WPS is preferred, click the protocol that your router supports. Options are WPS (PBC) or WPS (PIN). For details, refer to the documentation for your router. Proceed to Step 8. 6 From the list of Available Networks, click the required network s SSID. 7 For Connect To, enter the credentials for the SSID that you selected. 8 Leave the fields for Printer and Add Printer blank. Click Submit, then to confirm, click 38/11/15 7:53 the IP address for later locate the new IP address, click the Status tab, then scroll down to the Network section. Under Interface wlan0, note the IP the first four sections but ignore If no IP address appears, wait, then refresh the browser and check the Administration tab, then click the Reboot the PrinterIf the Web UI is open, close all Web browser windows and wait for the Status LED on the Wireless Print Solutions adapter to turn the printer connected to the Wireless Print Solutions adapter .
4 For details, refer to your printer the IP address of your printer. To find the IP address, at the printer control panel, open the Machine Status screen, or Print a Configuration Page. For details, refer to the documentation for your printer. For xerox printer documentation, go to the Wireless Print Solutions adapter Web Interface. For details, see steps 1 and 2 in Setting up the Connection Using the Web Interface. 48/11/15 7:53 AM56 Click the Printer tab. For Add Printer, enter the IP Address and name of your printer, then click Add Printer. When the web page refreshes, to verify correct installation and operation, click Print Test can configure additional setup and features as troubleshooting and additional help information, refer to In the Search for Keyword or Phrase field, enter troubleshooting. 2015 xerox Corporation. All Rights Reserved. xerox , and xerox and Design are trademarks of xerox Corporation in the United States and/or other countries.
5 BR# 58/11/15 7:53 AM