
Using TV Adapter 3 - Oticon
P1 P2 TV Adjust the volume by pressing up or down briefly. Repeat the brief press for further adjustments. Connect the TV Adapter 3.0 box to your television See the Instructions for Use booklet that comes with the TV adapter. Four methods are available to support a wide variety of connection needs. Using TV Adapter 3.0 1 2 3 4
Download Using TV Adapter 3 - Oticon

Information
Domain:
Source:
Link to this page:
Documents from same domain

Parents’ Guide - Oticon
www.oticon.comParents’ Guide A guide for parents of children with hearing loss. Hearing is one of the things many of us take for granted. It plays an enormous role in our lives. Yet, as long as it works we tend to forget that it is there. From birth we develop language by dis-

Instructions for use - oticon.com
www.oticon.comTUO IN POWER R L 1 3 12 About Installation Daily use Warnings Additionals 13 Connecting the TV Adapter to a power outlet Start by connecting the TV Adapter to a power outlet.

Quick guide Re-pairing Oticon Opn with accessories after ...
www.oticon.comre-pair the instruments with relevant accessories. This short guide shows you how to re-pair Oticon Opn with different types of accessories. Remote Control 3.0 3 Clear previous pairing in remote control 3 Put the hearing aids in pairing mode 3 Pair the remote control with the hearing aids 4 TV Adapter 3.0 5 iPhone 6
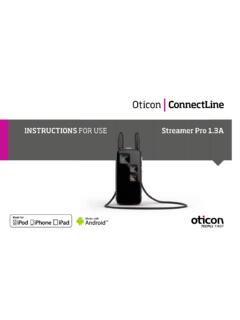
INSTRUCTIONS FOR USE Streamer Pro 1.3AStreamer Pro 1
www.oticon.comInterference and implantable devices The Streamer is designed to comply with the most stringent Standards of International Electromagnetic Compatibility. However, the Streamer might cause interference with ... loop breaks, it cannot be repaired and must be replaced immediately. Consult your Hearing Care Professional for a replacement. 17 Neck loop

Instructions for use - Oticon
www.oticon.comIf the speaker has an ear grip, place it in the ear so it follows the contour of the ear (see step 3). Put on the hearing aid Ear grip (optional) Ear grip Speaker (60 shown) Place the hearing aid behind your ear. Hold the bend of the speaker wire be-tween your thumb and index finger. The earpiece should point towards the ear canal opening.
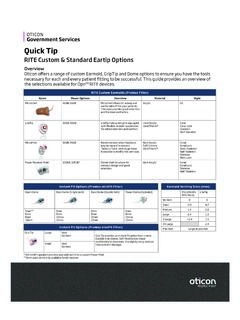
RITE Custom & Standard Eartip Options
www.oticon.comRITE Molds LiteTip No Vent 0 0 Small 0.8 0.7 Medium 1.4 0.8 Large 2.4 1.2 X Large >2.4 1.5 XX Large 2.4 Large as possible *105 miniFit speakers are only available built into a custom Power Mold **5mm open dome only available for 60 receiver
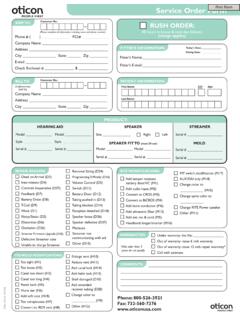
Service Order Form - Hearing aids, information on hearing ...
www.oticon.comHEARINg AID sPEAkER sTREAMER sPEAkER FIT TO (must fill out) MOLD ... Service Order Form Phone: 800-526-3921 Fax: 732-560-7376 ... Battery Door (D12) Tubing pushed in (D13) Tubing blocked (D14) Faceplate detached (D18) Speaker loose (D36) Speaker defective (D37) Moisture Streamer not

Technical data sheet - Oticon
www.oticon.comFitting Formulas VAC+, NAL-NL1 + 2, DSL v5.0 VAC+, NAL-NL1 + 2, DSL v5.0 ... Mold, Bass & Power dome Open dome Oticon OpnTM miniRITE is a discreet design with a smart single push button. Oticon Opn miniRITE-T is a discreet style based on …

PRODUCT INFORMATION OTICON RIA2 PRO OTICON RIA2
www.oticon.comBass dome, double vent 6, 8, 10, 12 mm Grip Tip, no vent S & L Grip Tip, large vent S & L BTE STYLES design RITE mini RITE & RITE RITE & BTE STYLES 6 7 Features Oticon Ria2 Pro Oticon Ria2 Fitting formulas NAL, DSL NAL, DSL Binaural Synchronisation (automatics) Yes No Binaural Coordination (PB operations) Yes Yes YouMatic Essential Personal ...

RITE & BTE Earmold Styles - Oticon
www.oticon.comRITE & BTE Earmold Styles Phone 877-310-9681 • Fax 732-764-9133 • pro.oticonusa.com Molds for 60, 85, designRITE 80, S, M & Intiga Speakers R L Hard Material acrylic (clear only) Soft
Related documents

User Guide - The Sharper Image
cdn4.sharperimage.comFor optimum performance, the TV Wireless Headphones must be fully charged before the first use. This can take 5 hours. CONNECTING YOUR TV 1. The TV Wireless Headphones can be connected to the TV three different ways: Headphone Jack — Use the included 3.5mm audio cable. Plug one end into the TV headphone jack.

BAR 48
d2um2qdswy1tb0.cloudfront.netThe BAR 48 is designed to quickly connect to your TV. Simply plug in the included HDMI cable or an optical cable to seriously upgrade your TV sound, using your TV’s remote to control it. SLIM PROFILE DESIGN The BAR 48 is crafted from high-quality wood materials, just like legendary Klipsch speakers.

DIRECTV WIRELESS VIDEO BRIDGE GEN2 - AT&T
www.att.comProduct Manual—Wireless Video Bridge Gen2 I. OVERVIEW A. WIRELESS VIDEO BRIDGE The Wireless Video Bridge Gen2 (WVB2) is a second-generation Wireless Video Bridge. It is a direct replacement of the WVB Gen1 and has enhanced networking features. The WVB2 provides the ability to stream DIRECTV programming from a Genie server to the Genie Mini ...

AT&T U-verse Wireless TV Receiver self-installation guide
www.att.comSet up the Wireless TV Receiver. The next step is to connect your Wireless TV Receiver to your TV. A. Connect the Wireless TV Receiver to your TV with an HDMI cable (not included). You may also use . Component or Coaxial cables. B. Power up your TV. Select the connection type you used in step 2A. For instance, if you used an HDMI . cable ...

Logitech® G933 Artemis Spectrum™
www.logitech.com1. Set switch to Wireless Off mode for passive audio mode, or set to Wireless On mode for active audio mode with additional features (see “Wireless On/ Off” section). 2. Connect the headset to the mobile device via the 3.5mm cable. 3. 3.5mm inline controls can be used to adjust audio. Mic select • Select “microphone” position
Instructions for use - Oticon
www.oticon.comThe TV Adapter is intended as a wireless transmitter of sound from a TV or from other electronic audio devices to hearing aids. The TV Adapter is intended to be used by children (> 36 months) and adults together with their hearing solution.

Wireless Desktop Mouse User Manual Product Features
www.verbatim.com2. Connect wireless mouse receiver to USB port 3. Ensure batteries are installed in the mouse and mouse power is turned on (See instructions below). 4. Hold mouse close to the receiver 5. Click the ID button at the end of the receiver once, (See …

Installation instructions - Verizon: Wireless, Internet ...
www.verizon.comon the Fios TV remote. Then turn on your TV and tune to channel 3 using the remote control that came with your TV. • To complete activation, call 1.855.372.2181 and provide the activation code found on your Verizon customer receipt. CableCARD Get hooked up Read through any instructions for your CableCARD-ready device and complete any set up.