Transcription of Oscilloscope Exercises for Analog & Digital 'scopes
1 Oscilloscope ExercisesforAnalog & Digital 'scopesPhyscs 431, 432, 09/21/20041 Oscilloscope EXERCISESThe Oscilloscope is probably the most ubiquitous piece of equipment in the laboratoryenvironment. In most of the experiments that you are going to perform, either all or part of the informationwill be displayed on the screen of an Oscilloscope . Most of the oscilloscopes in this lab are of the analogtype, though there are a few Digital scopes that are used on some of the more complicated experiments. Each scope type and model has it's own particular strengths and limitations.
2 The purpose of thescope Exercises described below is to have you become more familiar with some of the simple proceduresthat will allow you to get a display and observe a signal on the scopes in the lab, as well as to recognizesome of the possibilities and limitations of these instruments. The Digital scopes are a bit more challengingand may require more practice or the assistance of your TA in some instances in the lab. If you havepreviously had an electronics course or have a strong electronics background, you may find the exercisestrivial, but please do them anyway.
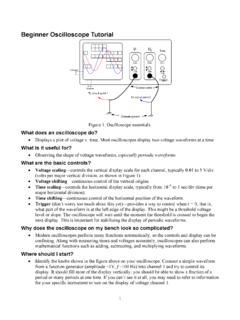
3 Using the Analog ScopeThe front panel of a typical Analog Oscilloscope used in the lab is pictured below. Yours may differ inminor respects, but will have much in Analog scopes are as a general rule, easier to use to start with, so we will begin exploring these IntensityTimebase ControlHorizontal Scale (X)Triggering Control : NORM:AUTO, ChanTrigger Level & SlopeChannel Coupling (AC/GND/DC) & Vertical (Y) Scale (Volts/Division)Vert. PositionChannel SelectAlt/Chop/AddBeam FindProbe Cal WvfrmPRELIMINARY exercise -- Getting up and running:Find the ground the intensity (using a small twist in the CCW direction) to a low value & switch all channelinputs to ground (GND) the trigger to "P-P-AUTO", NOT "NORM" and the horizontal-mode knob to "NO DLY".
4 Other trigger switches should be set to "AC", "INT", "CH1". Channel-1 by putting the vertical mode switch to "CH1" on the power and note that the trace is a straight line. If you do not immediately see a trace,gently push and hold the "BEAM FIND" button and adjust channel 1 vertical position knob untilthe trace is found. Adjust until the trace is about 1-2 cm (major divisions) above the center of the Vertical-Mode switch to CH2 and repeat steps 3&4, such that the channel 2 trace isabout 1-2cm below the center of the "BOTH" and "ALT" with the Channel Select switches so that you see both traces on a signal & explore signal probe effects and , take a 10X-scope probe (which divides the voltages down by a factor of 10) and put a BNC-T on the cable end.
5 Then plug this BNC-T into the CH1 input. Take a short piece of BNC cableand connect the other end of the BNC-T to the Channel2 input. Next, clip the probe tip to thegold pin emerging from the "PROBE ADJUST" output (labeled 500mV pp at 1-kHz" on somescopes). both CH1 & CH2 inputs to AC with vertical-gain knobs each at 20mV/cm. (Remember, youare using a 10X probe & gently check that the red "CAL" knows are turned fully clockwise.) Youshould now see two (roughly) square wave traces on the display. Can you explain why the peakto peak amplitude is half what it is labeled to be?
6 HINT: Disconnect the short BNC cable to CH2 and observe the CH1 signal alone. Then, add theprovided 1 Mohm and 100kOhm resistors to the end of the BNC cable attached to CH1. Explainwhat you see. Moral of the story: Your scope input, while relatively high impedance, can affectthe circuit you are observing! the short BNC cable between the CH1&2 inputs. Change the horizontal time baseknob until two full cycles are shown on the display ( where each div. = 1cm) the vertical mode switch to "ADD" and see the signal trace with twice the go back to ALT and push the CH2 INVERT button.
7 This causes the CH2 signal to be 180 out of phase with the CH1 signal. Now switch to ADD and see the signal disappear to a each vertical-gain knob to a more sensitive scale and note the signal comes back whenboth channels are on the same the trigger switch down to CH2 and remove the BNC cable from the CH2 input. You willnow see the CH1 display running free, without being triggered into a stationary trace. Youcan trigger, and thereby stabilize, this trace by flipping trigger switch back to CH1 triggering enabled, place the vertical mode switch to CH1.
8 Then, switch the triggerfrom the PPAUTO to NORM and see the signal disappear. Now, rotate the trigger level until youregain a stable trace. The differences between the PPAUTO and the NORM (which stands for"Normal") trigger modes are that in the PPAUTO mode, the range of the trigger level control isrestricted to the peak to peak range of the trigger signal, and that the scope will automaticallyinitiate (trigger) a sweep if it must wait more than about 50msec for a trigger signal. The result isthat the scope will always trigger when a signal is present, and even when one is not (which cansometimes be a hindrance).
9 The trigger back to PPAUTO and remove the BNC cable from the BNC-T. Now, stilllooking at the CH1 display, check the vertical calibration on a number of the vertical scales. Also,check the time base calibration on as many scales as possible using the time-base calibration knobby checking to see if the appropriate number of calibration cycles are being the probe to the CH2 input and repeat the last exercise #1 -- Use Tek 2213A Analog a signal: Connect a single function generator to either the CH1 or CH2 a sine wave signal, display various frequencies and adjust the time-base asrequired to easily observe several distinct use a square wave signal and measure the initial rise time of the triggered squarepulse, using a suitable choice of time-base setting and the vertical gain two sine-wave signals: Connect a separate function generator to each of the CH1 andCH2 one of the function generators to a kHz sine-wave and set the other one to sine-wave.
10 Set both signals to have about the same peak-to-peak amplitude, and usethe same vertical gain scale for both inputs. Observe both signals using the ALT observe them with the vertical-mode switch in the ADD position. Finally, observethem with the CH2 INVERT button pushed. Note that you can get some very complex-looking part a. using 100 Hz and 105 Hz on the respective inputs. With the vertical modeswitch in the ADD position, you should now be seeing somewhat less complex lookingsuperpositions. Reverse the order of the two inputs to see the superposition wavetraveling in the opposite direction on the screen.