Transcription of 1. Insert the SIM Card 2. Charging the Phone and …
1 OPENOPEN89881693120024945281. Insert the SIM card 2. Charging the Phone and power On Remove the battery from the Phone . Slide the SIM card into the slot, following the orientation shown on the decal. Re-install the battery. aAaA From the main menu, select Setup and then Location Options By default, GPS is disabled. To enable GPS, select GPS Options, GPS On/Off, and select Enabled. Your Phone is equipped with a programmable SOS button on the top of the Phone for emergency notifications to your specified contacts. You will be prompted to enter an emergency call recipient and emergency message recipient each time your Phone is powered on until these contacts are programmed.
2 Once the SOS button is pressed, a message and/or call will be initiated and your location will be sent every 5 minutes to your specified emergency recipient. To modify these settings, select Emergency Options. CAUTION: you must configure the SOS button Emergency Mode contact in order to send an emergency message to a designated emergency call recipient. To view your current GPS location, press the side Convenience Key (initial update can take up to 2 minutes). You will be provided with the option to Share your location by attaching your location to a New Message or a preconfigured Quick GPS list.
3 To program a Quick GPS list, select Message Options and then Quick GPS List. Your message will be sent with a link to that will display your location on a map. aA To send your location on a regular update schedule, select Message Options and Regular Updates. First program the message recipient by selecting Update Recipient. Next, program the message schedule by selecting Update Frequency. Once the Update Frequency is set, your location will be sent automatically to your programmed recipient on the defined frequency. Your Phone provides the ability to lock your GPS settings to maintain your desired configuration by selecting GPS Options and GPS Settings Lock.
4 The default GPS settings lock code is 3333 and can be changed in the Security menu under Change PIN and GPS Settings Lock. Your Phone supports integration with 3rd party online portals using short burst data (SBD). These 3rd party online portals provide the ability to track your Phone s location online, see location history, two-way message, set-up geofences, and coordinate scheduled check-ins. For more information about 3rd party online portals, contact your service provider or visit GPS location will be downloaded and stored locally when your Phone is powered on to provide an initial location status if Emergency Mode is initiated by pressing the SOS button.
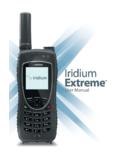
5 Pressing the programmable SOS button will always enable GPS for the Emergency Mode to send location updates whether GPS is enabled or disabled. Monthly access and usage fees may apply for location messaging and short burst data services. aAaAaASelectBackGPS OptionsEmergency OptionsMessage OptionsFormatCurrent LocationLocation OptionsSelectBackLocation OptionsCall OptionsVolumes and TonesTime & DateLanguageBacklightContrastSetupMenuMy PhonebookSIM PhonebookMessagesVoicemailData ModemCall HistorySetupSelectBack3. Set up and use of GPS Location Options In order to charge the Iridium Extreme , the appropriate adapter must first be selected and attached to the bottom of the Phone .
6 Prior to installation, open your Phone s accessory connector cover on the bottom of your Phone and move it to the back of your Phone , securing it to the rear retaining features. Select the appropriate adapter and orient it with the bottom of the Phone so the Iridium brand is facing forward. Then press the adapter up until the side clasps are locked into place and the adapter is securely fastened to your Phone . Connect the travel charger or auto accessory charger to the accessory adapter, ensuring that the accessory adapter is attached to your Phone .
7 Plug the travel charger or auto accessory adapter into the appropriate power source. The Phone beeps. The battery symbol on the LCD display flashes while Charging . When fully charged the battery symbol will become solid. When the Phone has completed Charging , remove the adapter by holding the Phone with your left hand and grasping the adapter on both sides. Press the bottom portions of the side clasps with your thumb and index fingers and pull the adapter away from the Phone . Move the accessory connector cover back to the accessory connector and press it so it is securely in place.
8 Turn the Phone on by pressing and holding the On/Off button on the top of the Phone for 5 seconds. Note that you must wait a minimum of 5 seconds before powering on the Iridium Extreme after you have disconnected from the charger. If prompted for a SIM PIN, enter the four to eight digit SIM card PIN code provided by your service provider. The default SIM PIN is 1111 and may be modified. Pressing the incorrect code multiple times will lock the Phone and require an unlock code. Important: The battery should only be charged in environments between 0 C (32 F) to 45 C (113 F).
9 PowerConnectoraAaAaAaA6. Send a Text Message (SMS) You can send and receive text messages and short emails using your Iridium Extreme Phone . Prior to sending short emails, it is helpful to store email addresses in your phonebook to automate delivery. To enable the predictive text software on your Phone , select Setup from the main menu, then Language, then Text entry, and change the setting from Multi-tap to English, French, or Spanish predictive text. To send a text message select Messages from the main menu, then Create message.
10 If you wish to send to an email address that is not stored in your phonebook, type the email address, add a space, and then type your message. To type using predictive text entry, you may choose several different modes including word (ww), letter (lw), punctuation (#?@), and digits (123) by tapping the side convenience key. Once your message is completed, select Options, then Send, then Add, and then you can either select a stored phonebook entry or manually enter a number. If you typed an email address in your message to send to an email address not stored in your phonebook, you must manually enter the number +*2 in order to send to an email not stored in your phonebook.