Transcription of CC2530 Software Examples User’s Guide - Texas Instruments
1 CC2530 Software Examples user 's Guide SWRU214A 1. Table of contents 1 3. 2 Abbreviations .. 3. 3 Using the Software .. 4. Prerequisites .. 4. Getting 5. Set up Hardware and 5. Program the board with IAR .. 5. Alternative: Download hex files with the Flash Programmer .. 6. 4 Application Examples .. 8. Light/Switch application .. 8. Packet Error Rate tester 10. Spectrum Analyzer application .. 12. 5 Software Library 13. Software architecture .. 13. Software folder 13. Basic 14. Basic RF frame format .. 14. Basic RF usage instructions .. 15. Basic RF API 16. Basic RF 18. Limitations of Basic RF .. 21. Hardware Abstraction Layer .. 21. HAL RF API reference .. 21. 24. Document History .. 24. SWRU214A 2. 1 Introduction This document describes Software Examples for the CC2530 System-on-Chip solution for IEEE. It also describes the necessary hardware and Software to run the Examples , and how to get started.
2 The Software Examples are designed to run on the CC2530EM mounted on SmartRF05EB. Section 3 of this document describes necessary prerequisites and how to get started with the code Examples . Section 4 describes how to run each of the application Examples . The Software library that the code Examples are built upon is described in section 5. The latter section also gives an API. reference and describes the functionality of the Software library. Hex files for each of the example applications are provided. IAR EW8051 Full version is needed for building the source code. 2 Abbreviations API - Application Programming Interface CBC-MAC - Cipher Block Chaining Message Authentication Code CCM - Counter with CBC-MAC (mode of operation). CCM* - Extension of CCM. FCS - Frame Check Sequence HAL - Hardware Abstraction Layer IO - Input/Output MIC - Message Integrity Code MPDU - MAC Protocol Data Unit PAN - Personal Area Network PER - Packet Error Rate RF - Radio Frequency RSSI - Received Signal Strength Indicator SFD - Start of Frame Delimiter SWRU214A 3.
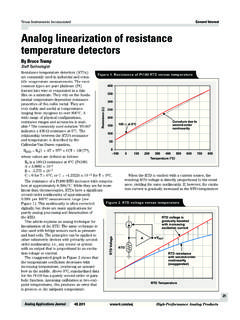
3 3 Using the Software This section describes the necessary hardware and Software , and how to get started with the application Examples for CC2530 . Prerequisites To successfully download and run the Software described in this document, the following material is needed: 2 x SmartRF05 EB rev. 2 x CC2530EM or CC2530 -CC2591EM boards with appropriate antennas IAR Embedded Workbench for 8051 versions (Full version). 4 AA batteries 1) The Software is tested with version , but later versions might also work. Figure 1 SmartRF05EB with CC2530EM. SWRU214A 4. Getting started The following sections describe hardware and Software setup, how to program the board and how to run example code from the IAR debugger. A description of how to operate each Software example is found in section 4 of this Guide . Set up Hardware and Software Follow these steps to configure the hardware and Software needed: 1.
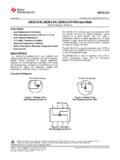
4 Install IAR Embedded Workbench for 8051 and the patch to enable support for CC2530 . 2. Save the CC2530 Software Examples zip file and unzip this file. 3. Attach the CC2530EM board to the SmartRF05EB. 4. Connect the SmartRF05EB to the PC with a USB cable. 5. Make sure the EM selection switch (P19 on SmartRF05EB) is placed in position SoC/TRX. Program the board with IAR. 6. Open IAR Embedded Workbench 7. Open the workspace file with IAR. This file is found in the folder ide under the folder where the CC2530 Software Examples was unzipped. Figure 2 shows the IAR EW with the workspace opened. 8. Each application has its own project tab in the IAR workspace viewer. Select the project to be compiled in the workspace viewer of IAR. See section 4 for a description of each application example . The PER test and Light Switch applications both have two projects, one for the CC2530EM and one for the CC2530 -CC2591EM.
5 9. Select Project->Rebuild All. This will perform a full rebuild on the selected project. 10. Select Project->Debug. IAR will now establish a connection with the CC2530 and program the application. The debugger will be started, halting the target at main(). 11. Start the application by selecting Debug -> Go. 12. The board can be reset by selecting Debug -> Reset. 13. The debugger can be stopped by selecting Debug -> Stop Debugging. 14. The unit can now be operated independently from the debugger by disconnecting the USB. cable and using the AA batteries as power source. Cycle power with the power switch on the SmartRF05EB. 15. Repeat the steps 9 to 12 to program additional boards. SWRU214A 5. Figure 2 IAR EW. Alternative: Download hex files with the Flash Programmer It is also possible to program the boards with the Texas Instruments Flash Programmer as an alternative to IAR.
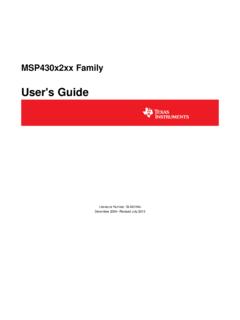
6 Follow these steps after connecting the USB cable in section 5. Install the Texas Instruments Flash Programmer. The TI Flash programmer tool is found under the Tools and Software ' section on the CC2530 web site. 6. Open the Texas Instruments Flash Programmer, and choose the System-on-Chip tab. The connected device is shown in the list as in Figure 3. 7. In the Flash image field browse to the correct hex file. 8. Make sure the Erase, program and verify' action is checked. 9. Push the Perform actions' button to program the device. SWRU214A 6. Figure 3 Flash programmer SWRU214A 7. 4 Application Examples The following application Examples are included in this Software package: light_switch Wireless light/switch application. One node is configured as a light controller, and the other node as a wireless light switch. PER_test Packet Error Rate test application. spectrum_analyzer This application use the LCD on the SmartRF05EB to display the RSSI.
7 Values of all IEEE defined channels. Details about how to run the different application Examples can be found in the following sections. Section describes how to program the applications on the target. Light/Switch application This application example requires 2 nodes programmed with the light_switch' project. The example implements a wireless light switch application. One of the nodes is configured as a light controller, while the other node is configured as a light switch. The following steps must be done to use the light/switch application: 1. Reset both boards by cycling power. 2. Press Button 1 to enter the application menu 3. Choose device mode. The menu is navigated by moving the joystick right or left. Choose device mode Switch' on one of the nodes, and Light' on the other node. Confirm the choices by pressing Button 1. 4. The light switch application example is now ready.
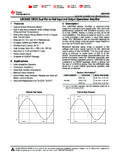
8 LED1 on the Light' node can now be toggled by pushing joystick down on the Switch'. The data sent out from the switch device can be observed with a Texas Instruments packet sniffer*. configured on channel 25 2475 Mhz. *The Texas Instruments packet sniffer application can be downloaded from: The following hardware can be used for the packet sniffer: SmartRF05EB/CC2530EM, CC2531 USB dongle, CC2430DB, SmartRF04EB/CC2430EM or SmartRF05EB/CC2520EM. It is also possible to build the Light/Switch application with the CCM security feature included. This will enable CCM authentication and encryption on each packet. In order to use the CCM security feature the compile option SECURITY_CCM must be set in the project file. This can be done in IAR EW by selecting Project and Options. Navigate to the C/C++ Compiler and Preprocessor tab and set SECURITY_CCM as one of the defined symbols ( change xSECURITY_CCM to SECURITY_CCM).
9 See also Figure 4. The CCM security feature is also described in section in this Guide . SWRU214A 8. Figure 4 Compile option for CCM security SWRU214A 9. Packet Error Rate tester application This application example requires 2 nodes for operation. Select the project per_test'* in the IAR. workspace viewer and program both nodes. *The PER test application is also preprogrammed on both of the CC2530EM boards found in the CC2530DK. The CC2530DK Quick Start Guide describes how to run the preprogrammed PER test out of the box. The packet error rate test application sets up a one-way RF link between two nodes. One board will operate as a transmitter and the other board will operate as a receiver. The transmitter node must be configured with the output power to use and the number of packets to transmit as part of the PER test (burst size). During a PER test the receiver node will display the number of received packets, the RSSI.
10 Level (signal strength) and PER. The user configurable parameters for the test can be seen in Table 1 and Table 2. These parameters are set using a menu on the LCD during initialization. The menu is navigated with the joystick (see arrows in the display) and the settings are confirmed by pressing Button 1. The user configurable parameters for the test can be seen in Table 1 and Table 2. The tables are for the CC2530EM and CC2530 -CC2591EM. When CC2530 -CC2591EM is used it is possible to choose the receiver gain, either high gain or low gain mode. The output power settings are also different between CC2520 and CC2530 -CC2591. These parameters are set using a menu on the LCD during initialization. The menu is navigated with the joystick (see arrows in the display) and the settings are confirmed by pressing Button S1. Parameter Settings Channel 11 26 (2405 2480 MHz). Operating Mode Receiver, Transmitter TX Output Power -3 dBm, 0 dBm, 4 dBm Burst Size 1K, 10K, 100K, 1M.