Transcription of Epson L805 Network Install Guide
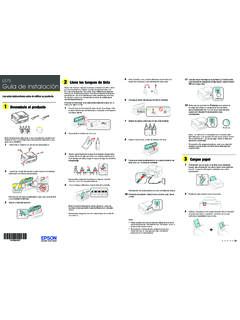
1 YourProducton a YourProductwith YourProductUsinga a WirelessRouteror Producton a Appearin OS X BeginMakesure you installedthe ink cartridgesand loadedpaperas describedon instructionsin this guideto set up the productfor use on a Lights1 Thepowerbuttonand light2 TheWi-Fibuttonand light3 Thenetworkstatusbuttonand light4 Theink buttonand light5 Thepaper/cancelbuttonand light7 SettingUp YourProducton a WirelessNetworkTo add your productto a wirelessnetwork,you may needto knowthe name(SSID)and passwordofyour it has securityenabled,you also needto knowthe WEPkey or :If your computerdoesnot havea CD/DVDdriveor you are usinga Mac,an Internetconnectionisrequiredto obtainthe Makesure your productis turnedon butNOTCONNECTEDto your computerwith a :WithWindows,if you see a FoundNewHardwarescreen,clickCanceland Insertthe productCD or downloadyour product s Selectyour languageand clickNext(Windows),or clickContinueand clickContinueagain(OS X).
2 4. Acceptthe softwarelicenseagreementto continuewith Whenyou see one of thesescreens, XNote:WithOS X, makesure you installSoftwareUpdaterto receivefirmwareand softwareupdatesfor your take the installationto X: If you see the followingmessage,clickYesorNoto Whenthe PrinterSetupscreenappears,clickNext(Wind ows)orStart(OS X) to beginsettingupyour producton your Whenyou see this screen,selectWirelessconnectionand clickNext(Windows)orContinue(OS X).109. Whenyou see this screen,selectSet up printerfor the first timeand clickNext(Windows)orContinue(OS X).1110. The screenyou see next dependson whetheryour computercan wirelesslyconnectwith yourproductautomaticallyor not.
3 If your computercan connectautomatically,you see the to step If your Windowscomputercannotconnectautomaticall y,you see the to step 11. If your Mac computercannotconnectautomatically,you can completesetupusinga the link for Selectone of thesenetworksetupmethods: To set up your productusingthe buttonon your productcontrolpanel,selectUsingprinterbu ttonand clickNext. To set up your productusinga temporaryUSBconnection,selectUsingtempor aryUSBcableconnectionand To completeinstallation,followthe stepsfor the setupmethodyou selectedin steps10 and 11: If your computercan connectautomatically,see the link for the auto connectinstructionsbelow.
4 To set up your productusingthe buttonson your productcontrolpanel,see the link for thoseinstructionsbelow. To set up your productusinga temporaryUSBconnection,see the link for YourProductwith Wi-FiAutoConnectSettingUp YourProductUsinga TemporaryUSBC onnection13 SettingUp YourProductwithWi-FiAutoConnect1. Whenyou see this screen,selectYesand clickNext(Windows)orContinue(OS X).14 You see a screenlike this:2. ClickNextto :If you see a firewallalert message,clickUnblockorAllowto let not selectAsk Me Later,KeepBlocking, X: If you see the followingmessages,clickOKand clickAllowto let EpsonNetSetupaccessyour Followthe on-screeninstructionsto let the systemautomaticallyconfigureyour producton :Yourproductbroadcastsits networkinformationfor 60 minutesfromthe time ink you do not completeWi-Fisetupwithin60 minutes,you cannotconnectautomaticallyandmay be promptedto enteryour networkname(SSID)and passwordon a canalso selecta X.
5 Whenyou see this screen,clickAdd Printerand followthe on-screeninstructionsto add yourproductand the print queueto your :Be sure to selectyour Epsonproductin Whenyou see this screen,print a test pageand clickNext(Windows)orContinue(OS X). : The systembeginssearchingfor the latestfirmwarefor your you see thisscreen,new firmwareis followthe areready,clickStartand wait for the firmwareupdateto :DO NOTTURNOFFYOURPRODUCTOR INTERRUPTTHEFIRMWARESEARCHPROCESSIN Followthe on-screeninstructionsto see this screen,clickExit(Windows)orClose(OS X) to closethe :SettingUp YourProducton a WirelessNetworkSettingUp YourProductUsinga TemporaryUSBC onnectionNote:The screensshownin thesestepsmay appearin a slightlydifferentorder,dependingon how yournetworkis set Whenyou see the KnowYourWirelessNetworkscreen,clickNext( Windows)orContinue(OS X).
6 X: Whenyou see this screen, At the next screen,makesure your producthas finishedchargingthe ink, then clickNext(Windows)orContinue(OS X).204. Whenyou see this screen,connecta USBcableas shownand wait for the installerto :If your productis not detected,makesure that it is Whenyou see this screen,clickNext(Windows)orStartNetworkS etup(OS X).6. Whenyou see the FirewallWarningscreen, :If you see a firewallalert message,clickUnblockorAllowto let not selectAsk Me Later,KeepBlocking, If you see this screen,clickYes(Windows)orOK(OS X).8. Do one of the following: Windows: If you havea wirelesscomputeror laptop,go to step OS X: If you havea wirelesscomputeror laptopand you see the followingmessages,clickOKand clickAllowto let EpsonNetSetupaccessyour step10.
7 All otherusers:Continuewith step If you see this screen,wait whileyour systemsearchesfor your networkname(SSID),then selectthe SSID fromthe displayedlist and :If your WPApassphrasecontainsupper-or lowercaseletters,be sure to note it do not knowyour wirelessnetworkname(SSID),WEPkey, or WPApassphrase,contactthepersonwho set up your Whenyou see this screen,enteryour networkpasswordand Waitseveralminutesfor wirelessnetworkconfigurationto finishand displaya see this prompt,disconnectthe USBcableand clickOK. ThenclickFinishonthe X: Whenyou see this screen,clickAdd Printerand followthe on-screeninstructionsto add yourproductand the print queueto your :Be sure to selectyour Epsonproductin Whenyou see this screen,print a test pageand clickNext(Windows)orContinue(OS X).
8 : The systembeginssearchingfor the latestfirmwarefor your you see thisscreen,new firmwareis followthe areready,clickStartand wait for the firmwareupdateto :DO NOTTURNOFFYOURPRODUCTOR INTERRUPTTHEFIRMWARESEARCHPROCESSIN Followthe on-screeninstructionsto see this screen,clickExit(Windows)orClose(OS X) to closethe :SettingUp YourProducton a WirelessNetwork28 SolvingNetworkProblemsCheckthesesolution sif you haveproblemssettingup or usingyour producton a :Breakdownor repairof this productmay causeloss of networkdata and notresponsiblefor backingup or recoveringdata and settingsduringor afterthe you makeyour own backupor print out your networkdata and a WirelessRouteror AccessPointNetworkSoftwareCannotFind Producton a NetworkProductDoesNot Appearin OS X PrinterWindowCannotPrintOvera NetworkProductCannotConnectto a WirelessRouteror AccessPointIf your producthas troublefindingor connectingto a wirelessrouteror accesspoint,try thesesolutions.
9 If you are connectingthe productvia Wi-FiProtectedSetup(WPS)and the Wi-Filight on your productis not solidgreen,makesure you presstheWi-Fibuttonon the productwithin2 minutesof pressingthe WPSbuttonon your the productfor 3 seconds. Makesure to placeyour productwithincontactrangeof your GHzrouteror productneara microwaveoven, GHzcordlessphone,or largemetalobject,suchas :If you are usinga 5 GHzwirelessrouter,set the routerto operatein dual band ( GHzand5 GHz) your routerusesa singlenetworkname(SSID)for both the GHzand 5 GHzband,give eachbandits own networkname(SSID)instead,suchas GHzand HomeNetwork5 your routerdocumentationor contactyour internetserviceproviderforinstructions.
10 Verifythat your routeror accesspointis operatingcorrectlyby connectingto it fromyour computeroranotherdevice. You may needto disablethe firewalland any anti-virussoftwareon your wirelessrouteror accesspoint. Checkto see if accessrestrictions,suchas MACaddressfiltering,are set on the routeror accessrestrictionsare set, add your product'sMACaddressto your router'saddresslist. Toobtainyour product'sMACaddress,print a instructionsin yourrouteror accesspointdocumentationto add the addressto the If your routeror accesspointdoesnot broadcastits networkname(SSID),followthe instructionsthatcamewith your productto enteryour wirelessnetworknamemanually.