Transcription of IMPORTANT - Code 3, Inc.
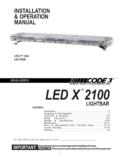
1 1 INSTALLATION & OPERATION MANUALFOR RX 2700 LIghTbAR WITh CENTRAL CONTROLLERRX 2700 CENTRAL CONTROLLER LIghT & & & List (Exploded View/Replacement Parts).. future reference record your lightbar s serial no. here _____IMPORTANT:Read all instruction and warnings before installing and : This manual must be delivered to the end user of this RX 2700 Lightbar is approximately " high, yet delivers 360 of unobstructed warning signal. PriZm reflector technology means more signal power and versatility than any other lightbar of its low profile and aerodynamic lines reduce air drag, which results in fuel savings and stability at high speeds.
2 This lightbar has a strong extruded internal frame, shock-resistant polycarbonate lenses, and warning signals that exceed SAE RX 2700 is designed on a modular basis, which means that the lightbar can be customized to meet any requirement. The RX 2700 has room for numerous halogen and LED options. While we do not recommend a light installed in every location, the design of the RX 2700 offers the ultimate flexibility in the location of warning and auxiliary use of this or any warning device does not ensure that all drivers can or will observe or react to an emergency warning signal. Never take the right-of-way for granted. It is your responsibility to be sure you can proceed safely before entering an intersection, driving against traffic, responding at a high rate of speed, or walking on or around traffic effectiveness of this warning device is highly dependent upon correct mounting and wiring.
3 Read and follow the manufacturer s instructions before installing or using this device. The vehicle operator should insure daily that all features of the device operate correctly. In use, the vehicle operator should insure the projection of the warning signal is not blocked by vehicle components ( : open trunks or compartment doors), people, vehicles, or other equipment is intended for use by authorized personnel only. It is the user s responsibility to understand and obey all laws regarding emergency warning devices. The user should check all applicable city, state and federal laws and 3, Inc., assumes no liability for any loss resulting from the use of this warning installation is vital to the performance of this warning device and the safe operation of the emergency vehicle.
4 It is IMPORTANT to recognize that the operator of the emergency vehicle is under psychological and physiological stress caused by the emergency situation. The warning device should be installed in such a manner as to: A) Not reduce the output performance of the system, B) Place the controls within convenient reach of the operator so that he can operate the system without losing eye contact with the warning devices often require high electrical voltages and/or currents. Properly protect and use caution around live electrical connections. Grounding or shorting of electrical connections can cause high current arcing, which can cause personal injury and/or severe vehicle damage, including INSTALLATION COMBINED WITH OPERATOR TRAINING IN THE PROPER USE OF EMERGENCY WARN-ING DEVICES IS ESSENTIAL TO ENSURE THE SAFETY OF EMERGENCY PERSONNEL AND THE & Pre-InstallationCarefully remove the lightbar and place it on a flat surface, taking care not to scratch the lenses or damage the cable coming out of the bottom.
5 Examine the unit for transit damage, broken lamps, etc. Report any damage to the carrier and keep the shipping lightbars are built to operate on 12 volt negative ground (earth) vehicles. If you have an electrical system other than 12 volt negative ground (earth), and have not ordered a specially wired lightbar, contact the factory for the unit before installation. To test, touch the black wire to the ground (earth) and the other wires to +12 volts , in accordance with the instructions attached to the cable (an automotive battery is preferable for this test). A battery charger may be used, but please note that some electronic options (flashers, etc.)
6 May not operate normally when powered by a battery charger. If problems occur at this point, contact the & MountingMOUNTINg hARDWARE - Mounting hardware is usually packed in a small box inside the main carton although some mounting kits may be shipped separately. Refer to the Installation Manual included in the mounting kit for mounting instructions. Note: Hook-on mounting for "gutterless" type vehicles will require a special hook for mounting. Several special application hooks are available. Contact the factory for InstructionsBefore attempting to connect wiring, refer to wire tag attached to the lightbar's main cable. Each wire in the cable controls a separate function of the Central Controller as described in the wire tag.
7 The RX 2700 with Central Controller provides an ArrowStik function as an optional feature. Connect the appropriate control wires to any control switch capable of providing +power at approximately 25ma current. As noted in the wire description, connecting both the LEFT Arrow and RIGHT Arrow wire to +power at the same time enables the Center-Out ArrowStik non-factory supplied screws and/or mounting brackets and/or the improper number of screws may result in loss of warranty coverage on the !Larger wires and tight connections will provide longer service life for components. For high current wires it is highly recommended that terminal blocks or soldered connections be used with shrink tubing to protect the connections.
8 Do not use insulation displacement connectors ( 3M Scotchlock type connectors). Route wiring using grommets and sealant when passing through compartment walls. Minimize the number of splices to reduce voltage drop. High ambient temperatures ( underhood) will significantly reduce the current carrying capacity of wires, fuses, and circuit breakers. Use "SXL" type wire in engine compartment. All wiring should conform to the minimum wire size and other recommendations of the manufacturer and be protected from moving parts and hot surfaces. Looms, grommets, cable ties, and similar installation hardware should be used to anchor and protect all wiring.
9 Fuses or circuit breakers should be located as close to the power takeoff points as possible and properly sized to protect the wiring and devices. Particular attention should be paid to the location and method of making electrical connections and splices to protect these points from corrosion and loss of conductivity. Ground terminations should only be made to substantial chassis components, preferably directly to the vehicle battery. The user should install a fuse sized to approximately 125% of the maximum Amp capacity in the supply line to protect against short circuits. For example, a 30 Amp fuse should carry a maximum of 24 Amps. DO NOT USE 1/4" DIAMETER GLASS FUSES AS THEY ARE NOT SUITABLE FOR CONTINUOUS DUTY IN SIZES ABOVE 15 AMPS.
10 Circuit breakers are very sensitive to high temperatures and will "false trip" when mounted in hot environments or operated close to their LED ArrowStik featureThe CODE 3 Central Controller has an optional programmable ArrowStik feature integrated into the light bar. The ArrowStik operates independently of the other features of the Central Controller. Refer to the ArrowStik Programming section of this manual for detailed information on pattern selection and operation & SPECIFICATIONSMany options are available for the RX 2700 . This section is designed to describe the function of the various WARNINg MODULESF using ConsiderationsThe RX 2700 Lightbar with Central Controller should be installed with an external fuse or circuit breaker in the RED lead of the two conductor 10 AWG power cable.