Transcription of INSTALLATION INSTRUCTIONS 2 ELECTRICAL GAUGES
1 For use with:Sender Resistance (Ohms)FullEmptyMost GM vehicles 1965 to presentMost Ford & Chrysler vehicles3262 fuel level senderMost GM vehicles before 1965 Most Ford vehicles '87 to present07324001690103330158 Disconnect negative battery cable when wiring andreconnect to check IMountingThese GAUGES can be mounted in-dash or in Auto Meter mountingpanels (21 16" dia. hole for 2" GAUGES ) . Fasten with bracketssupplied as shown. (Hookup wire is required.) To assure properfunctioning of this instrument, please read INSTRUCTIONS thoroughlybefore :Some late model vehicles use electronic sensors in theirpressure and temperature senders for engine controlfunctions.
2 Before removing the original sender, werecommend that you contact your automotive dealer to besure no critical functions will be disrupted. With pressuregauges it is beneficial to add a T-fitting to install your newgauge and to keep the warning light operational. Thisallows you to monitor the pressure and still have awarning light to indicate emergency Disconnect negative (-) battery Using 18 gauge wire route one length through firewall using one end to the negative (-) terminal on back of gauge , and theopposite end to a good engine Attach one length of wire to the positive (+) terminal on back of gaugeand opposite end to 12V terminal on ignition switch or other 12 Vpower Install light on back of gauge .
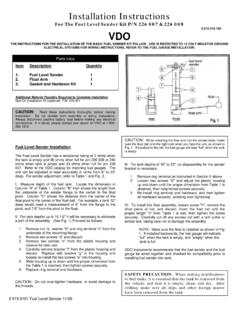
3 Connect one wire to dash lighting circuit orother 12V power source and connect other wire to negative (-) Reconnect negative (-) battery other side for Pressure & Temperature GAUGES , and Service/Warranty VIEWT wist-In LightGrommetTo 12V Terminalon Ignition Switchor other IBACK VIEWT wist-In LightTo ignition switchGrommetLightEngineGroundBACK VIEW1. Disconnect negative (-) battery Existing wires may be used, or route proper length 18 gauge , 2 conductorwire from fuel tank to gauge . Connect one end to terminal post on fuellevel sender and opposite end to sender (S) terminal on Connect wire from gauge center terminal [GND(-)] to ground on fuel Connect wire from ignition switch to positive I(+) terminal on gauge .
4 CAUTION:Be careful not to touch ignition wire to the sender (S)terminal on back of gauge or the sender may be Install the light in the socket on the rear of the gauge and connect one wire to the instrument lighting circuit or other 12V power source and connect other wire to (-) negative Reconnect negative (-) battery to fuel tankConnect to terminalpost on sender infuel SAFETY GLASSESINSTALLATION INSTRUCTIONS21/16" ELECTRICAL GAUGES Instr. No. 2650-665 HConnect to 12V LightingConnect to Good GroundFuel LevelCAUTION! As a safety precaution, the +12 V terminal of this product should be fused beforeconnecting it to the 12V ignition switch. We recommend using a 4 Amp, 3 AG fast-acting type cartridgefuse (Littlefuse #312 004 or an equivalent).
5 GNDS ISERVICEFor service send your product to Auto Meter in a well packed shipping carton. Please include a note explaining what the problem is along with your phonenumber. Please specify when you need the product back. If you need it back immediately mark the outside of the box "RUSH REPAIR," and Auto Meter willservice product within two days after receiving it. ($ charge will be added to the cost of "RUSH REPAIR.") If you are sending product back forWarranty adjustment, you must include a copy (or original) of your sales receipt from the place of MONTH LIMITED WARRANTYFOR SERVICE SEND TO: AUTO METER PRODUCTS, W. Elm St., Sycamore, IL 60178 (815) 895-8141 For Email: or Meter warrants to the consumer that this product will be free from defects in materials and workmanship for a period of twelve (12) months from the date of the original purchase.
6 Products that failwithin this 12 month warranty period will be repaired or replaced at the manufacturer's option to the consumer, when determined by the manufacturer that the product failed because of defects inmaterial or workmanship. This warranty is limited to the repair or replacement of parts in the instrument and the necessary labor done by the manufacturer to affect the repair or replacement of theinstrument. In no event shall this warranty exceed the original purchase price of the instrument, nor shall the manufacturer be responsible for special, incidental or consequential damages or costsincurred due to failure of this product. Warranty claims to the manufacturer must be transportation prepaid and accompanied with dated proof of purchase.
7 This warranty applies only to the originalpurchaser of product and is non-transferable. All implied warranties shall be limited in duration to the said 12 month warranty period. Breaking the meter seal, improper use or INSTALLATION , accident,water damage, abuse, unauthorized repairs or alterations voids this warranty. The manufacturer disclaims any liability for consequential damages due to breach of any written or implied warranty onall products made by the GaugesTemperature GaugesBACK VIEWT wist-In LightTo ignitionswitch1. Disconnect negative (-) battery When installing fuel pressure sender, an adapter may be required for your specificapplication. The following pieces are offered from Auto Meter:Model number 2276 (M12 banjo bolt to 1 8" NPT female) - fits most Import number 3275 (1 16" NPT male to -4 AN male) - fits most Ford number 3280 (1 16" NPT male to 1 8" NPT female) - fits most Ford : If your vehicle is not listed here, or you have questions as to whattype of connections need to be made, please contact Auto Meter for more information before continuing with Install sender into pressure port of appropriate type.
8 If unit is to be installed on a highvibration application such as a full race engine or engine capable of high RPM, it isstrongly recommended that the sender be remote mounted to either the fenderwellor firewall, to insulate from vibration. Failure to remote-locate pressure senders onsuch an application could result in gauge failure and potential damage to vehicleand/or operator stainless steel lines are sold seperately by Auto Meter,and can be used to accomplish this. Sender features 1 8" NPT male fitting and comeswith 1 4" NPT adapter. Sender should automatically be grounded when installed. If not,or if remote relocation of sender is required, a ground connection to sender "body" mayneed to be Route 18- gauge wire through firewall using grommet.
9 Connect one end to terminal poston pressure sender, and opposite end to sender (S) terminal on back of gauge . For 100psi fuel pressure connect (S) to sender terminal marked (S).CAUTION:Be careful not to touch ignition wire to the sender (S) terminal onback of gauge or the sender may be Connect wire from center terminal GND (-) on back of gauge to good engine ground nearsender. For 100 psi fuel pressure connect (GND) to sender terminal marked (GND).6. Connect wire from ignition switch to ignition (I) terminal on back of Install light in back of pressure gauge and connect one wire to the dashlighting circuit or to other 12V power source and connect the other wire to (-)negative Reconnect negative (-) battery Disconnect negative (-) battery Install temperature Water Temp: Install temperature sender ( included.)
10 B. Oil & Trans. Temp: Hole may have to be drilled and adapter nut(included) welded or brazed in pan. Be sure there is adequate internalclearance for nut and sender. Sender should automatically begrounded when installed. If not, proper ground connections should bemade. C. Cylinder Head Temp: Head must be drilled and tapped for 1/8" NPThole. Sender should be grounded automatically when installed. If not,proper ground connections should be Route 18- gauge wire through firewall using grommet. Connect one end toterminal post on temperature sender, and opposite end to sender (S) terminalon back of gauge . CAUTION:Be careful not to touch ignition wire to the sender (S) terminal onback of gauge or the sender may be Route 18- gauge wire from center terminal GND (-) on back of gauge to goodengine ground near Connect wire from ignition switch to ignition (I) terminal on back of Install light in back of temperature gauge and connect one wire to the dashlighting circuit or to other 12V power source and connect the other wire to (-)negative VIEWGNDS ITwist-In LightTo ignitionswitchEngineGroundGrommet2650-66 5H 10/19/01 SGNDG rommetFuel Pressure Sender WiringOil Pressure Sender Wiring 2001 Auto Meter Products, Inc.