Transcription of INSTALLATION INSTRUCTIONS - COMP Cams
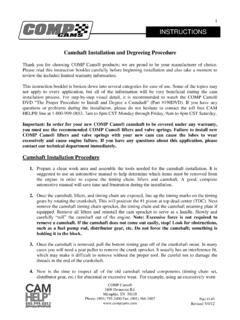
1 INSTALLATION INSTRUCTIONS . Camshaft INSTALLATION INSTRUCTIONS this point to lightly wire brush the distributor b INSTALLATION INSTRUCTIONS . gear and clean the cam with mineral spirits or A cam is a highly sophisticated, high performance part and requires a an equivalent solvent. Remember, during the little bit of TLC during INSTALLATION and break-in. This instruction sheet INSTALLATION process, the cleaner you keep your (Part #145) has been broken down into several categories so that it new components, the better chance you have will be easier for you to use. Some of the topics may not apply, but all of avoiding any type of failure during break-in.
2 Of the information will be very beneficial during your cam INSTALLATION . Using the comp cams Assembly Lube supplied with your cam, coat For step-by-step visual detail, we recommend that you refer to our 35. all lobes and the distributor gear. It is important to coat the lobes com- minute instructional video, The Proper Procedure to Install and Degree pletely, yet not excessively. This same rule applies to the distributor gear a Camshaft (Part #190 DVD). If you have any questions or problems at and the fuel pump lobe (Fig. B). Coat the cam bearing journals with any time during your INSTALLATION , please do not hesitate to contact the straight SAE 30 or 40 wt.
3 Oil. We do not recommend the use of synthetic toll free CAM HELP line at 1-800-999-0853 from 7 to 8 Cen- oils with our cams and lifters during break-in. tral Time Monday through Friday and 9:00 to 4 on Saturday. You can also email us at c Step 6: We recommend installing a new comp cams timing chain and gear set for Important: two reasons. First, the old chain is likely to be In order for your new comp cams camshaft to be covered under stretched beyond its service limits. Second, any warranty, you must use the recommended comp cams lifters your old timing set, as well as many new ones and valve springs. Failure to install new comp cams lifters and on the market, may be machined to retard the cam timing.
4 Either of valve springs with your new cam can cause the cam lobes to wear these conditions will detract from the performance your camshaft was excessively and cause engine failure. designed to deliver. Temporarily install the cam sprocket on the cam- shaft. The sprocket will again serve as a handle to help roll the cam INSTALLATION : into its bearings. Carefully slide the camshaft into the engine, oiling the Step 1: Prepare a clean work area, and assemble the tools needed bearing journals as it slides into the block (Fig. C). Excessive force is not for the camshaft INSTALLATION . We suggest you acquire an automotive necessary to install the cam.
5 Take your time. You do not want to scar manual to help you determine which items must be removed from the the camshaft or the cam bearing. Be sure you do not wipe away any of engine in order to expose the timing chain, lifters and camshaft. A good, the assembly lube as you install the cam into the block. Once the cam complete automotive manual will save you time. is installed in the block, fully remove the cam sprocket. If your engine was equipped with a camshaft retaining plate, it should be installed at Step 2: Once the camshaft, lifters and timing chain are exposed, line this time. Refer to your engine manual for the proper torque specs for up the timing marks on the timing gears by rotating the crankshaft the retaining plate bolts.
6 (Fig. A). This will position the #1 piston at Top Dead Center (TDC). Next, D. remove the camshaft timing chain sprocket, the timing chain and the Step 7: Install the new crankshaft sprocket on the camshaft retaining plate, if equipped. Remove all snout of the crankshaft (Fig. D). We recommend us- lifters, and reinstall the cam sprocket to serve as A. ing a Crankshaft Timing Sprocket INSTALLATION Tool (Part a handle. Slowly and carefully, roll the camshaft #4789) in conjunction with our Balancer INSTALLATION from the engine. Excessive force is not required. Kit (Part #4920) for all applications having an interfer- If the camshaft does not come out easily, stop im- ence fit crank sprocket.
7 Mediately. Look for obstructions, such as a fuel pump rods, distributor gears, etc. Do not force the Should You Degree Your New Cam? camshaft. Something is holding it in the block. It isn't absolutely necessary to degree the cam for the engine to run Step 3: Once the camshaft is out, pull the bottom timing gear off the efficiently. We grind most of our hydraulic cam series four degrees snout of the crankshaft. In many cases you will need a gear puller to advanced to make up for all machining tolerances. This will position remove the crankshaft sprocket. The bottom gear is usually an interfer- the cam for the best street performance.
8 However, to ensure maximum ence fit, which may make it difficult to remove without the proper tool. performance, we recommend you degree your new comp cams cam- Be careful not to damage the threads in the end of the crankshaft. shaft. The purpose of degreeing a cam is to correct the errors and toler- ances in the machining processes of the engine that affect camshaft Step 4: Now is the time to inspect all of the old camshaft related com- timing. If you do decide to degree your new cam, we suggest the intake ponents (timing chain set, distributor gear, etc.) for abnormal or exces- centerline method. It's simple, quick and efficient.
9 Sive wear. For example, using an excessively worn distributor gear with e a new camshaft could result in severe engine damage. We recommend Step 8: Reinstall the cam sprocket temporarily. Check replacing the distributor gear for the best results. It is also critical that the timing mark alignment in your engine manual. the old lifters be properly disposed of and new lifters installed. Your Rotate the crankshaft and camshaft to their proper camshaft warranty will be void if old lifters are used. positions. Our Small Block Chevrolet has a dot over dot alignment as shown (Fig. E). Remove the cam- Step 5: Remove your new comp cams camshaft from its packag- shaft sprocket, and install the new comp cams chain.
10 Bolt the cam ing. Inspect all lobes and the gear, making sure the camshaft is intact. sprocket to the cam, making sure the sprocket is pulled up flush onto Next, compare the stamped numbers on the end of the cam with the the cam (Fig. F). Once again, make sure the timing marks are positioned spec card, making sure this is the correct cam. It is a good idea at properly and according to your manual. 404 INSTALLATION INSTRUCTIONS . Refer to your manual for the proper torque specifi- F Step 11: Install rocker arms onto the engine (Fig. J). J. INSTALLATION INSTRUCTIONS . cations before tightening the camshaft bolt or bolts. Do not tighten the adjusting nut down before you go We also suggest that thread locker be applied to the through the proper sequence.
