Transcription of INSTALLATION INSTRUCTIONS DIGITAL FUEL LEVEL
1 12V BATTERYINSTALLATION INSTRUCTIONSDIGITAL fuel LEVEL2650-1239-00 Rev. A1. Check that you have all parts required for INSTALLATION , and that the engine is Disconnect the negative (-) battery gauge mounts in a 21 16" Connect the purple sender wire to the fuel LEVEL sender. Existing wires may be used, or route the purple sender wire to the fuel tank. (The stock fuel LEVEL gauge , if equipped, must be disconnected.)5. Connect the white wire to dash lighting or switchable 12v light source. DIGITAL display will dim when power is Connect one of the black wires to a good ground. (Either black wire, does not matter which one)7. Connect the red power wire to a switched +12v Reconnect the negative (-) battery The brown and black wires are used to set the sender type.
2 The gauge ships pre-programmed to read GM 0-90 ohm senders. If using a 0-90 ohm GM sender, separately insulate the ends of the brown and black wires with electrical tape, and coil them up under the If any other sender type is required, connect a Radio Shack 275-1556 or equivalent momentary button to the black and brown wires (see illustration above), or alternately touch the stripped ends of the black and brown wires to simulate pushing the Press and hold the button, and apply power to the gauge . After 10 seconds, the display will momentarily display a number with a dash on either side indicating the gauge is in sender select Allow the display to move to the appropriate number per the sender select chart (see next page), and release the push button.
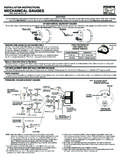
3 The display can be incremented to the next position by momentarily pressing the Remove power from the gauge to store the new sender type by turning off the ignition Re-apply power to the gauge , and confirm that it reads the proper fuel LEVEL . If the proper fuel LEVEL is not read, return to step 3 and repeat the sender select process. If the proper fuel LEVEL is still not indicated, perform a Custom Sender Remove power from the gauge by turning off the ignition Remove the momentary button if it was used, and tape the ends of the brown and black wires so they will not Coil the wires up under the the Existing Sender TypeInstallationGOOD ENGINE GROUND+ 12V CONNECTION REDBLACK+ 12V DASH LIGHTINGCONNECT TO fuel LEVEL SENDER (MAKE SURE SENDER IS GROUNDED)WHITEPURPLEFUSE(SEE CAUTION LEFT)BLACKBROWNRADIO SHACK 275-1556(OPTIONAL)CAUTION!
4 As a safety precaution, the +12V terminal of this product should be fused before connecting to the 12V ignition switch. We recommend using a 1 Amp, 3AG fast-acting type cartridge fuse (Littlefuse #312 001 or an equivalent). QUESTIONS ?If after completely reading these INSTRUCTIONS you have questions regarding the operation or INSTALLATION of your instrument(s), please contact Auto Meter Technical Service at may also email us at information can also be found at Traditional DIGITAL fuel LEVEL gauge can be programmed to flash the display when the fuel LEVEL has reached a reserve LEVEL . When power is applied to the gauge , it will momentarily display rXX, where XX is the current reserve LEVEL .
5 Setting the reserve LEVEL to 0% disables this The brown and black wires are used to set the reserve LEVEL . The gauge ships pre-programmed with the reserve set to 10%. If not changing the reserve LEVEL , separately insulate the ends of the brown and black wires with electrical tape, and coil them up under the the Programmable Reserve Level12 MONTH LIMITED WARRANTYAuto Meter Products, Inc. warrants to the consumer that all Auto Meter High Performance products will be free from defects in material and workmanship for a period of twelve (12) months from date of the original purchase. Products that fail within this 12 month warranty period will be repaired or replaced at Auto Meter s option to the consumer, when it is determined by Auto Meter Products, Inc.
6 That the product failed due to defects in material or workmanship. This warranty is limited to the repair or replacement of parts in the Auto Meter instruments. In no event shall this warranty exceed the original purchase price of the Auto Meter instruments nor shall Auto Meter Products, Inc. be responsible for special, incidental or consequential damages or costs incurred due to the failure of this product. Warranty claims to Auto Meter must be transportation prepaid and accompanied with dated proof of purchase. This warranty applies only to the original purchaser of product and is non-transferable. All implied warranties shall be limited in duration to the said 12 month warranty period.
7 Breaking the instrument seal, improper use or INSTALLATION , accident, water damage, abuse, unauthorized repairs or alterations voids this warranty. Auto Meter Products, Inc. disclaims any liability for consequential damages due to breach of any written or implied warranty on all products manufactured by Auto Meter. SERVICEFor service send your product to Auto Meter in a well packed shipping carton. Please include a note explaining what the problem is along with your phone number. Please specify when you need the product back. If you need it back immediately mark the outside of the box RUSH REPAIR, and Auto Meter will service product within two days after receiving it.
8 ($ charge will be added to the cost of RUSH REPAIR. ) If you are sending product back for Warranty adjustment, you must include a copy (or original) of your sales receipt from the place of SERVICE SEND TO: AUTO METER PRODUCTS, INC. 413 W. Elm St., Sycamore, IL 60178 USA (815) 899-0801 Email us at Rev. A 6/20/07 2007 Auto Meter Products, IncSender Select ChartThe fuel LEVEL gauge can be custom calibrated to accurately display the output from any fuel LEVEL sender with an output between 0 and 270 Make sure the fuel LEVEL sender is connected to the gauge and the fuel tank is empty, or nearly empty, before Connect a Radio Shack 275-1556 or equivalent momentary button to the black and brown wires (see illustration on previous page), or alternately touch the stripped ends of the black and brown wires to simulate pushing the Press and hold the button, and apply power to the gauge .
9 After 10 seconds, the display will momentarily display a number with a dash on either side indicating the gauge is in sender select mode. The display can be incremented to the next position by momentarily pressing the button. Allow the display to reach -8- and release the push button. 4. Remove power from the gauge to enter custom calibration Re-Apply power to the gauge . The gauge will display CC indicating that the empty calibration point can be With an empty, or nearly empty tank, capture the empty calibration point by momentarily (less than one second) pushing the button. After 1 second, the gauge will display Fill the tank and momentarily (less than one second) push the button to capture the full calibration point.
10 After approximately one second, the gauge will reset, and begin reading the fuel LEVEL per the custom Confirm that the gague reads the proper fuel If the the proper fuel LEVEL is not indicated, return to step 3 and Remove the momentary button if it was used, and tape the ends of the brown and black wires so they will not Coil the wires up under the Sender Type DisplayFord Pre- 89, Chrysler 73 - 10 ohms -1-Ford 89 - Present 16 - 158 ohms -2-GM Pre- 65 0 - 30 ohms -3-GM 65 - Present* 0 - 90 ohms -4-Auto Meter Sender 240 - 33 ohms -5-Eclipse 90 - 02, Civic 88 - 00 - 7 ohms -6-Civic 01 - Present 131 -12 ohms -7-Custom Calibration -8-Custom Sender CalibrationSender Error If no sender is connected, the gauge will display E.