Transcription of Installation Instructions - Huber Engineered Woods
1 Installation InstructionsComposItIon & materIalsHuber Engineered Woods (HEW) is committed to the responsible use of natural resources. AdvanTech panels are produced from young, fast-growing trees for less waste and faster availability. All parts of the log are used during production. Leftover chips, bark and sawdust are used as fuel to reduce energy use during manufacturing. CertIfICatIon & Code ComplIanCe The International Code Council (ICC) Evaluation Service (ES) provides technical evaluations of building products for manufacturers that want to validate and qualify their products as having superior design properties. For years, HEW has maintained an ICC-ES report for its Engineered wood subfloor, AdvanTech flooring, to elevate it from other subfloors that only meet the PS-2 industry standard.
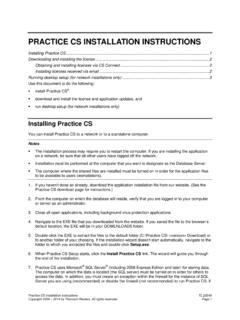
2 The result? AdvanTech flooring was issued the Evaluation Service Report, ESR-1785, certifying that it has endured a battery of testing protocols that measure and ensure greater and consistent levels of panel strength, stiffness and fastener holding For additional information, go to flooring and sheathing panels, certified to be in conformance with requirements for Department of Housing and Urban Development (HUD-FHA) Use of Materials Bulletin #40C, bear the designation HUD-UM-40C within the spreadAdvanTech flooring and sheathing panels are recognized as having a Class C (III) flame spread rating without need for test or label by HUD/ FHA Manual of Acceptance Practices, Section 405-8 to the Minimum Property Ship panels under tarp. Set bundles on three supports to keep off the ground.
3 Outdoors, cover panels loosely with waterproof protective material. Anchor covers on the top of the stack, but keep away from sides and bottom for good air circulation. When high moisture exists, cut banding on the stack to prevent edge Avoid dropping panels on corners or edges. When using a forklift, put the stack on a pallet or supports to minimize damage from panels should not be used in applications that will expose the panels to weather permanently. AdvanTech panels are not approved or certified for exterior exposure. Classified as Exposure 1 under PS-2, AdvanTech panels are intended to resist the effects of moisture due to construction delays or other conditions of similar severity, but are not suitable for permanent InformationSquare Edge Panel Size: 4' x 8'Tongue & Groove Panel Size: 4' x 8' (Actual face dimensions for tongue & groove panel are approximately 47-1/2" x 95-7/8")Edge: Tongue & grooveCustom: Specialty sanding and cut sized are available on request.
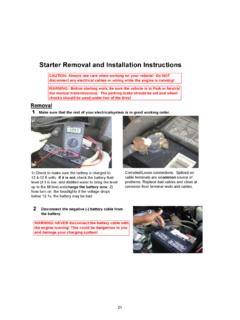
4 Inquiries will be handled on an individual basis. Flooring Mill SpecificationsMillPanel Thickness (in)Approx.* Weight Per PanelPanels Per Unit Easton, MECommerce, GA Crystal Hill, VABroken Bow, OK19/32 23/3219/32 23/32 7/819/32 23/32 7/8 1 1 1/819/32 23/32 7/8 1 1 1/861 lbs. 72 lbs. 78 lbs. 94 lbs. 78 lbs. 94 lbs. 110 lbs. 124 lbs. 85 lbs. 100 lbs. 108 lbs. 126 pcs. 45 pcs. 45 pcs. 40 pcs. 45 pcs. 40 pcs. 35 pcs. 30 pcs. 45 pcs. 40 pcs. 35 pcs. 30 pcs.* Estimated panel weight. Actual weight may vary by mill. Apply two lines of adhesive to joists where panel ends one: foCus on safetyMake sure the floor framing system is properly fastened to the supporting walls, beams, girders or other supports and is properly braced against rollover during floor panel Installation . See floor joist or truss manufacturer Installation Instructions for additional information.
5 Follow all OSHA regulations and any other safety guidelines and safety practices during Installation and two: glue panelsHEW recommends using polyurethane or solvent-based subfloor adhesives that conform to industry standard APA AFG-01 or ASTM D 3498, and follow manufacturer s recommendations when installing AdvanTech flooring. Recommended adhesives structurally bond the panel to the joist for a stronger, stiffer Installation than panels installed with fasteners alone. Panels should span two or more floor joists with the long dimension perpendicular to the floor framing. Apply a 1/4-inch bead of adhesive to the top of the floor joists. The adhesive fills minor framing irregularities and provides a tight, even bond that helps prevent tHree: JoInIng & spaCIngSome installers choose to run a 1/8-inch bead of adhesive in the groove.
6 Using too much will cause squeeze-out. The practice of gluing the tongue & groove (T&G) edge is at the builder s discretion and does not affect any AdvanTech flooring after applying the adhesive, lower the first panel into place, making sure the panel is square on the joists and the certification stamp is face down for easy viewing by local building not install floor panels at temperatures below 20 F (-7 C) or above 100 F (38 C). Adhesive performance could be affected outside of these ranges, causing squeaks or other problems. Adhesive should come to room temperature before use. Store adhesives as directed by adhesive manufacturer. Apply only enough adhesive to lay one or two panels at a time to keep the adhesive from curing or a skin forms on the glue, remove it and reapply to avoid customer complaints and costly reCommendatIonsATTENTION: This Installation guide is intended to provide general information for the designer and end user.
7 The following guidelines will help you safely and properly install the AdvanTech flooring. We urge you, and anyone installing this product, to read these guidelines to minimize any risk of safety hazards and prevent voiding any applicable warranties. This manual is a general Installation guide and does not cover every Installation condition. Proper Installation shall be deemed to mean the most restrictive requirement specified by Huber Engineered Woods (HEW), local building code, engineer or architect of record, or other authority having jurisdiction. You are fully and solely responsible for all safety requirements and code compliance. For additional information, contact up squeeze-out immediately. This saves you costly dried glue cleanup and possible delays for your finished floor installer who needs a smooth surface.
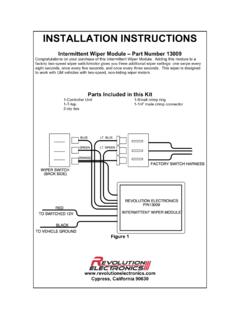
8 Step four: fasten tHe panelInstall ALL required fasteners (edges and intermediate) prior to adhesive skinning or curing. DO NOT sequence fastener installations starting at corners followed by a later stage Installation at edges and intermediate locations. ALL fasteners must be installed while subfloor adhesive is still end joints of adjacent panel runs. T&G edges are designed to the T&G edges together using wood blocks and a framing hammer. Avoid excessive force that can damage the tongue or groove. (Damaged tongues or grooves can give the appearance of edge swell and may require costly sanding and blocking.)DO NOT use a sledge hammer to beat panels together!Code-approved fasteners must penetrate framing members at least one inch. For panels up to 3/4-inch thick, use 8d ring shank nails, screw shank nails or #8 wood screws.
9 For panels greater than 3/4-inch thick, use 10d ring shank nails, screw shank nails or #9 wood FASTENErS: Start at one corner. Work your way to the remaining edges. Maintain a maximum edge distance of 3/8-inch to 1/2-inch. Heads should slightly penetrate the panel surface. Maintain a maximum spacing of 6-inch on supported edges (4-foot ends). Maintain a maximum spacing of 12-inch at intermediate support AdvanTech flooring pre-printed fastener guides for attachment to joists spaced at 16-inch , and 24-inch 1 1/8-inch panels with joists spaced greater than 24-inch , space fasteners a maximum of 6-inch at edges and intermediate + the next panel and all additional panels, space 4-foot panel ends and other cut edges with a recommended 1/8-inch gap 8d nails make good SErvICE CONdITIONSC rawlspace foundations shall have durable ground cover vapor barriers installed and may be vented or unvented.
10 All foundations must be constructed in accordance with the applicable code. In addition, panels should be acclimated to end use service conditions before applying necessary finish FlOOr INSTAllATIONDo not use water sealers on AdvanTech flooring. Doing so will void the warranty. AdvanTech flooring panels must be dry and clean prior to finished floor Installation . NOTE TO FINISh FlOOrING INSTAllEr: The dimensional stability and no-sand guarantee of AdvanTech flooring does not relieve you from the responsibility of making sure the subfloor is in suitable condition for successful Installation of the particular type of finish flooring being installed. Subfloor preparation may include practices such as making sure fastener heads are properly seated flush with the panel, scraping adhesives and drywall joint compound, applying floor leveler, installing underlayment, repairing damaged subfloor or irregular framing and minor surface levelling if needed, etc.