Transcription of INSTRUCTION MANUAL INSTRUCTION MANUAL
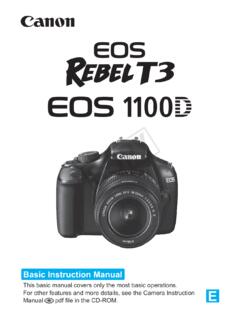
1 EINSTRUCTION MANUALEINSTRUCTIONMANUALCOPY2 Thank you for purchasing a Canon EOS 7D is a high-performance, digital SLR camera featuring a fine-detail CMOS sensor with about effective megapixels, Dual DIGIC 4 , approx. 100% viewfinder coverage, high-precision and high-speed 19-point AF (all cross-type), approx. 8 fps continuous shooting, Live View shooting, and Full HD (Full High-Definition) movie shooting. The camera is highly responsive to any shooting situation at anytime, provides many features for demanding shoots, and expands shooting possibilities with system a Few Test Shots to Familiarize Yourself with the CameraWith a digital camera, you can immediately view the image you have captured. While reading this MANUAL , take a few test shots and see how they come out. You can then better understand the avoid botched pictures and accidents, first read the Safety Warnings ( ,262) and Handling Precautions ( ,13).Testing the Camera Before Using and LiabilityAfter shooting, playback and check whether the image has been properly recorded.
2 If the camera or memory card is faulty and the images cannot be recorded or downloaded to a computer, Canon cannot be held liable for any loss or inconvenience laws in your country may prohibit the use of your recorded images of people and certain subjects for anything but private enjoyment. Also be aware that certain public performances, exhibitions, etc., may prohibit photography even for private CardIn this MANUAL , card refers to the CF card. The CF card (for recording images) is not included. Please purchase it starting, check that all the following items have been included with your camera. If anything is missing, contact your dealer.* Battery Charger LC-E6 or LC-E6E is provided. (The LC-E6E comes with a power cord.) If you purchased a Lens Kit, check that the lens is included. Depending on the Lens Kit type, the lens INSTRUCTION MANUAL might also be included. Be careful not to lose any of the above Check ListBattery Pack LP-E6(with protective cover)Battery ChargerLC-E6/LC-E6E*Interface CableIFC-200 UStereo AV CableAVC-DC400 STEOS DIGITAL Solution Disk(Software)Software INSTRUCTION MANUAL (1) INSTRUCTION MANUAL (this booklet)(2)Pocket GuideQuick start guide to shooting.
3 (3) CD-ROM GuideGuide to the provided software (EOS DIGITAL Solution Disk) and Software INSTRUCTION (with eyecup and body cap)Wide StrapEW-EOS7 DCOPY4 Icons in this MANUAL <6>: Indicates the Main Dial.<5>: Indicates the Quick Control Dial.<9>: Indicates the Multi-controller.<0>: Indicates the setting , 9, 7, 8: Indicates that the respective function remains active for 4 sec., 6 sec., 10 sec., or 16 sec. respectively after you let go of the button.* In this MANUAL , the icons and markings indicating the camera s buttons, dials, and settings correspond to the icons and markings on the camera and on the LCD : Indicates a function which can be changed by pressing the <M> button and changing the : When shown on the upper right of the page, it indicates that the function is available only when the Mode Dial is set to d, s, f, a, or F.* Function which cannot be used in the fully-automatic modes (1/C).(p.**) : Reference page numbers for more information.: Tip or advice for better shooting.
4 : Problem-solving advice.: Warning to prevent shooting problems.: Supplemental Assumptions All operations explained in this MANUAL assume that the power switch is already set to <1> ( ). <5> operations explained in this MANUAL assume that the Quick Control Dial switch is already set to <J>. It is assumed that all the menu settings and Custom Functions are set to the default. For explanatory purposes, the instructions show the camera attached with an EF-S15-85mm IS USM Used in this ManualCOPY5 For first-time DSLR users, Chapters 1 and 2 explain the camera s basic operations and shooting Started23 Basic ShootingFully automatic Settings57 Setting the AF and Drive Modes83 Advanced OperationsAdvanced shooting View shootingShoot while viewing the LCD Movies149 Image Playback161 Sensor Cleaning183 Printing Images189 Customizing the Camera203 Reference227123456789101112 COPY6312 IntroductionItem Check 3 Conventions Used in this MANUAL .. 4 Chapters .. 5 Index to Features.
5 10 Handling Precautions .. 12 Quick Start Guide .. 14 Nomenclature .. 16 Getting Started23 Charging the Battery .. 24 Installing and Removing the 26 Turning on the Power .. 27 Installing and Removing the CF 29 Attaching and Detaching a Lens .. 31 About the Lens Image 33 Basic Operation .. 34Q Using the Quick Control Screen .. 383 Menu Operations .. 40 Before You Start .. 42 Setting the Interface Language .. 42 Setting the Date and 42 Formatting the Card .. 43 Set the Power-off Time/Auto Power Off .. 44 Reverting the Camera to the Default 45 Displaying the Grid and Electronic 47 Basic Shooting491 Fully Automatic Shooting .. 501 Full Auto 52C Creative Auto 53 Setting the Image Review Time .. 56 Image Settings57 Setting the Image-recording Quality .. 58i: Setting the ISO 62 ContentsCOPY7 Contents54A Selecting a Picture Style ..64A Customizing a Picture Style ..66A Registering a Picture : Setting the White Balance ..70O Custom White Setting the Color Temperature.
6 72u White Balance Correction ..73 Auto Lighting Optimizer ..75 Lens Peripheral Illumination Correction ..76 Creating and Selecting a Numbering Methods ..80 Setting the Color Space ..82 Setting the AF and Drive Modes83f: Selecting the AF Selecting the AF Area ..87AF Area Selection Modes ..89 When Autofocus Fails ..92MF: MANUAL Focusing ..92i Selecting the Drive Mode ..93j Using the Self-timer ..94 Advanced Operations95d: Program AE ..96s: Shutter-Priority AE ..98f: Aperture-Priority AE ..100 Depth of Field Preview ..101a: MANUAL Selecting the Metering Mode ..103 Setting Exposure Auto Exposure Bracketing (AEB) ..105A AE Lock ..106F: Bulb Exposures ..107 Mirror Lockup ..109R Remote Control Using the Built-in Flash ..111 COPY8 Contents9678 Setting the Flash .. 115 Using Wireless 119 External Speedlites .. 129 Live View Shooting131A Live View 132 Shooting Function 135z Menu Function 136 Using AF to Focus .. 138 Focusing 145 Shooting Movies149k Shooting 150 Shooting Function 155x Menu Function Settings.
7 156 Image Playback161x Image 162B Shooting Information 163HI Searching for Images Quickly .. 165u/y Magnified 167b Rotating the Image .. 168k Enjoying Movies .. 169k Playing Movies .. 171X Editing the Movie s First and Last Scenes .. 173 Slide Show (Auto Playback).. 174 Viewing the Images on 176K Protecting 178L Erasing 179 Changing Image Playback 181 Adjusting the LCD Monitor Brightness .. 181 Auto Rotation of Vertical Images .. 182 Sensor Cleaning183f Automatic Sensor Cleaning .. 184 Appending Dust Delete 185 MANUAL Sensor Cleaning .. 187 COPY9 Contents101112 Printing Images189 Preparing to Print .. the Image ..197W Digital Print Order Format (DPOF) ..199W Direct Printing with the Camera203 Setting Custom Functions ..204 Custom Functions ..205 Custom Function Settings .. I : Exposure .. II : Image .. III : IV : My Menu ..222w Register Camera User Copyright Button the Battery Information ..230 Using a Household Power Outlet ..234 Replacing the Date/Time Battery.
8 235 Function Availability Table ..236 Menu Settings ..238 Troubleshooting Guide ..243 Error Map ..250 Specifications ..252 Safety Warnings ..261 Index ..270 COPY10 Power Battery Charging Battery check Battery information check Power outlet Auto power off Attaching/Detaching Zoom Image Stabilizer Settings (Menu Functions) Language Date/Time LCD brightness adjustment Beeper Release shutter without card Images Format Create/select a folder File No. Quality Image-recording quality One-touch RAW+JPEG ISO speed Picture Style White balance Color space Image improvement features Auto Lighting Optimizer Lens peripheral illumination correction Noise reduction for long exposures Noise reduction for high ISO speeds Highlight tone priority AF mode AF point selection AF area selection mode Limited MANUAL focusing Metering mode Drive modes Maximum burst Electronic level Creative Auto Program AE Shutter-priority AE Aperture-priority AE MANUAL exposure Bulb Mirror lockup Quick Control screen to FeaturesCOPY11 Index to Features Self-timer Remote control adjustment Exposure compensation AEB AE lock Built-in flash Flash exposure compensation FE lock External flash Flash control Wireless flash View shooting Live View shooting AF MANUAL focusing Exposure simulation Grid display Silent shooting
9 Shooting Movie shooting Movie menu Stills playback Image review time Single image display Shooting information display Movie playback Movie first/last scene editing Index display Image browsing (Jump display) Magnified view Auto playback Viewing the images on TV Protect Erase Custom Function ( ) Custom Controls My Menu Camera user setting registration cleaning/Dust reduction Sensor cleaning Add Dust Delete Data Dioptric adjustment Grid display Electronic level Care This camera is a precision instrument. Do not drop it or subject it to physical shock. The camera is not waterproof and cannot be used underwater. If you accidentally drop the camera into water, promptly consult your nearest Canon Service Center. Wipe off any water droplets with a dry cloth. If the camera has been exposed to salty air, wipe it with a well-wrung wet cloth. Never leave the camera near anything having a strong magnetic field such as a magnet or electric motor.
10 Also avoid using or leaving the camera near anything emitting strong radio waves such as a large antenna. Strong magnetic fields can cause camera misoperation or destroy image data. Do not leave the camera in excessive heat such as in a car in direct sunlight. High temperatures can cause the camera to malfunction. The camera contains precision electronic circuitry. Never attempt to disassemble the camera yourself. Use a blower to blow away dust on the lens, viewfinder, reflex mirror, and focusing screen. Do not use cleaners that contain organic solvents to clean the camera body or lens. For stubborn dirt, take the camera to the nearest Canon Service Center. Do not touch the camera s electrical contacts with your fingers. This is to prevent the contacts from corroding. Corroded contacts can cause camera misoperation. If the camera is suddenly brought in from the cold into a warm room, condensation may form on the camera and internal parts. To prevent condensation, first put the camera in a sealed plastic bag and let it adjust to the warmer temperature before taking it out of the bag.