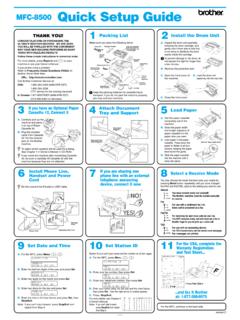
Transcription of MFC-L2700DW Basic User's Guide DCP-L2520DW DCP ... - …
1 Basic User's GuideDCP-L2500 DDCP-L2520 DWDCP-L2540 DNMFC-L2700 DNMFC- l2700dw Online User's GuideFor more advanced instructions and information,see the Online User's Guide you need to call Customer ServicePlease complete this information for future reference:Model Number:(Circle your modelnumber)DCP-L2500D/ DCP-L2520DW /DCP-L 2540DN/MFC-L2700DN/MFC-L2700 DWSerial Number: 1 Date of Purchase:Place of Purchase:1 The serial number is on the back of the machine. Retain this User s Guide with your salesreceipt as a permanent record of your purchase, in the event of theft, fire or your product on-line registering your product with Brother, you will be recorded as the originalowner of the product. Your registration with Brother: may serve as confirmation of the purchase date of your product should youlose your receipt; may support an insurance claim by you in the event of product losscovered by insurance; and, will help us notify you of enhancements to your product and special most convenient and efficient way to register your new product is onlineat 2015 Brother Industries, Ltd.
2 All rights the Latest Driver UpdatesGo to your model's Downloads page on the Brother Solutions Center to download keep your machine s performance up-to-date, check there for the latest firmware Online User's Guide Helps You Get the MostOut of Your MachineQuicker navigation!Search boxNavigation index in a separate panelComprehensive!Every topic in one guideSimplified Layout!Provides step-by-step instructionsFeature summary at the top of the page12341. Search Box2. Navigation3. Summary4. Step-by-StepWhere can I find this manual?(Windows )Click (Start) > All Programs > Brother > Brother Utilities > Brother MFC-XXXX series >Support > User s Guides.(Windows 8)Tap or click (Brother Utilities) > Brother MFC-XXXX series > Support > User s Guides.(Select your model from the drop-down list if not already selected.)(Macintosh or other options)Go to your model's Manuals page on the Brother Solutions Center at download you have questions or problems, please take alook at our several ways to search!
3 Displays related questions for more informationReceives regular updates based on customer feedbackSince the Brother Solutions Center is updated regularly, this screen shot is subject to changewithout can I find these FAQs?Brother Solutions of NotesWe use the following symbols and conventions throughout this User's Guide : WARNINGWARNING indicates a potentially hazardous situation which, if not avoided, could result indeath or serious injuries. CAUTIONCAUTION indicates a potentially hazardous situation which, if not avoided, may result in minoror moderate indicates a potentially hazardous situation which, if not avoided, may result indamage to property or loss of product specifies the operating environment, conditions for installation, or special conditions icons provide helpful hints and supplementary Hazard icons alert you to possible electrical Hazard icons alert you to the possibility of a Surface icons warn you not to touch hot machine icons indicate actions you must not style identifies buttons on the machine's control panel or computer style emphasizes an important point or refers you to a related topic.
4 [Courier New]Courier New font identifies messages shown on the machine's and Publication NoticeThis manual has been compiled and published to provide the latest product safety information atthe time of publication. The information contained in this manual may be subject to the latest manual, visit us at 1 Control Panel Brother the Date and the Ring Volume ..9 Adjust the Beeper Volume ..9 Adjust the Speaker Volume ..92 Paper and Print using the Paper Tray ..11 Set the Check Size ..12 Change the Paper Size ..12 Change the Paper Print Special 15 Print from Your Computer (Windows )..15 Print a Document (Windows )..15 Print on Both Sides of the Paper (Windows ) ..15 Print More Than One Page on a Single Sheet of Paper (N in 1)(Windows )..16 Printing on Envelopes, Thick Paper, or on Plain Paper, Thin Paper, Recycled Paper, or Bond Paperusing the Manual Feed .. 21 Copy a Multiple Pages on Both Sides of the a 2-sided Document Using the Scanner Glass.
5 25 Copy Both Sides of an ID Card onto One Page .. 28 Scan from Your Computer (Windows )..28 Save Scanned Documents and Photos to a Folder as a PDF File UsingControlCenter4 Advanced Mode (Windows ) ..28 Scan Using the Scan Button on Your Brother of ContentsviScan Using the Scan Button on the Machine .. 31 Before Your Station ID ..31 Set telephone Line Compatibility for Interference and VoIP Systems ..32 Receive the Correct Receive the F/T Ring Time (Fast Double-ring)..36 Set the Number of Rings Before the Machine Answers (Ring Delay) ..36 Store Numbers ..37 Store One Touch Dial Speed Dial or Delete One Touch Dial Numbers ..37 Change or Delete Speed Dial Numbers ..38 telephone Services and External Mail ..39 Voice Over Internet Protocol (VoIP)..39 Connection of an External telephone Answering Device (TAD)..39 External and Extension Telephones ..39 Send and Receive a Fax Using Your a Fax ..40 Fax Using Your Computer (PC-FAX).
6 42 Send Faxes from Your Computer ..42 Receive Faxes on Your Computer (Windows only) .. 44 Identify the and Maintenance and telephone for Other Fax or Scan and Paper the Jammed Document or the Document the Paper 61 How to Enter Text on Your Brother Machine .. 64viiControl Panel OverviewThe control panel will vary depending on your One Touch buttonsStore and recall up to eight fax and telephone access stored One Touch fax and telephone numbers 1-4, press the One Touch buttonassigned to that number. To access stored One Touch fax and telephone numbers 5-8, holddown Shift as you press the Fax buttonsRedial/PausePress to dial the last number you called. This button also inserts a pause whenprogramming quick dial numbers or when dialling a number Tel/R to have a telephone conversation after picking up the external handset duringthe F/T fast connected to a PBX, use this button to gain access to an outside line, to recall anoperator, or to transfer a call to another WiFi (for wireless models)Press the WiFi button and launch the wireless installer on your computer.
7 Follow the on-screen instructions to set up a wireless connection between your machine and your the WiFi light is on, your Brother machine is connected to a wireless access the WiFi light blinks, the wireless connection is down, or your machine is in the processof connecting to a wireless access (for certain models only)Press to change the Fax Information1 General Information14. Liquid Crystal Display (LCD)Displays messages to help you set up and use the the machine is in Fax Mode, the LCD displays:baFax Only01/01 12:00a. Date & Timeb. Receive ModeWhen you press COPY, the LCD displays: defgc100% AutoStack Copies:01c. Type of copyd. Number of copiese. Qualityf. Contrastg. Copy ratio5. Mode buttonsFAXP ress to switch the machine to FAX to switch the machine to SCAN to switch the machine to COPY Copy buttonsOptionsPress to access temporary settings for in 1 (ID) CopyPress to copy both sides of an identification card onto a single to copy on both sides of a sheet of Menu buttonsClearPress to delete entered data or cancel the current to access the Menu for programming your machine to store your machine or cPress to scroll back or forward through menu or b Press to scroll up or down through menus and options.
8 Press to change the resolution in Fax to access speed dial Dial Pad Use to dial fax and telephone numbers. Use as a keyboard to enter text or Power On/Off Turn on the machine by pressing . Turn off the machine by pressing and holding . The LCD displays [Shutting Down]and stays on for a few seconds before turning off. If you have an external telephone orTAD connected, it is always Press to stop an operation. Press to exit from a Start Press to start sending faxes. Press to start copying. Press to start scanning illustration is based on 3 4 51. Power On/Off Turn on the machine by pressing . Turn off the machine by pressing and holding . The LCD displays [Shutting Down]and stays on for a few seconds before turning Copy buttonsOptionsPress to access temporary settings for in 1 (ID) CopyPress to copy both sides of an identification card onto a single (for certain models only)Press to copy on both sides of a sheet of ScanPress to switch the machine to Scan WiFi (for wireless models)Press the WiFi button and launch the wireless installer on your computer.
9 Follow the on-screen instructions to set up a wireless connection between your machine and your the WiFi light is on, your Brother machine is connected to a wireless access the WiFi light blinks, the wireless connection is down, or your machine is in the processof connecting to a wireless access Information55. Liquid Crystal Display (LCD)Displays messages to help you set up and use the the machine is in Ready Mode or COPY Mode, the LCD displays: bacde100% AutoStack Copies:01a. Type of copyb. Number of copiesc. Qualityd. Contraste. Copy ratio6786. Menu buttonsMenuPress to access the Menu for programming your machine Press to delete entered data. Press to cancel the current to store your machine or bPress to scroll up or down through menus and Stop/Exit Press to stop an operation. Press to exit from a Start Press to start Press to start scanning Information7 Access Brother UtilitiesBrother Utilities is an application launcherthat offers convenient access to all Brotherapplications installed on your one of the following: (Windows XP, Windows Vista ,Windows 7, Windows Server 2003,Windows Server 2008 and WindowsServer 2008 R2)Click Start > All Programs >Brother > Brother Utilities.
10 (Windows 8 and Windows Server 2012)Tap or Click (Brother Utilities)either on the Start screen or thedesktop. (Windows and WindowsServer 2012 R2)Move your mouse to the lower leftcorner of the Start screen and click (if you are using a touch-baseddevice, swipe up from the bottom ofthe Start screen to bring up the Appsscreen). When the Apps screenappears, tap or click (BrotherUtilities).2 Select Brother MFC-XXXX series(where XXXX is the name of yourmodel).3 Select the operation you want to SetupSet the Date and TimeRelated Models:MFC-L2700DN/MFC-L2700DW1 Press a or b to display the [InitialSetup] option, and then press a or b to display the[Date&Time] option, and then a or b to display the[Date&Time] option, and then the last two digits of the yearusing the dial pad, and then press the two digits for the month usingthe dial pad, and then press the two digits for the day using thedial pad, and then press the time in the 24-hour formatusing the dial pad, and then press the Ring VolumeRelated Models:MFC-L2700DN/MFC-L2700DW1 Press a or b to display the [GeneralSetup] option, and then press a or b to display the [Volume]option, and then press a or b to display the [Ring]option, and then press a or b to display the [High],[Med], [Low], or [Off] option, andthen press the Beeper VolumeRelated Models.