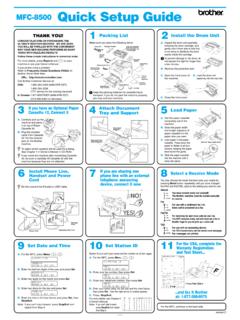
Transcription of Quick Setup Guide Start Here
1 1 Start HereMFC-9130CW / MFC-9330 CDWMFC-9340 CDWQ uick Setup GuideUSA/CAN Version 0 Thank you for choosing brother , your support is important to us and we value your business. Your brother product is engineered and manufactured to the highest standards to deliver reliable performance, day-in and read the Product Safety Guide first, then read this Quick Setup Guide for the correct Setup and installation procedure. To view the Quick Setup Guide in other languages, please visit (MFC-9130CW / MFC-9330 CDW / MFC-9340 CDW) In USA.
2 To download other guides for this product, visit the brother Solutions Center at and click Manuals on your model's the machine and check the componentsNOTENot all models are available in all Unit and Toner Cartridge Assemblies(pre-installed)(Black, Cyan, Magenta and Yellow)Waste Toner Box(pre-installed)CD-ROMAC Power CordTelephone Line CordBelt Unit(pre-installed)Product Safety GuideBasic User's GuideQuick Setup Guide2 WARNING Plastic bags are used in the packing of your machine. Plastic bags are not toys.
3 To avoid the danger of suffocation, keep these bags away from babies and children, and dispose of them correctly. This machine is heavy and weighs more than lb. ( kg). To prevent possible injuries, at least two people should lift the machine. One person should hold the front of the machine, and one person should hold the back, as shown in the illustration below. Be careful not to trap your fingers when you put the machine down. WARNINGWARNING indicates a potentially hazardous situation which, if not avoided, could result in death or serious injuries.
4 CAUTIONCAUTION indicates a potentially hazardous situation which, if not avoided, may result in minor or moderate Keep a minimum gap around the machine as shown in the illustration. The components included in the box may differ depending on your country. We recommend that you save the original packaging. If for any reason you must ship your machine, carefully repack the machine in the original packaging to avoid any damage during transit. The machine should be adequately insured with the carrier. For details on how to repack the machine, see Advanced User's Guide : Packing and shipping the machine.
5 Illustrations in this Quick Setup Guide are based on the MFC-9340 CDW. The interface cable is not a standard accessory. Buy the appropriate interface cable for the connection you want to use (USB or Network (MFC-9330 CDW / MFC-9340 CDW)).USB cable We recommend using a USB cable (Type A/B) that is no longer than 6 feet (2 meters). DO NOT connect the interface cable at this time. Connecting the interface cable is done during the MFL-Pro Suite installation cable (MFC-9330 CDW / MFC-9340 CDW)Use a straight-through Category 5 (or greater) twisted-pair cable for 10 BASE-T or 100 BASE-TX Fast Ethernet mm( in.)
6 400 mm ( in.)150 mm( in.)150 mm( in.)32 Remove the packing material from the machineCAUTIONCAUTIONDO NOT eat the silica gel pack, please throw it away. If ingested, seek medical attention the packing tape from the outside of the machine, the silica gel pack on the support flap and the film covering the scanner open the top cover by lifting the handle up all eight yellow drum locks in the direction of the arrows (the locks may require a firm push).dTake out all four drum and toner cartridge the orange packing piece from the belt NOT connect the AC power cord avoid print quality problems, DO NOT touch the shaded part shown in the the orange packing piece from each drum and toner cartridge both hands, hold each drum and toner cartridge assembly level, and gently shake it from side to side several times to distribute the toner evenly inside the all four drum and toner cartridge assemblies into the machine.
7 Make sure the toner cartridge color matches the same color label on the the top cover of the paper in the paper trayaPull the paper tray completely out of the pressing the green paper- Guide release levera, slide the paper guides to fit the paper size you are loading in the tray. Make sure the guides are firmly in the the stack of paper well to avoid paper jams and - BlackM - MagentaC - CyanY - YellowBKCMY5dLoad paper in the tray and make sure: The paper is below the maximum paper mark (bbb)a. Overfilling the paper tray will cause paper jams.
8 The side to be printed on is face down. The paper guides touch the sides of the paper so it will feed the paper tray firmly back in the machine. Make sure it is completely inserted into the the support flap a to prevent paper from sliding off the face-down output the power cord and telephone lineaConnect the AC power cord to the machine and then plug it into an AC power on the control the telephone line cord: connect one end of the telephone line cord to the jack on the machine marked LINE and the other end to a modular wall information about recommended paper, see Basic User's Guide .
9 Recommended paper and print NOT connect the interface cable NOT touch the Touchscreen immediately after plugging in the power cord or turning the machine on. Doing this may cause an telephone line cord MUST be connected to the jack on the machine marked machine must be grounded using a 3-prong the machine is grounded through the power outlet, you can protect yourself from potentially hazardous electrical conditions on the telephone network by keeping the power cord connected to your machine when you connect it to a telephone line.
10 Similarly, you can protect yourself when you want to move your machine by disconnecting the telephone line first and then disconnecting the power your language (if needed)aPress .bPress All up or down, or press a or b to display Initial Initial up or down, or press a or b to display Local Local your .NOTEIf you are sharing one telephone line with an external telephone, connect it as shown you connect the external telephone, remove the protective capc from the EXT. jack on the telephonebExternal telephonecProtective capNOTEIf you are sharing one telephone line with an external telephone answering machine, connect it as shown you connect the external telephone answering machine, remove the protective capc from the EXT.