Transcription of Software Installation Guide - Ricoh
1 Software Installation Guide This manual explains how to install the Software over a USB or network connection. Network connection is not available for models SP 200/200S/203S/203SF/204SF. To manually configure the wireless LAN setting via Smart Organizing Monitor, first install Smart Organizing Monitor via a USB connection. For details about configuring the wireless LAN set- ting, see Wi-Fi Settings Guide . Flowchart The following flowchart illustrates the Software Installation procedures over USB and network connections. USB Connection Before Installing the Software (Preparing the Necessary Items) (See ).
2 Quick Install for USB (Installing the Software ) (See ). Network Connection (IPv4 Environment). Before Installing the Software (Preparing the Necessary Items) (See ). Selecting the Type and Method of IP Address Configuration (See ). Connecting the Computer and Machine (See ). Printing a Network Setting List (See ). Quick Install for Network (Installing the Software ) (See ). After Installing the Software (Checking the IP Address) (See ). Network Connection (IPv6 Environment). Before Installing the Software (Preparing the Necessary Items) (See ).
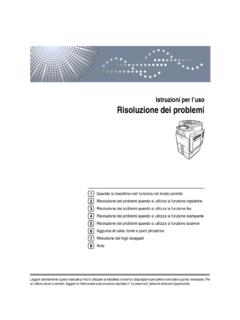
3 Selecting the Type and Method of IP Address Configuration (See ). Connecting the Computer and Machine (See ). Printing a Network Setting List (See ). Configuring the IPv6 Address via Web Image Monitor or Control Panel (See and the User Guide ). Quick Install for Network (Installing the Software ) (See ). After Installing the Software (Checking the IP Address) (See ). 1. 1. Connecting the Computer and Installing the Software (USB Connection). Connect the machine and computer with the USB cable, and then click [USB Quick Install] to install the Software .
4 CTT177. 1. USB Quick Install SP 200, 200N, 200Nw, 201N, 201Nw Install the printer driver and Smart Organizing Moni- tor. SP 200S, 202SN, 203S, 204SN Install the printer driver, TWAIN/WIA driver, and Smart Or- ganizing Monitor. SP 203SF, 203 SFN, 203 SFNw, 204SF, 204 SFN, 204 SFNw Install the printer driver, TWAIN/. WIA driver, PC FAX driver, and Smart Organizing Monitor. Before Installing the Software To install the Software over a USB connection, a USB cable and the supplied CD-ROM are re- quired. 2. Quick Install for USB. Installing the Software .
5 Do not turn the machine on until you have read how to do so. CTT136. Do not connect the USB cable to the machine until a message to do so appears. CXP122. 1. Make sure the machine is off. 2. Turn on the power of the computer. 3. Insert the CD-ROM into the CD-ROM drive. CXP066. 4. Select a language for the interface, and then click [OK]. 3. 5. From the CD-ROM menu, click [USB Quick Install]. 6. Follow the instructions in the Installation wizard. If a message to turn on the power and connect the USB cable appears, do the following: Connect the machine and computer with a USB cable.
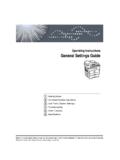
6 CTT137. Turn the power on. CTT061. 4. 2. Connecting the Computer and Installing the Software (Network Connection). Network connection is not available for models SP 200/200S/203S/203SF/204SF. Ethernet and wireless LAN settings cannot be enabled at the same time. Connect the machine and computer with the Ethernet cable, and then click [Network Quick Install (DHCP)] or [Network Quick Install (Fixed IP)] to install the Software . CTT178. 1. Network Quick Install (DHCP). 2. Network Quick Install (Fixed IP). SP 200N, 200Nw, 201N, 201Nw Install the printer driver and Smart Organizing Monitor.
7 SP 202SN, 204SN Install the printer driver, TWAIN/WIA driver, and Smart Organizing Moni- tor. SP 203 SFN, 203 SFNw, 204 SFN, 204 SFNw Install the printer driver, TWAIN/WIA driver, PC. FAX driver, and Smart Organizing Monitor. 5. Before Installing the Software To install the Software over a network connection, a Ethernet cable and the supplied CD-ROM. are required. To automatically obtain the IP address, a router with a built-in DHCP server is re- quired. Selecting the type and method of IP address configuration What is an IP Address?
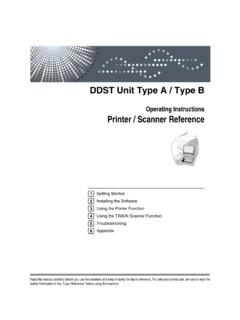
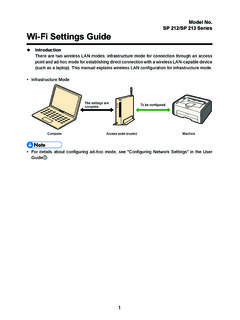
8 The IP address is an identification number allocated to computers and other devices connected to an IP network. An IP address is an address for use on a network. There are two types of IP. address: IPv4 and IPv6. IPv4 address The IPv4 address consists of four fields, such as " ". The first three fields ( ) are fixed, and the last one (113) is variable. 113. 1 2. CTT179. 1. Fixed part 2. Variable part To manage the network, only the variable part needs to be changed. 1. 2 3 4. CTT180. 1. Router 2. Another computer 3. Machine 4.
9 Your computer IPv6 address Because IPv4 addresses are running out as a result of the widespread use of the Internet, IPv6. has been developed as a next generation Internet protocol. 6. What is a DHCP Server? You can configure settings to automatically obtain the IP address from a DHCP server. A DHCP server is required on the network for the machine to receive an IP address automati- cally. Types of IP addresses that can be configured for the machine (1) Configuring the Machine Settings to Obtain an IPv4 Address Automatically (2) Configuring the Machine's IPv4 Address Manually (3) Configuring the Machine Settings to Obtain an IPv6 Address Automatically (4) Configuring the Machine's IPv6 Address Manually Connecting the computer and machine If you use the wireless LAN setting, disconnect the Ethernet cable.
10 1. Connect the Ethernet cable to the Ethernet port. CTT138. 2. Plug the other end of the cable into a network device, such as a hub. 3. Turn on the power. CTT061. 7. Printing a network setting list Before you install the Software , print the network setting list to check the network information. It can take up to two minutes to print the network setting list. Printing a network setting list SP 200N, 200Nw, 201N, 201Nw 1. Hold down the [Start] key. CTT175. Hold the key down for two seconds. SP 202SN, 203 SFN, 203 SFNw, 204 SFN, 204SN, 204 SFNw 1.