Transcription of Tutorial (Beginner level): 3D Model Reconstruction …
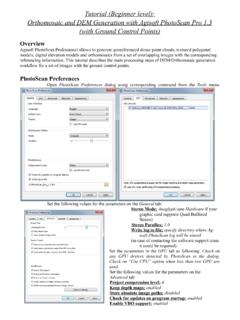
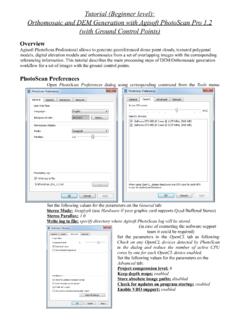
1 Tutorial ( beginner level): 3d model reconstruction with agisoft photoscan photoscan Preferences Open photoscan Preferences dialog from Tools menu using corresponding command. Set the following values for the parameters in the General tab: Stereo Mode: Anaglyph (Hardware mode requires quad-buffered opengl support by GPU). Stereo Parallax: Write log to file: specify directory and file where agisoft photoscan log would be stored (in case of contacting the software support team it could be required). Set the parameters in the OpenCL tab as following: Check on any OpenCL devices detected by photoscan in the dialog and reduce the number of active CPU cores by one for each OpenCL device enabled. Set the following values for the parameters in the Advanced tab: Project compression level: 6 (default). Keep depth maps / Store absolute image paths: disabled Check for updates on program startup: Enabled Enable VBO support: Enabled Add Photos To add photos select Add command from the Workflow menu or click Add Photos button located on Workspace toolbar.
2 In the Add Photos dialog browse the source folder and select files to be processed. Click Open button. Mask Photos To achieve good Reconstruction results it is necessary to mask all irrelevant elements on the source photos (background, turntable, accidental foreground, etc.). Open a photo with an irrelevant element in Photo View double-clicking on the photo in the Photo pane. Choose one of the selection tools from the Toolbar: Rectangular Selection for rectangular shape irrelevant elements; Intelligent Scissors to select irregular shaped area in the photo; Intelligent Paint to paint the selection with the mouse. To mask uniform background of the image use Magic Wand tool. First, click the Magic Wand button on the Toolbar, then click inside the uniform area to be masked. To change the border of the automatically selected area, click inside the area to be added to the selection. Add the selected area to the current mask by clicking the Add Selection button from the main Toolbar.
3 To alter the current mask use other selection tools together with Add Selection / Subtract Selection buttons on the Toolbar. Repeat the described procedure for every photo where background (irrelevant elements) should be masked. Masked areas could be ignored at Align Photos processing stage (Check Constrain features by mask option in Align Photos dialog) and are always ignored at Build Dense Cloud and Build Texture stages. Align Photos At this stage photoscan refines the camera position for each photo and builds the point cloud Model . Select Align Photos command from the Workflow menu. Set the following recommended values for the parameters in the Align Photos dialog: Accuracy: High (higher accuracy setting helps to obtain more accurate camera position estimates. Lower accuracy setting can be used to get the rough camera positions in the shorter time). Pair preselection: Disabled (for faster processing of the big number of photos Generic preselection can be used).
4 Constrain features by mask: Enabled (if the mask covers any moving objects including clouds) or Disabled (if all masked area was static during shooting). Key point limit: 40000. Tie point limit: 1000. Click OK button to start photo alignment. After photo alignment is finished, refine bounding box position and orientation to fit the object: This step is optional since photoscan automatically calculates bounding box dimensions and location. But it is recommended to check if any correction is needed, because geometry Reconstruction step deals only with the point cloud inside the volume. Bounding box is resizable and rotatable with the help of Resize Region and Rotate Region tools. Build Dense Point Cloud Based on the estimated camera positions the program calculates depth information for each camera to be combined into a single dense point cloud. Select Build Dense Cloud command from the Workflow menu. Set the following recommended values for the parameters in the Build Dense Cloud dialog: Quality: Medium (higher quality takes longer time and demands more computational resources).
5 Depth filtering: Aggressive Reuse depth maps flag is available only if you have previously generated dense cloud and Keep depth maps option was turned on in the photoscan Preferences window. Points from the dense cloud can be removed with the help of selection tools and Delete/Crop instruments located on the Toolbar. Build Mesh After dense point cloud has been reconstructed it is possible to generate polygonal mesh Model based on the dense cloud data. Select Build Mesh command from the Workflow menu. Set the following recommended values for the parameters in the Build Mesh dialog: Surface type: Arbitrary Source data: Dense cloud Polygon count: High (The values indicated next to High/Medium/Low preset labels are based on the number of points in the dense cloud. Custom polygon count can be used.). Interpolation: Enabled Click OK button to start geometry Reconstruction . Build Texture This step could be skipped if untextured Model is sufficient as the final result.
6 Select Build Texture command from the Workflow menu. Set the following recommended values for the parameters in the Build Texture dialog: Mapping mode: Generic Blending mode: Mosaic Texture size/count: 4096 x 1 (width & height of the texture atlas in pixels and determines the number of files for texture to be exported to. Exporting texture to several files allows to archive greater resolution of the final Model texture, while export of high resolution texture to a single file can fail due to RAM limitations). Enable color correction: disabled Click OK button to start building texture. Export Model In case the Model should be exported to the file, select Export command from the File menu. In the Save dialog select the folder for the Model to be saved in, print in the file name and choose preferred file type from the list. Click Save button. In the Export Model dialog indicate the desired export parameters. Note that the list of available exporting parameters depends on the selected file format.
7 Note: Exported texture will be stored in the same folder as the 3D- Model with the same file name (file type is selected by user). photoscan supports direct uploading of the models to the Sketchfab and Verold resources. To publish your Model online use Upload command from the File menu. Note: To apply correct Model orientation in space use Rotate Object tool prior to Model upload.
