Transcription of Wi-Fi Settings Guide - Ricoh
1 Wi-Fi Settings GuideStandards and abbreviations Wi-Fi : Wi-Fi is a standard for the connection between devices that have a wireless LAN. The devices supporting this standard can be connected using a wireless ( Wi-Fi Protected Setup): WPS is a standard for encryption Settings for connections between devices that support Wi-Fi . Devices that support this standard can be connected easily using a wireless LAN with : A WPS connection method using a push buttonPIN: A WPS connection method using a PIN codeAP: An access pointAbout the WPS button and connection using a PIN codeDevices that have a WPS button can also be connected using a PIN establish a connection using a PIN code, the configuration screen of the wireless LAN router and the access point must be displayed on the WPS connection security The optimum security for the devices is automatically configured in a WPS connection.
2 Security Settings depend on the connection environment. Accordingly, it cannot be assumed that the configured security setting is the most the WPS button on the access point within two details about how to use the WPS button, refer to the manuals for the wireless LAN router and access name of the button may vary depending on the device you are the has succeeded: Press the [EXIT] key to return to the screen displayed in Step 6, and then press the [User Tools] key to return to the initial you switch the connection method from a wired LAN to a wireless LAN, disconnect the Ethernet cable from the has failed.
3 Press the [EXIT] key to return to the screen displayed in Step 6. Check the configurations for the wireless LAN router and the access point, and then reconnect the router and the access point to the the [EXIT] key, and then press the [User Tools] key to return to the initial the Wi-Fi Settings is next step is to install the printer driver from the provided details, see User Guide on the provided 310 DNw/ 311 DNwThe following operations can be performed only when a WPS connection is configured for the first time. Once a WPS connection is configured, use Smart Organizing Monitor to configure the WPS connection again when changes are added to the access point or other Settings .
4 For details, see "Configuring the Machine Settings ", User Guide and the Smart Organizing Monitor that the wireless LAN router and the access point are working that the USB and LAN cable are not connected to the machine, and then turn on the and Easy Setup Using the WPS ButtonSP 310 SFNw/ 311 SFNwCheck that the wireless LAN router and the access point are working the [User Tools] the [ ] or [ ] key to select [Network Settings ], and then press the [OK] the [ ] or [ ] key to select [ Wi-Fi ], and then press the [OK] the [ ] or [ ] key to select [WPS], and then press the [OK] the [ ] or [ ] key to select [PBC], and then press the [OK] the [Yes] key.
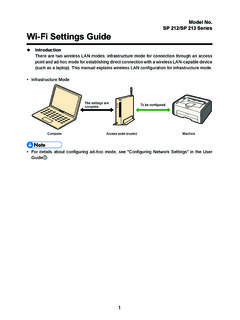
5 "Please push the button of AP within 2 minutes" appears, and the machine starts to connect in PBC manual describes a quick and easy setup using WPS ( Wi-Fi Protected Setup). A quick and easy setup is supported for the following models that have a built-in wireless LAN: Multifunctional printer: SP 310 SFNw/311 SFNw Printer: SP 310 DNw/311 DNwIntroduction This section explains how to connect to the network via a wireless LAN router and an access point as the following illustration shows. First prepare a wireless LAN router and an access point that support Your Wireless Network EnvironmentMake sure your router is connected to the network.
6 Check the specifications of the wireless LAN ro uter and the access point to be connected to. The connection method may vary depending on the specifications of the wireless LAN router and the access point you are details about the specifications of the devices, refer to their 310 SFNw/310 DNwComputerWireless LAN routerTo be Settings are connect directly to a device that has a wireless LAN such as laptop, you need to configure the Settings manually. For details, see the following sections in User Guide on the supplied CD-ROM.* Because of security vulnerability and complexity of the connection procedure, we recommend using a wireless LAN access point for 310 SFNw/311 SFNw: See "Wireless LAN Setup (Type 2 model only)".
7 SP 310 DNw/311 DNw: See "Configuring the Machine Settings " and Smart Organizing Monitor be the device support WPS ( Wi-Fi Protected Setup) ?NoNoYesYesYou need to configure the Settings details about the connection method, see the following sections in User Guide on the supplied CD-ROM: SP 310 SFNw/311 SFNw:See "Wireless LAN Setup (Type 2 model only)". SP 310 DNw/311 DNw:See "Configuring the Machine Settings " and the Smart Organizing Monitor to the following: Multifunctional printer "SP 310 SFNw/311 SFNw" in "2 Quick and Easy Setup Using the WPS Button". Printer "SP 310 DNw/311 DNw" in "2 Quick and Easy Setup Using the WPS Button".
8 Proceed to the following: Multifunctional printer "SP 310 SFNw/311 SFNw" in "3 Quick and Easy Setup Using the PIN Code" Printer "SP 310 DNw/311 DNw" in "3 Quick and Easy Setup Using the PIN Code"The name of the button may vary depending on the device you are you cannot find the WPS button, refer to the manual for the wireless LAN router and the access the device have a WPS button?When the Power indicator is lit, press and hold the [Stop/Start] key for two seconds or Power indicator, Alert indicator, and Toner/Paper End indicator will repeatedly flash in this order, and the machine starts to connect in PBC you press and hold the [Stop/Start] key for more than two seconds, the PIN code will be the WPS button on the access point within two details about how to use the WPS button, refer to the manual for the wireless LAN router and access name of the button may vary depending on the device you are the has succeeded.
9 The Power indicator lights has failed: All the indicators start to flash simultaneously, and after 30 seconds, only the Power indicator lights the configurations of the wireless LAN router and the access point, and then reconnect the router and the access point to the the Wi-Fi Settings is next step is to install the printer driver from the provided details, see User Guide on the provided Settings GuideQuick and Easy Setup Using the PIN CodeTo establish a connection using the PIN code, use a computer that is connected to the wireless LAN router and the access point. For details of the configuration method, refer to manuals for the wireless LAN router and access you switch the connection method from a wired LAN to a wireless LAN, disconnect the Ethernet cable from the 310 SFNw/ 311 SFNwCheck that the wireless LAN router and the access point are working the PIN code configuration screen for the wireless LAN router or the access point on your the [User Tools] the [ ] or [ ] key to select [Network Settings ], and then press the [OK] the [ ] or [ ] key to select [ Wi-Fi ], and then press the [OK] the [ ] or [ ] key to select [WPS]
10 , and then press the [OK] the Wi-Fi Settings is next step is to install the printer driver from the provided details, see User Guide on the provided 310 DNw/ 311 DNwThe PIN code will be printed on paper. Refer to Quick Installation Guide and load paper for print following operations can be performed only when a WPS connection is configured for the first time. Once a WPS connection is configured, use Smart Organizing Monitor to configure the WPS connection again when changes are added to the access point or other Settings . For details, see Configuring the Machine Settings , User Guide and the Smart Organizing Monitor that the wireless LAN router and the access point are working the PIN code configuration screen for the wireless LAN router or the access point on your that the USB and LAN cable are not connected to the machine, and then turn on the the Power indicator is lit, press and hold the [Stop/Start] key for two PIN code will be printed.