
Installation Instructions: Hinge Kit
Installation Instructions: Hinge Kit The Invisidoor hinge kit is designed to offer a durable hinge system for a hidden door with the easiest installation on the market. The hinge was engineered to offer versatility for the Invisidoor universal bookcase which can be hinged left or right for an inswing or an outswing door. The hinge
Download Installation Instructions: Hinge Kit

Information
Domain:
Source:
Link to this page:
Documents from same domain
42826 Steam Box - go.rockler.com
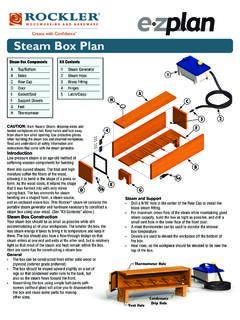
go.rockler.comH 4 E 5b 5a F 3 C 2 1 A B D G Vent Hole Thermometer Hole Condensate Drip Hole Steam Box Plan Kit Contents 1 Steam Generator 2 Steam Hose 3 Brass Fitting 4 Hinges 5 Latch/Clasp
BUILD IT WITH PROJECT PLAN OUTFEED TABLE
go.rockler.comShelving Jig and 1/4" Bit Set 32991. OUTFEED TABLE | PAGE 4 d d 3. ADD STABILITY – AND MOBILITY 4. BUILD THE DRAWERS Assemble the risers for the leveling feet and glue them to the bottom of the case. Attach the leveling feet to the risers with screws. Casters can
CNC Shark Quick-Start Guide
go.rockler.com1. The CNC Shark has three stepper motors, one for each axis of movement: X, Y and Z. Serial cables extending from the motors are marked as such and must be connected to the corresponding ports on the back of the Control Box (i.e., X to X, Y to Y and Z to Z). Be sure to make these connections before supplying power to the Controller Box. 2.

Lift Top Coffee Table - Rockler Woodworking and Hardware
go.rockler.com13. Using the Rockler One-Handed Bar Clamp to hold the jig to the bottom panel surface 14. Drill dowel hole using the 3/8” bit included n Rockler 3/8”DowelingJig 15. Use a vise or the Rockler Sure-foot F-style clamp to hold the doweling jig against the edge of the side panels 16. Drill into the surface of the side panel.

Full-size Deluxe Murphy Bed Plan - Rockler Woodworking and ...
go.rockler.comLocate the center on each end of the solid-wood Leg Support Rail (13) by drawing diagonal lines from corner to corner. Drill a 7/32" hole 11 ... the Female Metal Pivots (29) toward the back of the .

Queen-size Deluxe Murphy Bed Plan
go.rockler.comRead these instructions completely and watch the video included with your Murphy bed hardware before beginning assembly. Note that, because of ... Cut the rounded corners with a jigsaw and sand smooth. Apply Veneer Edge Banding (48) along the top edges and radiused ends. Trim excess. Fig. 1 - Inner Bed Frame 20" 1 1 1 1 2 2 2 1 1 1 1 1 1 1 1 1 ...
Library Ladder Assembly Instructions
go.rockler.comAssembly Instructions Congratulations on your purchase of the Library Ladder Hardware Kit! These instructions will guide you through the process of building a 7-step (8 foot) ladder. Familiarity with the instructions will make the process ... Drill a 7/16" hole for mounting the Aluminum Decorative Spindle (5). 3.
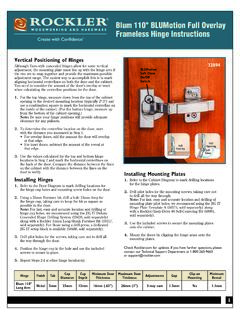
Blum 110 Blumotion Full Overlay Frameless Hinge …
go.rockler.comwith a Rockler/Insty-Drive #6 Self-Centering Bit (68991, sold separately). 3. Use the included screws to secure the mounting plates onto the cabinet. 4. Mount the doors by clipping the hinge arms onto the mounting plates. Hinge Finish Tab Cup Diameter Cup Depth Minimum Door Thickness Maximum Door Thickness Adjustments Gap Clip-on Mounting ...
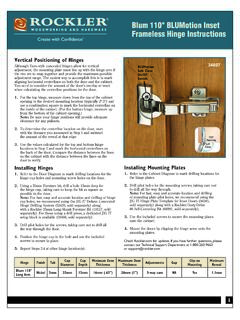
Blum 110° BLUMotion Inset Frameless Hinge Instructions
go.rockler.comsold separately) along with a Rockler/Insty-Drive #6 Self-Centering Bit (68991, sold separately). Use the included screws to secure the mounting plates onto the cabinet. 4. Mount the doors by clipping the hinge arms onto the Hinge Finish Tab Cup Diameter Cup Depth Minimum Door Thickness Maximum Door Thickness Adjustments Gap Clip-on Mounting ...
CNC Shark Quick-Start Guide
go.rockler.comSolid carbide. 1" cutter height, 1/4" shank • Rockler 1/8" Spiral Up-Cut End Mill Item no. 84228 1/2" cutter height, 1/4" shank • Rockler Hold Down Clamp for T-Track Item no. 21912 Aluminum clamp, T-bolt and knob • Rockler Auto Lock T-Track Inline Clamp Item no. 58616
Related documents

FIBERGLASS DOOR SYSTEM Installation Instructions
www.featherriverdoor.comALL HINGE JAMBS: Place additional shims at top of middle hinge (6/8) or hinges (8/0). Install two #9 x 2-1/4" screws (included in installation kit) through the top hinge at the locations shown in Figure 3g. Install one screw through each of the lower two (6/8) or three (8/0) hinges (Figure 3h). Install in holes closest to weatherstrip groove.

Replacement Door Handle Kit Installation: Splendide Washer ...
splendide.comINSTALLATION INSTRUCTIONS PART#090216 - titanium PART#081746 / 082299 - white ... Replacement Door Handle Kit Installation: Splendide Washer-Dryer Step 1: Remove Door From Hinge Remove the two door-to-hinge torx screws. Then, lift the door from the hinge. Step 2: Remove Door Ring Remove the six screws that hold the door ring and handle.
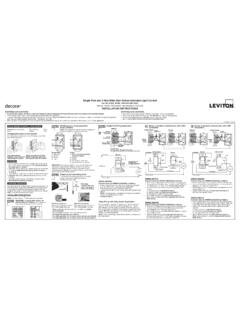
Single Pole and 3-Way Wide View Motion Activated Light …
www.leviton.comINSTALLATION INSTRUCTIONS PK-93978-10-00-2A FEATURES • Cat. For Single Pole No. IPS06 and IPV06 have a sensing area of coverage of 30 IMPORTANT:ft. x 30 ft., O and a sensing angle of 180 (see Sensing Area Coverage figure on page 2). • Adjustable light and time-delay controls are Blaclocated on the front
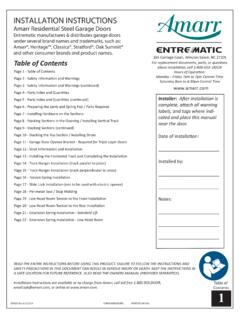
INSTALLATION INSTRUCTIONS - Garage Doors
www.doorson-line.comINSTALLATION INSTRUCTIONS Amarr Residential Steel Garage Doors Entrematic manufactures & distributes garage doors under several brand names and trademarks, such as: Amarr®, Heritage™, Classica®, Stratford®, Oak Summit® and other consumer brands and product names. ©AGD Rev A 6/7/14 FORM #99295090 PRINTED IN USA

Use & Care Guide - Whirlpool
www.whirlpool.comOn coil element models, the installation of a Canning Unit Kit is recommended. If a kit is not installed, the life of the coil element will be shortened. See “Assistance or Service” for ordering instructions. For more information, contact your local U.S. Government Agricultural Department Extension Office. In Canada, contact

69-2631ES 03 - HE360 Humidifier and Installation Kit
www.honeywellstore.comHE360 HUMIDIFIER AND INSTALLATION KIT 69-2631ES—03 6 CAUTION Sharp Edges Installation Hazard. Can cause personal injury. Wear gloves and safety glasses. 1. Turn off power to the air handing system at the circuit breaker. 2. Draw a level line on the plenum in the location chosen for the humidifier. (Leveling assures optimal humidifier ...

Installation Guide - Sub-Zero
www.subzero-wolf.comIf the installation exceeds these elevations, contact an authorized Wolf dealer for a high altitude conversion kit. Gas Supply Installation must comply with local codes, or in the absence of local codes, with the National Fuel Gas Code. Locate the gas supply within the shaded area shown in the illustration on the following page.

REFRIGERATOR USER INSTRUCTIONS
www.kitchenaid.comReset the Door Hinge 1. Lift the door from the bottom hinge pin and place it on a flat surface. 2. Using a driver with a #2 square bit, remove the bottom hinge with the bushing from the cabinet. 3. Insert the bottom hinge and bushing into the corresponding slot in the bottom of the door. NOTE: Make sure that the base of the hinge is parallel to the