Transcription of Digital Backgrounds using GIMP
1 Digital Backgrounds using GIMP GIMP is a free image editing program that rivals the functions of the basic versions of industry leaders such as Adobe Photoshop and Corel Paint Shop Pro. For information on which image editing program is best for your needs, please refer to our website, in the FAQ section. This tutorial was created to teach you, step-by-step, how to remove a subject (person or item) from its original background and place it onto a Foto*Fun Digital background . Upon completing this tutorial, you will have the skills to create realistic portraits plus photographic collages and other useful functions. If you have any difficulties with any particular step in the process, feel free to contact us anytime at How to read this tutorial It is recommended that you use your own image when following the instructions.
2 However, one has been provided for you in the folder entitled "Tutorial Images". This tutorial uses screenshots to visually show you each step of the process. Each step will be numbered which refers to a number within the screenshot image to indicate the location of the function or tool being described in that particular step. Written instructions are first and refer to the following screenshot image. Keyboard shortcuts are shown after most of the described functions and are in parentheses as in the following example (ctrl+T); which would indicate that the "ctrl" key and the letter "T" key should be pressed at the same time. These are keyboard shortcuts and can be used in place of the described procedure; not in addition to the described procedure. This tutorial uses the PC keyboard shortcuts for its examples.
3 Mac users should substitute the "Command" key for the "ctrl" key and likewise should substitute the "Apple" key for the "alt" key. GIMP Installation Procedures The following installation procedures are for PC computer desktops and laptops running Windows XP or later versions. If you are using Linux OS, or an Apple computer, or have not received a disc yet; go to for download and installation procedures, then return to this ebook when finished. To install GIMP on your PC computer, insert purchased disc into the dvd-rom drive on your computer. Go to the file on the disc entitled "GIMP Program" and double-click to open the file. If you are viewing this tutorial from the purchased disc, then you are in the proper folder already. Click on the exe file entitled " " and you will be prompted on how to proceed for installation.
4 If you encounter any installation problems, contact us at Digital Backgrounds Procedures Opening Files, Creating Selections, Copying and Pasting 1. Open your subject image by going File>Open (ctrl+O) . 2. Direct the dialog box to the desired subject image file. 3. Click the Open button. ---------------------------------------- ---------------------------------------- ---------------------------------------- -------- 4. Go to Select>All (ctrl+A) to create a selection around your entire subject image. 5. When the dotted line around the image starts to move, commonly called marching ants , then the image has been selected. ---------------------------------------- ---------------------------------------- ---------------------------------------- ------- 6. Go to Edit>Copy (ctrl+C) to copy the selection area.
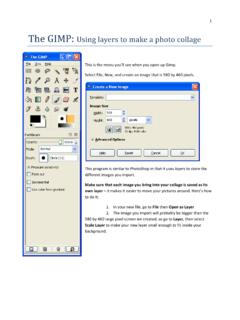
5 ---------------------------------------- ---------------------------------------- ---------------------------------------- ------- 7. Open your background file by going to File>Open (ctrl+O) and directing the dialog box to the desired background file image. 8. For this example, we have used the file entitled "Neutral" within the folder entitled "Full-Length Horizontal Backgrounds " 9. You can also see a thumbnail picture to the right in the Preview Window. 10. Then click on the Open button. ---------------------------------------- ---------------------------------------- ---------------------------------------- ------- 11. Go to Edit>Paste (ctrl+V) to paste your subject file onto the Digital background file. Turning a Floating Layer into a Pasted Layer When you pasted your subject file onto the background file, you created a layer of your subject that was placed over the top of the background layer.
6 To view the layers, GIMP has a Layer Window from which you can see each layer of your image. 1. To view the Layers Window, go to Windows>Layers, Channels, Paths, Undo, Brushes, Patterns, Gradients. 2. The "layers" portion of this window should appear first. If not, select the tab from the window that appears to be transparent pieces of paper stacked on top of each other. 3. When the subject is pasted to the Digital background , it is classified as a floating selection . To enable further editing of the subject layer you must reclassify it as a pasted layer . 4. To turn the floating layer into a pasted layer, click on the New Layer button at the bottom-left of the Layers Window. ---------------------------------------- ---------------------------------------- ---------------------------------------- ------- Moving the subject 1.
7 Make sure the subject s layer is selected within the Layers Window. 2. Select the Move Tool (M) from the Tools Window 3. Make sure the Move active layer is selected in the Move Tool at the bottom of the Tools Window. 4. Place your cursor over the subject, left-click and hold, then drag the subject to the desired location. Resizing Subject and/or Digital background The subject image and the Digital background image will most likely be different sizes; the background being likely the larger of the two. It is important for the purposes of image clarity to reduce the size of the largest of the two elements (subject and background ) to the smaller of the two. Upsizing an image will make it blurry and pixelated. However, you can get away with a very slight enlargement if absolutely necessary.
8 If the Digital background needs to be 1. Make sure the background layer is selected within the Layers Window. 2. Choose the Scale Tool (Shift+T) 3. Place your cursor over any corner of the background image. Left-click and hold to drag the image to the center to create a smaller size. 4. Click Scale in the dialog box to finalize the resizing. Note: If you need to maintain scale ratios of height and width, press and hold the ctrl key while performing this step. If the subject layer needs to be 1. Make sure the subject layer is selected within the Layers Window. 2. Choose the Scale Tool (Shift+T). 3. Place your cursor over any corner of the subject image. Left-click and hold to drag the image to the center to create a smaller size. It is essential when resizing the subject that you maintain the scale ratio by pressing and holding the ctrl key while performing this step.
9 4. Click Scale in the dialog box to finalize the resizing. Removing Original Subject s background 1. To remove the background from the subject, make sure the subject layer is selected within the Layers Window. 2. Select the Eraser Tool (Shift+E) from the Tools Window. You can change the size and other characteristics of the Eraser Tool at the bottom of the Tools Window. 3. Left-click and hold to drag your cursor over the original background to remove it. Get as close as you can to the subject as possible, without getting too detailed. In the next step, we are going to get closer to the subject to make it easier to get the finer remnants of the old background . 4. Go to the Navigation Window (Windows>Dockable Dialogs>Navigation).
10 5. Click on the far-left tab to zoom in to at least 100%. 6. Go over any remaining areas of the subject's original background . Fine-Tuning Subject s Edges 1. Make sure the subject s layer is selected within the Layers Window. 2. Select the Blur Tool (Shift+U). 3. You can change the size and other characteristics of the Blur Tool at the bottom of the Tools Window. If needed, change Brush size to just enough to cover the edge of the subject. 4. Left-click and hold, then drag cursor over the entire edge of the subject. 5. You can easily move the viewable area within the image window by left-clicking and holding over the small square within the Navigation Window and dragging it to the desired point on the image. using Drop-Shadows to Add Realism.