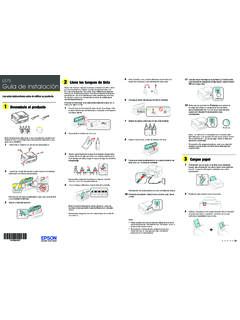
Transcription of Start Here - WF-2750/WF-2760
1 4 2. WF-2750/WF-2760 . Remove only the yellow tape from each ink cartridge. Slide the side edge guides all the way out and set the 2 Turn on and configure front edge guide to the paper size you are using. Start Here 1 Connect the power cord to the back of the product and to an electrical outlet. LTR. Read these instructions before using your product. The illustrations show the WF-2750, but the steps are the same for the WF-2760. Caution: Do not remove any other labels or seals, or ink will leak. 3 Insert paper with the glossy or printable side down. Note for Spanish speakers/Nota para hispanohablantes: Do not touch the green chip on the cartridge. Para obtener instrucciones de configuraci n en espa ol, consulte la Gu a de instalaci n en o 5 Insert the cartridge in the holder for each color. Press each (requiere una conexi n a Inernet). cartridge down until it clicks. Make sure all cartridges are Caution: Do not connect to your computer yet. pushed down into place. 2 Turn on the product.
2 1 Unpack Note: Make sure the paper is loaded against the front edge guide and not sticking out from the end of the cassette. 4 Slide the side edge guides against the paper, but not too 6 Lower the scanner unit. tightly. 3 Select your language, country, date, and time. Note: You can change these settings later using the product's French control panel stickers control panel. For more information, see the online User's Guide. Note: Do not open the ink cartridge packages until you are ready to install the ink. Cartridges are vacuum packed to maintain reliability. 5. 3 Install ink cartridges Keep the cassette at as you insert it all the way. 1 Remove all protective materials from the product. 7 The printer starts charging the ink. Ink charging takes 1 Lift up the scanner unit. approximately 4 minutes. When you see a completion message on the printer's LCD screen, charging is complete. Caution: Don't turn off the printer or raise the scanner unit while the printer is charging or you'll waste ink.
3 Note: The printer is designed for use with Epson cartridges only, not 2 Lift up the scanner unit and remove all protective materials third-party cartridges or ink. 6 Pull out the output tray and its extensions. from inside the product. The cartridges included with the printer are designed for Caution: Do not touch the at, white cable. printer setup and not for resale. After some ink is used for charging, the rest is available for printing. 2 Gently shake the ink cartridges. 4 Load paper 1 Make sure the product is done charging the ink, and then pull out the paper cassette. 7 Select the paper settings on the product's control panel. 3 Lower the scanner unit. For more information on loading different paper types or envelopes, see the online User's Guide. 3 Unpack the ink cartridges. *413163100*. *413163100*. 4131631 4131631 1-F PMS376U 1-F K. 4 2. WF-2750/WF-2760 . Remove only the yellow tape from each ink cartridge. Slide the side edge guides all the way out and set the 2 Turn on and configure front edge guide to the paper size you are using.
4 Start Here 1 Connect the power cord to the back of the product and to an electrical outlet. LTR. Read these instructions before using your product. The illustrations show the WF-2750, but the steps are the same for the WF-2760. Caution: Do not remove any other labels or seals, or ink will leak. 3 Insert paper with the glossy or printable side down. Note for Spanish speakers/Nota para hispanohablantes: Do not touch the green chip on the cartridge. Para obtener instrucciones de configuraci n en espa ol, consulte la Gu a de instalaci n en o 5 Insert the cartridge in the holder for each color. Press each (requiere una conexi n a Inernet). cartridge down until it clicks. Make sure all cartridges are Caution: Do not connect to your computer yet. pushed down into place. 2 Turn on the product. 1 Unpack Note: Make sure the paper is loaded against the front edge guide and not sticking out from the end of the cassette. 4 Slide the side edge guides against the paper, but not too 6 Lower the scanner unit.
5 Tightly. 3 Select your language, country, date, and time. Note: You can change these settings later using the product's French control panel stickers control panel. For more information, see the online User's Guide. Note: Do not open the ink cartridge packages until you are ready to install the ink. Cartridges are vacuum packed to maintain reliability. 5. 3 Install ink cartridges Keep the cassette at as you insert it all the way. 1 Remove all protective materials from the product. 7 The printer starts charging the ink. Ink charging takes 1 Lift up the scanner unit. approximately 4 minutes. When you see a completion message on the printer's LCD screen, charging is complete. Caution: Don't turn off the printer or raise the scanner unit while the printer is charging or you'll waste ink. Note: The printer is designed for use with Epson cartridges only, not 2 Lift up the scanner unit and remove all protective materials third-party cartridges or ink. 6 Pull out the output tray and its extensions.
6 From inside the product. The cartridges included with the printer are designed for Caution: Do not touch the at, white cable. printer setup and not for resale. After some ink is used for charging, the rest is available for printing. 2 Gently shake the ink cartridges. 4 Load paper 1 Make sure the product is done charging the ink, and then pull out the paper cassette. 7 Select the paper settings on the product's control panel. 3 Lower the scanner unit. For more information on loading different paper types or envelopes, see the online User's Guide. 3 Unpack the ink cartridges. *413163100*. *413163100*. 4131631 4131631 1-F PMS376U 1-F K. 4 hen you see the Select Your Connection screen, select W The printer's screen is dark. Need paper and ink? 5 Connect the fax line one of the following and follow the on-screen instructions: Make sure your product is turned on, and press any button to wake it from sleep mode. Wireless connection ry Epson specialty papers with DURAB rite . T.
7 1 onnect a phone cord to a telephone wall jack and to the C In most cases, the software installer automatically Ultra Ink for professional results. You can LINE port on your product. See the online User's Guide attempts to set up your wireless connection. If setup Setup is unable to find my printer after connecting it purchase them at ( for more information. is unsuccessful, you may need to enter your network with a USB cable. sales) or (Canadian sales). You name (SSID) and password. can also purchase supplies from an Epson Make sure your product is securely connected as shown: Direct USB connection authorized reseller. Call 800-GO-EPSON. Make sure you have a USB cable (not included). (800-463-7766). Wired network connection (WF-2760). Make sure you have an Ethernet cable (not included). 5 hen software installation is complete, restart your W. computer. Mobile printing 2 F-2750: Press W. up later. to set up the fax, or press to set it Connect wirelessly from your smartphone, tablet, or computer.
8 Any questions? WF-2750/WF-2760 replacement ink cartridges Print documents and photos from across the room or around the world: Color Standard-capacity High-capacity WF-2760: Press Start to set up the fax, or press Close to Quick Guide set it up later. Print directly from your iPhone, iPad, or iPod touch. Simply Basic information and troubleshooting. Black 220 220XL. connect your printer and device to the same network and Cyan 220 220XL. tap the action icon to print. User's Guide Magenta 220 220XL. Use Epson Print Enabler (free from Google Play ) with Windows: Click the icon on your desktop or Apps screen to 6 Install software Android devices ( or later). Then connect your printer and device to the same network and tap the menu icon to access the online User's Guide. Yellow 220 220XL. Note: If your computer does not have a CD/DVD drive or you print. OS X: Click the icon in Applications/Epson Software/Guide are using a Mac, an Internet connection is required to obtain the to access the online User's Guide.
9 Print remotely with Epson Connect and Google Cloud product software. To print from a Chromebook , go to Print . See your online User's Guide for instructions or If you don't have a User's Guide icon, go to the Epson website, ( ) or (Canada) for instructions. learn more at as described below. 1 ake sure the product is NOT CONNECTED to your M Technical support computer. Any problems? ( ) or (Canada). Network setup was unsuccessful. (562) 276-4382 ( ) or (905) 709-3839 (Canada), 6 am to 8 pm, Pacific Time, Monday through Friday, and 7 am to 4 pm, Pacific Make sure you select the right network name (SSID). Time, Saturday. Days and hours of support are subject to change without notice. Toll or long distance charges may apply. Restart your router (turn it off and then on), then try to connect to it again. Recycling The printer can only connect to a network that supports Epson offers a recycling program for end of life hardware and GHz connections. If your router offers both GHz and ink cartridges.
10 Please go to for Windows : If you see a Found New Hardware screen, click . 5 GHz connections, make sure GHz is enabled. Cancel and disconnect the USB cable. information on how to return your products for proper disposal. If you see a firewall alert message, click Unblock or Allow 2 I nsert the product CD or download and run your product's to let setup continue. software package: If your network has security enabled, make sure you enter WF-2750: your network password (WEP key or WPA passphrase). ( ). correctly. Be sure to enter your password in the correct (Canada). case. WF-2760: ( ) WF-2750: Press a button on the keypad repeatedly to scroll (Canada) through characters (ABC, abc, or 123). 3 ollow the instructions on the screen to run the setup F WF-2760: Press to enter uppercase letters or press 123#. program. to enter numbers or symbols. OS X: Make sure you install Software Updater to receive firmware and software updates for your product. There are lines or incorrect colors in my printouts.