Transcription of STEP 1 STEP 2 - Brother
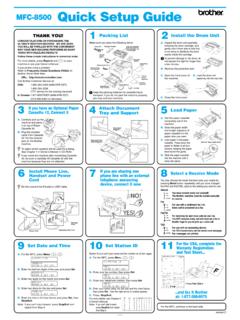
1 step 1 step 2 Setup is Complete!Quick Setup GuideSetting Up the MachineInstalling the Driver & SoftwareMFC-7840W Before you can use the machine, you must set up the hardware and install the driver. Please read this Quick Setup Guide for proper set up and installation this Quick Setup Guide and the supplied CD-ROM in a convenient place for quick and easy reference at all times. Version 0UK/IRE/SAF 1 Symbols used in this guide Warning Caution Improper SetupWarnings tell you what to do to prevent possible personal specify procedures you must follow or avoid to prevent possible damage to the machine or other Setup icons alert you to devices and operations that are not compatible with the machine. Note User's Guide, Software User's Guide or Network User's GuideNotes tell you how you should respond to a situation that may arise or give tips about how the current operation works with other reference to the User's Guide, Software User's Guide or Network User's Guide which is on the CD-ROM we have of Contents1 Getting StartedCarton 2 Control 3 step 1 Setting Up the MachineInstalling the drum unit and toner cartridge 4 Loading paper in the paper tray.
2 5 Install the power cord and phone line .. 6 Setting the date and time .. 7 Setting your station ID .. 8 Tone and pulse dialling mode .. 9 Selecting a receive 9 Setting the phone line 10 Setting the LCD contrast .. 11 step 2 Installing the Driver & SoftwareWindows For USB Interface Cable Users (For Windows 2000 Professional/XP/XP Professional x64 Edition/Windows Vista ) .. 14 For Wired Network Interface Users (For Windows 2000 Professional/XP/XP Professional x64 Edition/Windows Vista ) .. 17 For Wireless Network Interface Users (For Windows 2000 Professional/XP/XP Professional x64 Edition/Windows Vista ) in infrastructure mode .. 20 For Windows Server 2003, see the Network User s Guide on the For USB Interface Cable 29 For Mac OS X or 29 For Wired Network Interface Users .. 31 For Mac OS X or 31 For Wireless Network Interface Users (For Mac OS X or greater) in infrastructure 34 For Network UsersBRAdmin Light utility (For Windows users).
3 43 Installing the BRAdmin Light configuration utility .. 43 Setting your IP address, Subnet Mask and Gateway using BRAdmin Light .. 43 BRAdmin Light utility (For Mac OS X users) .. 44 Setting your IP address, Subnet Mask and Gateway using BRAdmin Light .. 44 Web Based Management (web browser) .. 45 Restoring the network settings to factory default .. 45 Print the Network Configuration 45 Entering text .. 46 Consumables and OptionsConsumables .. 47 Getting Started2 1 1 Carton componentsCarton components may vary from one country to all packing materials and the carton in case for any reason you must ship your bags are used in the packaging of your machine. To avoid danger of suffocation, keep these bags away from babies and children. 1 Automatic Document Feeder (ADF)2 Control Panel3 Face-down Output Tray Support 4 Manual Feed Slot5 Paper Tray6 Front Cover7 Power Switch8 ADF Document Output Support Flap9 Document CoverThe interface cable is not a standard accessory.
4 Please purchase the appropriate interface cable for the interface you intend to use (USB or Network). Do NOT connect the interface cable at this time. Connecting the interface cable is done during the software installation process. USB interface cablePlease make sure you use a USB interface cable that is no longer than 6 feet (2 metres). When you use a USB cable, make sure you connect it to the USB port of your computer and not to a USB port on a keyboard or non-powered USB hub. Network cable Use a straight-through Category 5 (or greater) twisted-pair cable for 10 BASE-T or 100 BASE-TX Fast Ethernet CD-ROMsFor Windows For Macintosh User s Guide Quick Setup Guide AC Power Cord Telephone line Cord Drum Unit Assembly(including Toner Cartridge)Getting Started3 2 Control panelMFC-7840W 1 Copy keys2 Print keys3 One Touch keys4 Shift key5 Mode keys6 Menu keys7 Dial Pad8 Start key9 Stop/Exit key10 LCD (Liquid Crystal Display)11 Fax and Telephone keys For the details of the control panel, see Control panel overview in Chapter 1 of the User s you move the machine, grasp the side handholds that are under the scanner.
5 Do NOT carry the MFC by holding it at the bottom. 51263748 Setting Up the Machine4 step 1 1 1 Installing the drum unit and toner cartridge assemblyImproper SetupDO NOT connect the interface cable. Connecting the interface cable is done when installing the driver. 1 Open the front cover. 2 Unpack the drum unit and toner cartridge assembly. 3 Gently shake it from side to side several times to distribute the toner evenly inside the assembly. 4 Put the drum unit and toner cartridge assembly into the machine. 5 Close the front cover of the machine. Setting Up the Machine5 2 Loading paper in the paper tray1 Pull the paper tray completely out of the machine. 2 While pressing the green paper-guide release lever, slide the paper guides to fit the paper size you are using. Make sure that the guides are firmly in the slots. 3 Fan the stack of paper well to avoid paper jams and misfeeds. 4 Put paper in the paper tray. Make sure that the paper is flat in the tray and below the maximum paper mark (1).
6 CautionMake sure the paper guides touch the sides of the paper so it will feed properly. If you do not this, it may cause damage to your the paper tray firmly back into the machine. Make sure that it is completely inserted into the machine. 1 Setting Up the Machine6 step 1 3 Install the power cord and phone line1 Make sure that the machine s power switch is off. Connect the AC power cord to the machine. 2 Plug the AC power cord into an AC outlet. Turn the power switch on. 3 Connect one end of the telephone line cord to the socket on the machine marked LINE and the other end to a modular wall socket. Warning The machine must be fitted with an earthed plug. Since the machine is grounded through the power outlet, you can protect yourself from potentially hazardous electrical conditions on the telephone network by keeping the power cord connected to your machine when you connect it to a telephone line. Similarly, you can protect yourself when you want to move your machine by disconnecting the telephone line first and then the power you are sharing one phone line with an external telephone, connect it as shown below.
7 NoteIf you are sharing one phone line with an external telephone answering device, connect it as shown below. Please set the receive mode to External more details, see Selecting a receive mode on page 9 and Connecting an external TAD in Chapter 7 of the User s Up the Machine7 4 Setting the date and timeThe machine displays the date and time, and if you set up the station ID, it will add it to each fax you the last two digits of the year on the dial pad, and then press OK. Date&TimeYear:2008( Enter 0, 8 for 2008.)5 Enter the two digits for the month on the dial pad, and then press OK. Date&TimeMonth:03( Enter 0, 3 for March.)6 Enter the two digits for the day on the dial pad, and then press OK. Date&TimeDay:25( Enter 2, 5.)7 Enter the time in 24-hour format on the dial pad, and then press OK. Date&TimeTime:15:25( Enter 1, 5, 2, 5 for 3:25 )8 Press you make a mistake and want to start again, press Stop/Exit and go back to step 1. Setting Up the Machine8 step 1 5 Setting your station IDYou should store your name and fax number to be added on all fax pages that you your fax number (up to 20 digits) on the dial pad, and then press OK.
8 To enter a + for international dialling codes, press l. For example, to enter the UK dialling code +44 , press l, 4, 4, and then the rest of your number. Station IDFax:+44 XXXXXXXXX5 Enter your tel number (up to 20 digits) on the dial pad, and then press OK. (If your telephone number and fax number are the same, enter the same number again.) Station IDTel:+44 XXXXXXXXX6 Use the dial pad to enter your name (up to 20 characters), and then press OK. Station IDName:Note Refer to the following chart for entering your name. If you need to enter a character that is on the same key as the previous character, press to move the cursor to the right. If you entered a letter incorrectly and want to change it, press or to move the cursor to the incorrect character, press Clear/Back. For more details, see Entering Text in the User s timeTwotimesThreetimesFourtimesFive times2 ABC2A3 DEF 3D4GH I 4G5 JKL5J6 MNO 6M7 PQRS 78 TUV8 T9WX Y Z 9 Setting Up the Machine9 6 Tone and pulse dialling mode Your machine comes set for Tone dialling service.
9 If you have Pulse dialling service (rotary), you need to change the dialling or to select Pulse (or Tone).Press Stop/Exit. 7 Selecting a receive modeThere are four possible receive modes: Fax Only, Fax/Tel, Manual and External TAD. Choose the Receive Mode which best suits your needs. 1 Press or to select the mode. Press Stop/Exit. For more details, see Receiving a fax in Chapter 6 of the User s you want to use the telephone features of your machine (if available) or an external telephone or external telephone answering device connected on the same line as the machine?Your machine automatically answers every call as a machine controls the line and automatically answers every call. If the call is not a fax, the phone will ring for you to pick up the external telephone answering device (TAD) automatically answers every call. Voice messages are stored on the external TAD. Fax messages are automatically control the phone line and must answer every call you want the machine to answer fax and telephone calls automatically?
10 ManualFax OnlyFax/TelExternal TADNoYe sYe sNoNoYe sAre you using the voice message function of an external telephone answering device?Setting Up the Machine10 step 1 8 Setting the phone line typeIf you are connecting the machine to a line that features a PABX (PBX) or ISDN to send and receive faxes, it is also necessary to change the phone line type accordingly by completing the following or to choose PBX, ISDN or Normal. Press one of the following: If you choose ISDN or Normal, go to step 8. If you choose PBX, go to step one of the following: If you want to change the current prefix number, press 1 and go to step 6. If you do not want to change the current prefix number, press 2 and go to step default setting is ! . When you press Tel/R, ! will be displayed on the LCD. 6 Enter the Prefix number (up to 5 digits) on the dial pad, and then press can use the number 0 to 9 , # , l and !. (Press Tel/R to display ! .) You cannot use ! with any other numbers or your telephone system requires a timed break recall, press Tel/R to enter the break.