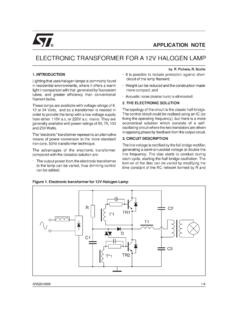
Transcription of Understanding and minimising ADC conversion errors
1 AN1636. APPLICATION NOTE. Understanding AND minimising ADC conversion . errors . By Microcontroller Division Applications 1 INTRODUCTION. The purpose of this document is to explain the different ADC errors and the techniques that application developers can use to minimise them. The ADC ( analog to Digital Converter) is an important peripheral that connects the analog world to the digital world of microcontrollers. In this application note the ADC embedded in the ST7 microcontroller is used as an example, however the same principles to apply to other ADCs. The accuracy of analog to digital conversion has an impact on overall system quality and effi- ciency. To be able to improve accuracy you need to understand the errors associated with the ADC and the parameters affecting them. The ADC itself, cannot ensure the accuracy of results, It depends on your overall system de- sign. For this reason, you need to do some careful preparation before starting your develop- ment.
2 Lots of parameters affect the ADC accuracy depending on the application. Some of these fac- tors are: PCB layout, voltage source, I/O switching and analog source impedance. AN1636/0603 1/42. 1. Understanding AND minimising ADC conversion errors . 1 INTRODUCTION .. 1. 1 WHAT IS AN ADC? .. 4. 2 ADC BLOCK DESCRIPTION .. 6. analog INPUT PINS .. 6. analog MULTIPLEXER .. 8. SAMPLE AND HOLD CIRCUIT .. 9. CONTROL BLOCK .. 11. analog SUPPLY AND REFERENCE .. 11. 3 ADC TERMINOLOGY .. 12. REFERENCE VOLTAGE .. 12. RESOLUTION .. 12. QUANTIZATION .. 13. MONOTONICITY .. 14. BIPOLAR AND UNIPOLAR ADC INPUT .. 14. HARDWARE AVERAGING .. 15. SAMPLING THEOREM .. 15. 4 SOURCES OF ERROR .. 16. POWER SUPPLY NOISE .. 16. POWER SUPPLY REGULATION .. 17. analog INPUT SIGNAL NOISE .. 18. EFFECT OF analog SOURCE RESISTANCE .. 19. EFFECT OF SOURCE CAPACITANCE .. 20. EFFECT OF INJECTION CURRENT .. 24. I/O PIN CROSS-TALK.
3 25. EMI-INDUCED NOISE .. 26. 2/42. 2. Understanding AND minimising ADC conversion errors . 5 DIFFERENT TYPES OF A/D CONVERTER errors .. 27. OFFSET ERROR .. 28. GAIN ERROR .. 29. DIFFERENTIAL LINEARITY ERROR .. 30. INTEGRAL LINEARITY ERROR .. 32. TOTAL UNADJUSTED ERROR .. 33. 6 PCB LAYOUT RECOMMENDATIONS .. 34. 7 HOW POWER SAVING MODES AFFECT THE ADC .. 39. 8 RELATED DOCUMENTATION .. 41. 3/42. 1. Understanding AND minimising ADC conversion errors . 1 WHAT IS AN ADC? An analog to digital converter is a peripheral which converts analog signals in a defined range to the digital outputs. In the real world, signals are mostly available in analog form. To use a microcontroller in this type of system, an ADC is required, so that the signals can be converted to the digital values. The application software can then process the digital outputs and take decisions depending on the application or system requirements.
4 The limitation imposed by the finite number of digital outputs decides how close the output is to the analog input. The more bits there are in the output, the closer the digital result will be to the analog signal. In other words, the resolution of the ADC is defined by the number of bits in the digital result (8 bits, 10 bits etc) and the input voltage range. successive approximation Method Different techniques are available for converting analog signals to digital outputs. The Succes- sive approximation method is the most popular technique. It is also known as successive ap- proximation Register (SAR) technique. This technique uses binary search method. It consists of a high speed comparator, DAC (digital to analog converter), and control logic. Refer to Figure 1. Figure 1. successive approximation Block Diagram VIN. +. Control From Sample - Logic VAREF. and Hold Comparator DAC n bit register Digital Output The SAR starts by forcing the MSB (Most Significant bit) high (for example in an 8 bit ADC it becomes 1000 0000), the DAC converts it to VAREF/2.
5 The analog comparator compares the input voltage with VAREF/2. If the input voltage is greater than the voltage corresponding to the MSB, the bit is left set, otherwise it is reset. 4/42. Understanding AND minimising ADC conversion errors . VAREF is the reference voltage used by ADC for conversions. The details are mentioned in Section After this comparison is done, the next significant bit is set (=VAREF /4) and a comparison is done again with the input voltage. The procedure is followed till all the bit positions are com- pared. At the end of all the bit comparisons we get the corresponding digital output for the analog input. The successive approximation steps are shown in Table 1. As you can see, the digital output obtained from the ADC is B2h when the analog input is Table 1. 8-bit ADC successive approximation steps Steps Vin = , VAREF= 5V. Comparator digital output Digital code DAC output output (for steps).
6 1 1000 0000 1 1000 0000. 2 1100 0000 0 1000 0000. 3 1010 0000 1 1010 0000. 4 1011 0000 1 1011 0000. 5 1011 1000 0 1011 0000. 6 1011 0100 0 1011 0000. 7 1011 0010 1 1011 0010. 8 1011 0011 0 1011 0010. Final output = B2h 5/42. Understanding AND minimising ADC conversion errors . 2 ADC BLOCK DESCRIPTION. Figure 2. ADC Block diagram fCPU DIV 4. 0. fADC. DIV 2 1. (e). VAREF. EOC SPEEDADON 0 CH3 CH2 CH1 CH0 ADCCSR. VSSA. (f). 4. AIN0. AIN1 Sample and successive analog Hold circuit approximation MUX Block (c) (d). AINx (a) (b). ADCDRH D9 D8 D7 D6 D5 D4 D3 D2. ADCDRL 0 0 0 0 0 0 D1 D0. The ADC can be divided into the following blocks. a. analog input pins b. analog multiplexer c. Sample and Hold circuit d. successive approximation block e. Control block f. analog supply/ reference analog INPUT PINS. Several analog input pins are available to connect different analog signals. These are inter- nally multiplexed to use same sample and hold circuit and SAR logic.
7 6/42. Understanding AND minimising ADC conversion errors . Figure 3. Electrical diagram of typical ADC application VDD. VT. RAIN AINx RADC 10-Bit A/D. VAIN conversion CAIN VT. IL CADC. 1 A. Configuring the analog pin Choose any I/O port that has analog input capability (AIN alternate function) and configure it as floating input. You can do this by writing 0' in the DDR and OR register bits of the corre- sponding port. At reset, most of the ST7 IOs are configured by default as floating input. The pin should NOT be configured as floating input with pull-up. This configuration reduces the ADC accuracy. The reason being the potential divider formed between the pull-up resist- ance and RADC. Also some current flows from VDD to the analog source. This current is drawn from the VDD supply. Also there is a potential divider formed between VDD, R PU and R AIN, where RAIN is the series impedance of the voltage source.
8 Figure 4. analog input with pull-up NOT RECOMMENDED. RPU should not be enabled. VDD. \/\/\/\/\/\. Current from VDD RPU. RADC. \/\/\/\/\/ \/\/\/\/\/\/. RAIN. VIN. CADC. VSSA ( analog Ground). Configuring the analog input as floating input with pull-up ( instead of floating input ) will cause more current to be drawn from the V DD is also an affect on the accuracy of the ADC and the digital output converted by ADC may not be accurate. 7/42. Understanding AND minimising ADC conversion errors . analog Pin Input Impedance RADC and CADC (hold capacitor) define the input impedance of the analog pins. RADC is also called as Rss (Resistance of sampling switch and internal trace/resistance). Please refer to the Sample and Hold circuit explanation in Section If the hold capacitor is fully discharged, the minimum input impedance is R ADC. As the hold ca- pacitor starts to charge, the current flowing into the pin will reduce.
9 If the hold capacitor is charged to a level equal to the external voltage there will be only minimal charging current flowing into the analog input. Figure 5. analog input pin Impedance RADC. \/\/\/\/\/\/. Input impedance CADC. Zi = RADC + CADC. VSSA ( analog Ground). The minimum input impedance of the analog pin is thus R ADC. In the datasheet the maximum value of RADC is specified instead of a typical value, so that the user can calculate the affect of external resistance on sampling. This is explained in Section analog MULTIPLEXER. The ADC can have several analog input pins. These pins are connected internally to the An- alog to Digital converter using the analog multiplexer. You can select each pin simply by writing in the appropriate control register. This allows a single Sample and Hold circuit and An- alog to Digital Converter block to be used to convert several analog input sources.
10 This allows you to switch the analog channels and convert them one by one through software control. 8/42. Understanding AND minimising ADC conversion errors . Figure 6. analog multiplexer AIN0. AIN1. AIN2. To Sample and Hold Circuit analog Input AIN7. Channels Channel selection bits = 010 selects AIN2. CH[2:0] = 010. SAMPLE AND HOLD CIRCUIT. The sample and hold circuit samples the input signal and charges the internal hold capacitor CADC to the voltage equal to VIN through RADC. The analog pin is then disconnected and the voltage across the capacitor is then converted to digital code using successive approximation . Figure 7. Sample and Hold circuit Electrically operated switch VIN RADC. \/\/\/\/\/\/. From analog Multiplexer CADC. VSSA ( analog Ground). The sample and hold circuit consists of an electrically operated analog switch, internal charging resistance and hold capacitor.