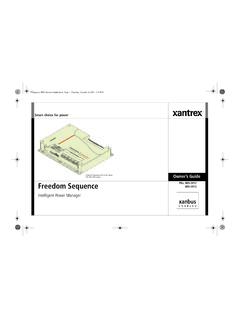
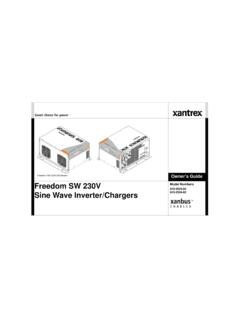
Transcription of Owner's Manual Xantrex Freedom Inverter/Charger Basic …
1 Owner's ManualXantrex FreedomInverter/ChargerBasic RemoteRemote Control PanelManual 4 Setup 7 Error Indications and 8 Control your Xantrex Freedom Inverter/Charger DC system monitoring of DC Volts, Battery charger output current, inverter input current and Battery State Adjustable features of Power Share Battery Type and Idle Modesettings. Additional features on Freedom 458 and Marine Series includeBatteryCapacity setting. Easy to install2 Notice of CopyrightXantrex Freedom Inverter/Charger Basic Remote October 2002 Xantrex International. Allrights SPECIFICALLY AGREED TO IN WRITING, Xantrex TECHNOLOGY INC.
2 ( Xantrex )(a)MAKES NO WARRANTY AS TO THE ACCURACY, SUFFICIENCY ORSUITABILITY OF ANY TECHNICAL OR OTHER INFORMATION PROVIDED IN ITSMANUALS OR OTHER DOCUMENTATION.(b)ASSUMES NO RESPONSIBILITY OR LIABILITY FOR LOSS OR DAMAGE,WHETHER DIRECT, INDIRECT, CONSEQUENTIAL OR INCIDENTAL, WHICH MIGHTARISE OUT OF THE USE OF SUCH INFORMATION. THE USE OF ANY SUCHINFORMATION WILL BE ENTIRELY AT THE USER S and Revision October 2002, Revision 1 Part Number 445-0191-01-01 Contact Information Web: Email: 1-800-670-0707 (toll free) 1-604-422-2777 (direct)Fax: 1-604-420-21453 If external AC Power is availableNormal Operation Mode: ControlsThe remote comes On automatically when the Freedom inverter /Chargeris connected to a charged battery or external AC power.
3 The followingbuttons are used:Normal Operation IndicationsThe Freedom Remote shows AC IN (status), DC VOLTS, DC AMPS( charger or inverter current), and INCOMING AC BREAKER AMPS setting plus CHARGE, INVERT and BATTERY STATE. The display isupdated once per IN On Power Up Indications and Default ValuesWhen power is first applied to the remote, there is a delay of up to fourseconds, while the remote and the Freedom Inverter/Charger installation of the Freedom Remote, the Freedom Inverter/Charger may have power applied to it. If using a 458 Series, theAUXILIARY SWITCH (jumper) on the inverter must be in the Offposition.
4 Refer to the owner s Manual for position details. The FreedomRemote may be mounted up to 50 feet from the Freedom Inverter/Charger . Cut a hole in an appropriate location using the mountingtemplate supplied. Route the data cable from the remote to the the data cable away from AC and DC wires will minimize thepotential for interference. Plug the data cable into the Freedom Re-mote and the Freedom Inverter/Charger . Secure the Remote ControlPanel using the supplied ! You have purchased a powerful electronic order to understand, use, and install it, PLEASE read this this Manual , Freedom will refer to the Freedom inverter /Chargerwhile 458 or 458 Series will refer to both the Freedom 458 SeriesInverter/ charger and the Freedom Marine Series indicates SETUP is explained on page the INVERT LED is On (solid green), the FreedomInverter is inverting (making AC power from the DCbattery source).
5 When the INVERT LED is Off, theinverter is external AC power is present (AC IN LED On) and the INVERTLED is blinking green, the inverter is in standby, waiting for external ACpower to be removed to begin inverting. When there is no external ACpower, a blinking green LED indicates the inverter is in the Idle mode is explained in detail in the SETUP section. OPERATINGTIP: To avoid the risk of discharging your batteries if external powerfails, leave the inverter OFF when leaving the boat or RV AC power is detected. OPERATING TIP: Leaving the chargerON helps to assure a full the CHARGE LED is On (solid green), the BatteryCharger is On and charging.
6 When the LED is Off, thecharger is Off. Charging automatically begins when CHARGEREMOTE POWER SHARE USED BY Freedom (SN < 100,000)POWER MODEL: F10 F20 F25 F25 SHARE SN: <100,000 <70699 <70801 >70802 50 NA NA OFF OFF 30 30 30 NA NA 20 20 20 50 30 15 15 15 30 20 5 10 10 20 5plug into a 30 ampere external AC power source, press POWERSHARE until the 30 amp INCOMING AC BREAKER LED is TIP: If the breaker trips, reduce this setting.
7 Setting thePOWER SHARE feature to a lower setting may limit charger output,causing the batteries to require more time to become fully SHARE limits the amount of external AC current used by thecharger. If the total AC load is larger than the AC power available, theexternal AC circuit breakers may trip. Select a lower POWER SHARE setting to reduce AC power consumption by the charger , thus reducingthe total AC POWER SHARE settings vary by Inverter/Charger the settings that the Inverter/Charger supports are allowed. Thefollowing table shows the effective power share for a Freedom Inverter/Charger with a serial number less than 100, you plug into an external AC source, note thebreaker size.
8 Press POWER SHARE until the appropriate INCOMING AC BREAKER LED is On. For example, toPOWERSHARE5 Setup ModeEnter the SETUP mode by pressing and holding SETUP for fiveseconds until the LED blinks. The Freedom Remote is connected to a458 Series if at least one DC VOLTS LED is On. After five seconds ofno activity, the Freedom Remote automatically exits from the SETUP mode. Use the Freedom Remote buttons SET AHRS SET IDLE orSET TYPE to select SETUP features. Refer to the following TIP: Battery type and Battery Capacity are the mostcritical setup settings. Battery Capacity (Amp-hours)Applies only to 458 SeriesUsing CHARGE, set the amp-hour rating of the battery bank.
9 Thisinformation is used to determine the charge parameters for the setting varies. 1000 W: 200 amp hours(458 Series Only) 1500 2000 W: 400 amp hours 2500 3000 W: 600 amp hoursIdle Load (Watts)Changing this setting is not normally INVERT, select Idle setting. If present inverter loads are less thanthe selected value, the inverter will remain in Idle Mode. Idle modeprevents unnecessary power drain on the battery when no AC loads arein use. When an AC load is turned On and the load draw exceeds theidle value, the unit begins full power inverting. When the appliance isturned Off, the inverter returns automatically to Idle mode.
10 A setting of 0 disables Idle : Freedom : 4 watts, 458 Series: 5 :Sets amp hours(458 Series units only) SET AHRS SET IDLEPOWER SHARE:Sets Battery TypeINVERT:Sets Idle Mode SET TYPEB attery TypeThis setting is important. Check your POWER SHARE, set the Battery Type. The charger uses thisinformation to set charging values for the 3-stage automatic sure to set the correct : Freedom : Cool (<80 F) Wet cell, 458 Series: Wet cellSetting the Battery Type correctly is Series selections: Wet, Gel 1, Gel 2 or selections:Cool Wet Cell:< 80 Wet Cell:> 80 Gel Cell:< 80 Gel Cell:> 80 Power ModeWhen no external AC power is available, the remote panel LEDs canbe turned Off to conserve battery power.